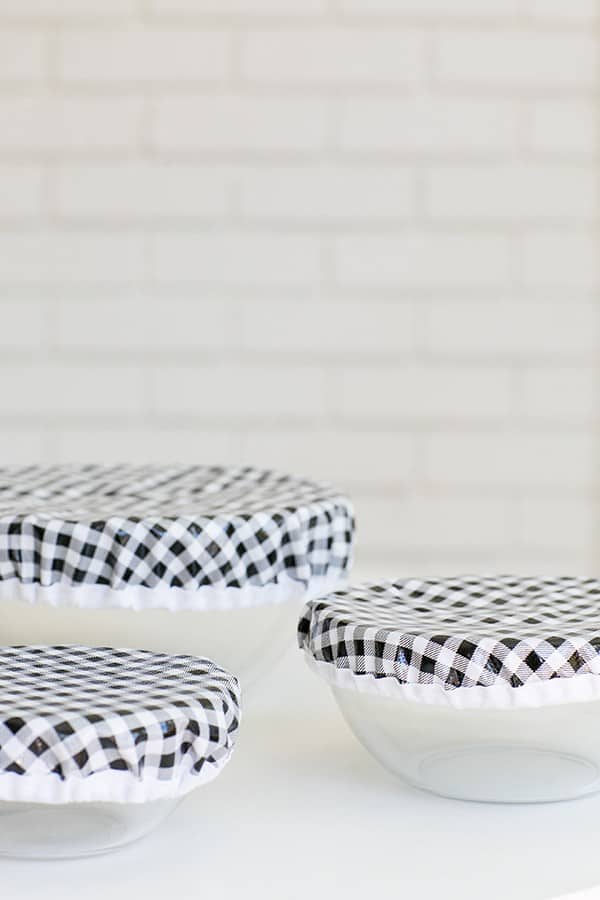
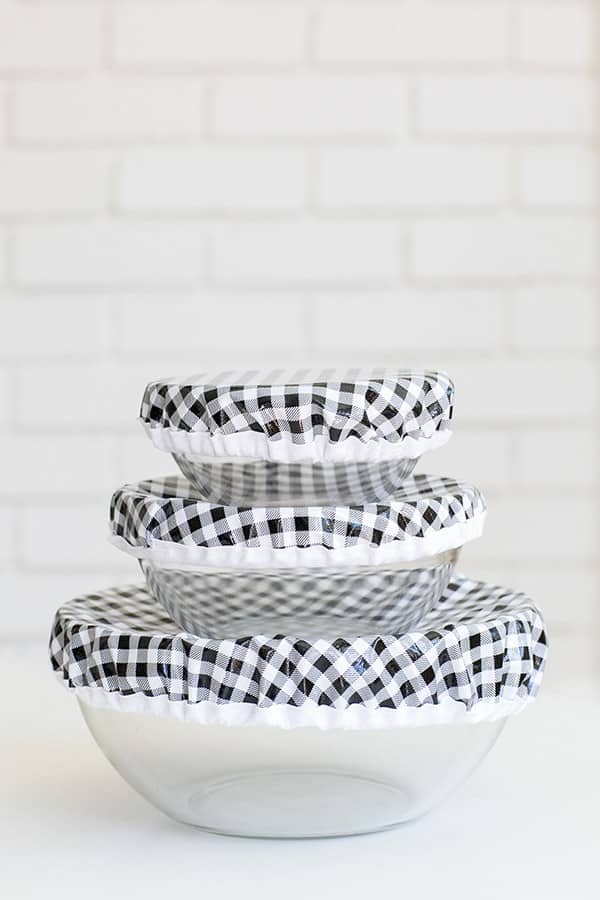
Instead of using saran wrap to cover and store food and ingredients, we made DIY Reusable Oilcloth Bowl Covers that are waterproof and fit different sizes of bowls.
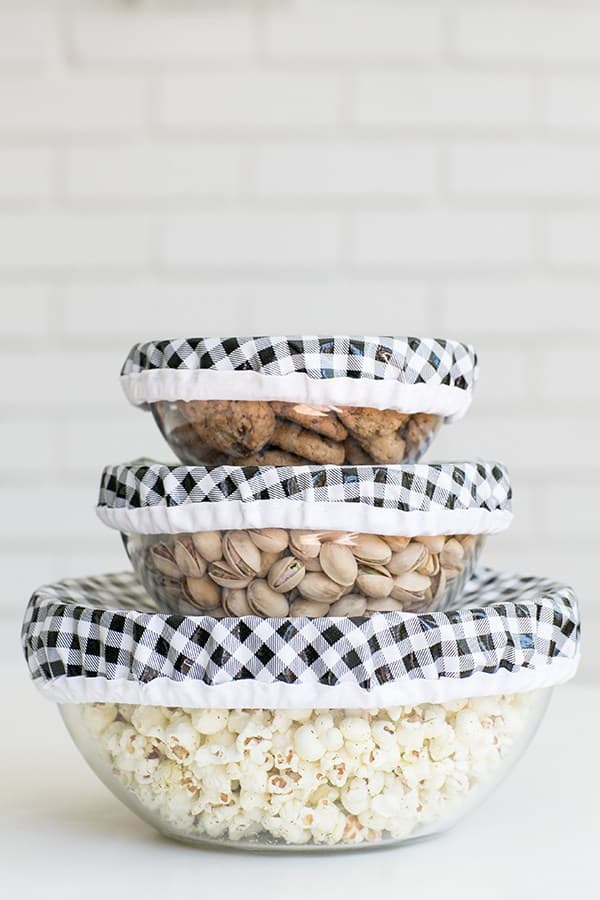
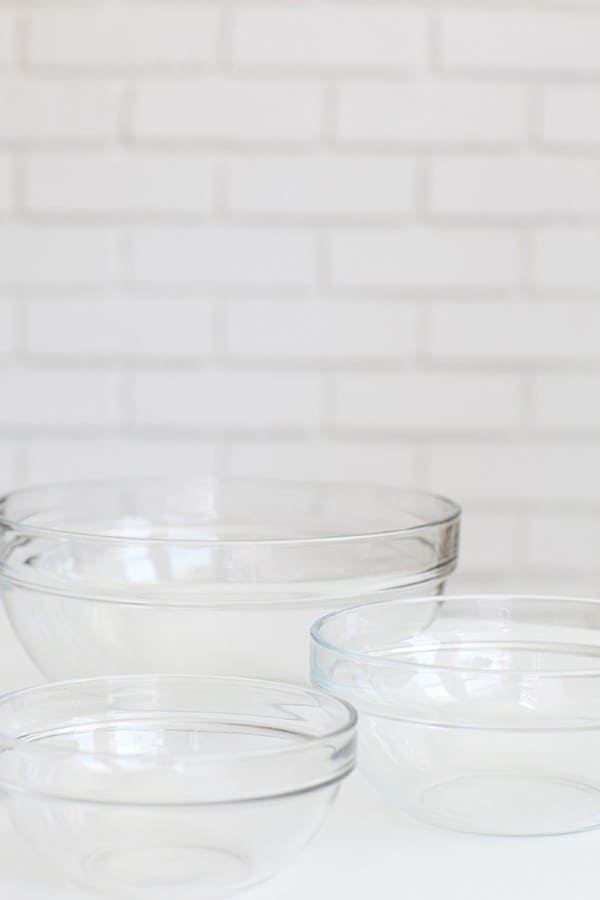
We’re going old school with these DIY reusable oilcloth bowl covers! They’re actually so useful and a DIY that I use often! I have this handy 10-piece glass bowl set that I use for mixing, storing, etc.
I keep them in the same drawer as the saran wrap, so I never forget about them. Such a charming and easy way to cover food, especially around the holidays!!
Also, a set of these bowls with homemade covers would be an awesome gift for any host and cook!
DIY Oilcloth bowl Covers
Materials
- Oilcloth or laminate fabric. This site has a great selection!
Directions
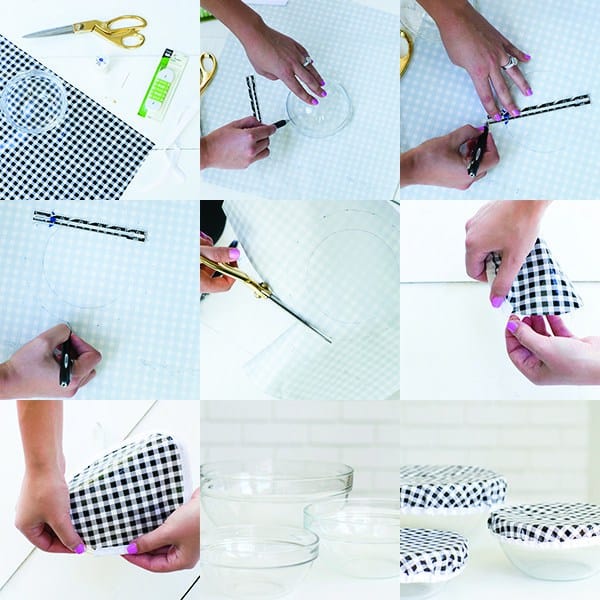
1. Place your bowl on the unfinished side of the oilcloth and trace around it lightly with a pen.
2. Using a ruler, measure 1 inch larger than the bowl. We did this by making small marks every couple of inches and then connecting the dots.
3. Cut around this line. Take the bias tape and position it so the oilcloth is in the middle and there’s about 1/4’’ along the edge. That’s where the elastic will eventually go.
4. Sew the bias tape onto the oilcloth, leaving an opening of about 2 inches on one side.
5. Measure around the top of the glass bowl where the cover will sit. Subtract 2 inches from that number and cut the elastic to that size.
6. Pin the safety pin to one end of the elastic and work the pin and elastic inside the bias tape all around the cover.
7. When you get to the opening on the other side, sew the two sides of the elastic together.
8. Sew the remaining section of the bias tape and put the cover on your bowl!
We hope you all enjoy these DIY Reusable Oilcloth Bowl Covers! It’s been 3 years and I still use mine and have the same mixing bowl set! See more easy projects below.
More Simple and Fun DIY Projects
Frequently Asked Question
It’s a sheet of natural fabric with a tight weave, like cotton or linen, that gets treated on one side to make it waterproof. The treatment that coats the cloth is usually made of PVC or Teflon.
It’s a sheet of natural fabric with a tight weave, like cotton or linen, that gets treated on one side to make it waterproof. The treatment that coats the cloth is usually made of PVC or Teflon.
There are also waterproof fabrics made from PVC alone. The technical name for PVC is polyvinyl chloride.
In the 1950’s it was common to make clothes coated with PVC. It didn’t take long for the coating to gain the nickname “vinyl.”
Because of this connection, people sometimes refer to oilcloth as vinyl as well. It’s two words for the same thing.
You can wash some Teflon-coated cloths in a machine with a low enough heat setting, but it’s usually a bad idea. Your best bet is to read and follow the washing instructions for your specific product.
An Oilcloth’s waterproof and stain-resistant properties make it ideal for outdoor use. That said, it’s best not to leave it out. The oilcloth fades over time if left in the elements.
There was a time when flexible, waterproof materials were rare, and leather was both expensive and hard to maintain. For this reason, the oilcloth became a popular alternative. It was used to waterproof luggage, carriages, and even clothing.
Before PVC and Teflon were a thing, people made their oilcloth by boiling linseed oil, lead dross, metal, and salts. If you think that doesn’t sound healthy, you’re right. The stuff was toxic.
Additionally, the linseed oil mixture took a long time to both boil and cure, so the process took a while. The cloth also liked to stick to itself when folded, so people had to scrub it with pumice beforehand to keep this from happening.
Modern oilcloth is much healthier and easier to take care of.
How Do You Get Stains Out of Oilcloth?
Most stains that end up on your oilcloth will wipe right off with warm soapy water or a quick spritz from your favorite kitchen cleaner. Stains from things like curries, tomato sauces, and red wines, however, will still leave their mark.
The best thing you can do if your sangria granita snow cone drips onto your oilcloth is to wipe it up as soon as possible. If you can’t get to it in time, there’s no guaranteed method for getting the spot out, but there are a few things you can try.
Baking Soda: Use water to make a paste and coat the stain, rubbing it gently. Let it sit for two to three minutes, and then wash it off.
White Toothpaste: Cover the stain with the toothpaste and let it sit for a bit to start to harden. Wipe off the paste and repeat until the stain fades. This sometimes takes two or three times to work.
Nail Polish Remover: Rub the remover over the stain with cotton wool. Don’t forget to be gentle. Let it sit for a few minutes, and then wash it off.
Knowing the type of stain you have is the best way of determining how to remove it. This stain removal guide may prove useful if these methods don’t work.
No matter how you go about it, be sure to test your stain remover on a small, difficult-to-see spot before you dive in.
When you’re done, try one of these gin and tonic recipes. You’ve earned it.
You can also FOLLOW US on FACEBOOK, INSTAGRAM, and PINTEREST to see more delicious recipes, cocktails, desserts, and parties!

How do you clean the back side of the bowl covers if they touch the food.
Great idea …Nice Tutorial .thank you so much for sharing!!!
Great tutorial! Thank you for the instructions! An idea I had is to use a compass splayed to 1” to mark the cutting line. This would eliminate the need to mark the cutting line after the fact.
Great idea! Thank you Peggy!
Absolutely love these bowl covers! I have added them to our article, 5 DIY Plastic Wrap Alternatives. You can check it out here if you like https://www.diythought.com/5-diy-plastic-wrap-alternatives/ Thanks!
Yay!! Thank you SO much Kelly for including us! Thrilled to be part of your roundup!
Are they microwaveable?
They are not, you have to remove it first.
Love these! Can they be washed in a washing machine?
Thank you! You can!!
what a fantastic idea!!! i’m totally going to make these, thank you so much for the good directions too!!