Block Printing with DIY Rubber Stamps
Using a soft rubber DIY stamp, carving tools and some fabric paint, create your own fabulous designs to stamp napkins, tablecloths, whatever you want!
Servings: 1 stamp
Calories:
Equipment
- An ink roller
- A soft printmaking block
- Carving tools
- Water Soluble Ink
- Vintage hankies or blank napkins
- Old spoon
- Old cardboard
Instructions
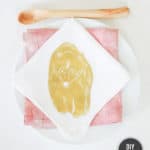
- To make the stamp, you’ll first draw your image on the rubber block and start carving away the areas that you don’t want to show.
- Once you have your stamp ready, squeeze some ink onto a large piece of cardboard and with your roller spread the ink out so it’s evenly distributed on the roller.
- Then roll the ink onto the block. You might need to carve away more areas outside the image that the ink has adhered to.
- Spray your fabric with water and place on top of the block directly onto the ink, use a roller or a spoon to press the fabric into the block.
- Carefully remove the fabric and let dry.
- The ink used for this process is thick and usually takes 24hrs to dry.
- Once it's dry, it is safe to machine wash.