
We’re sharing all of the details and resources for creating a disaster preparedness emergency kit for you and your family. Scroll through to see our tips and lists provided by The American Red Cross.
This post is sponsored by Clorox. All opinions are my own.
Now more than ever, I’ve been thinking about the importance of creating an emergency– evacuation kit. No matter where you live, natural disasters in all forms can hit, causing people to live without power, water and other essential needs for days and even weeks.
September is National Preparedness Month and as we all experienced this year when the COVID-19 pandemic hit, some of the most essential items were almost impossible to find.
It made me realize how I want to be prepared for my own family if we’re ever affected by a natural disaster and all of the challenges it brings. In 1994 the Northridge earthquake left people in the Los Angeles area, very close to our home, without running water for weeks.
Freeways crumbled and power was out for many days? weeks? Aside from power outages and a plethora of wildfires, there’s also always talk of “the big one” (earthquake!) coming to Los Angeles.
Unfortunately, natural disasters know no boundaries, in 2012, hurricane Sandy hit New Jersey and my in-laws were left without power for two weeks. Their basement flooded and they were grounded at home.
Currently, many friends and family have been forced to evacuate their homes due to wildfires up and down the west coast, many losing their homes and everything they have.
No matter where you live in the world, we all know someone who’s been impacted by a natural disaster, or we’ve been personally affected. I can’t express how important it is to be prepared! It doesn’t take a lot of time and in most cases, you’ll just need to restock some of the items after 5 years.

How to Create an Emergency Kit
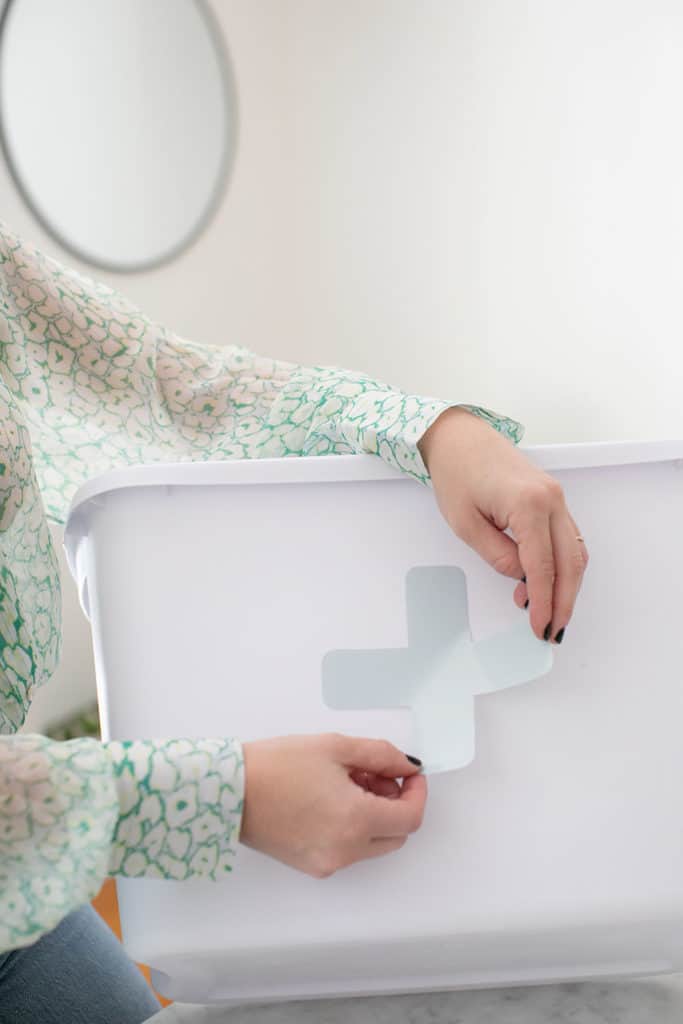
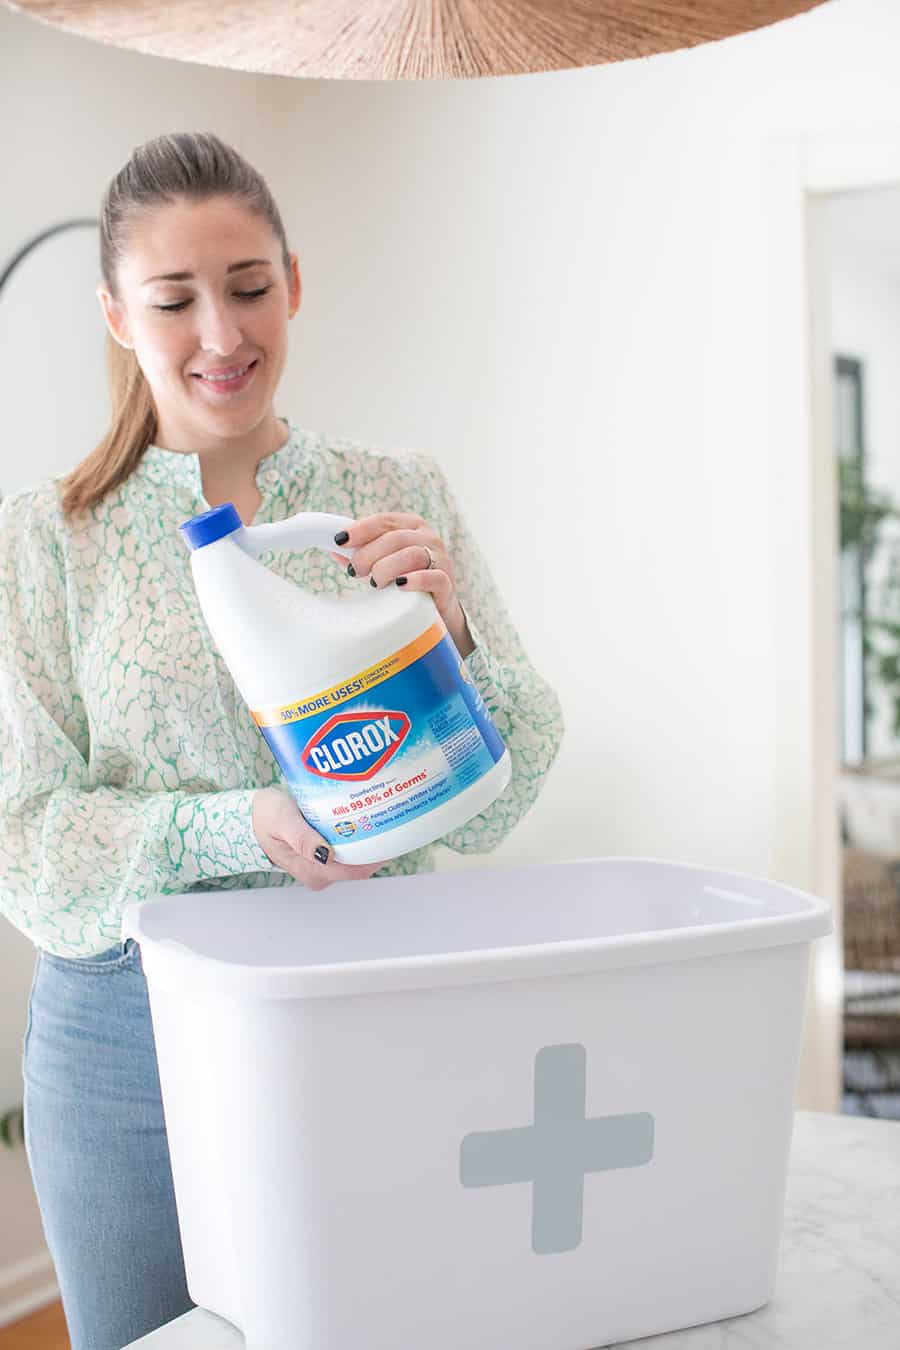
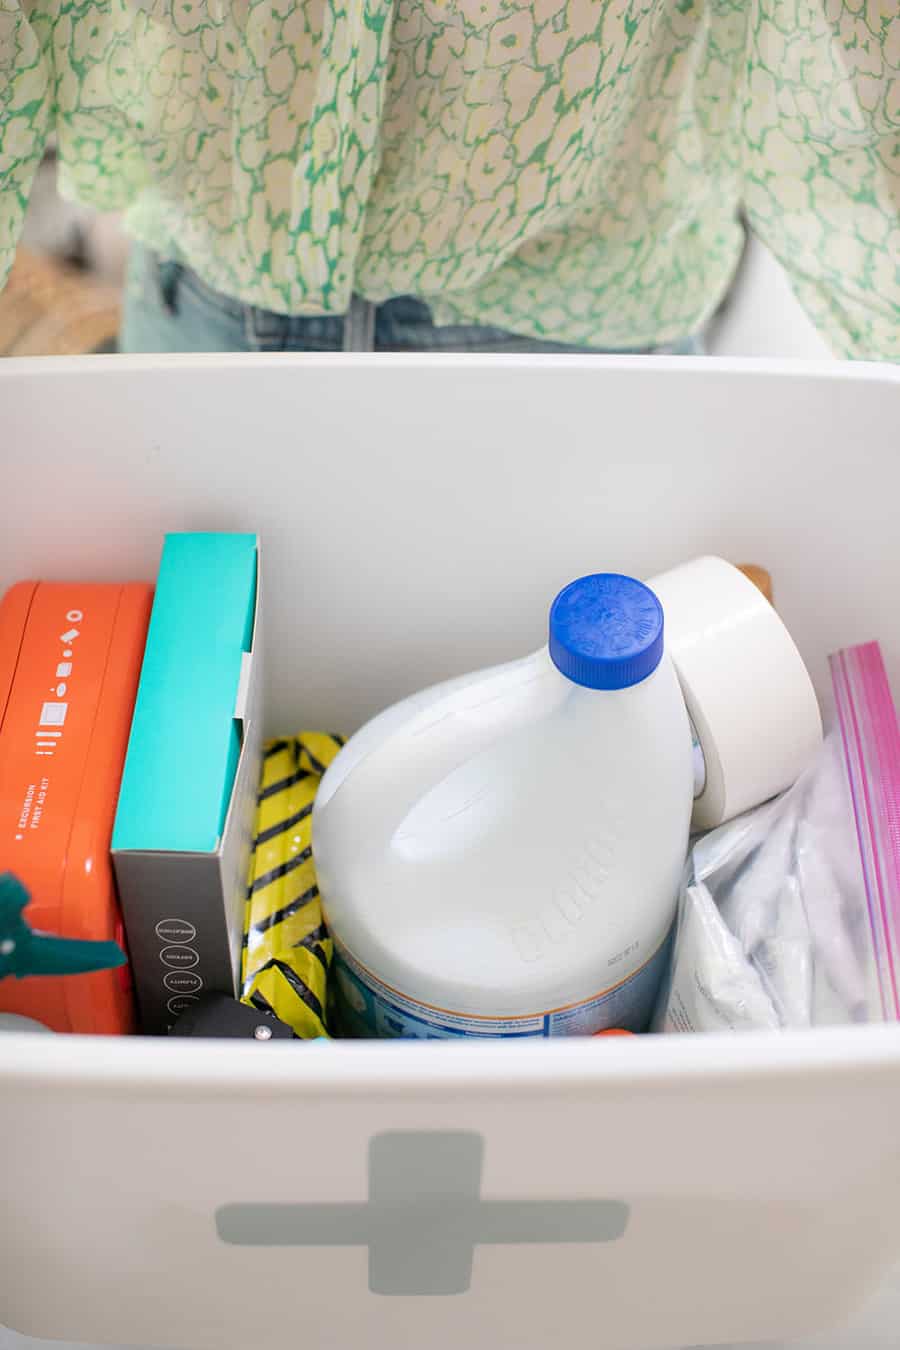
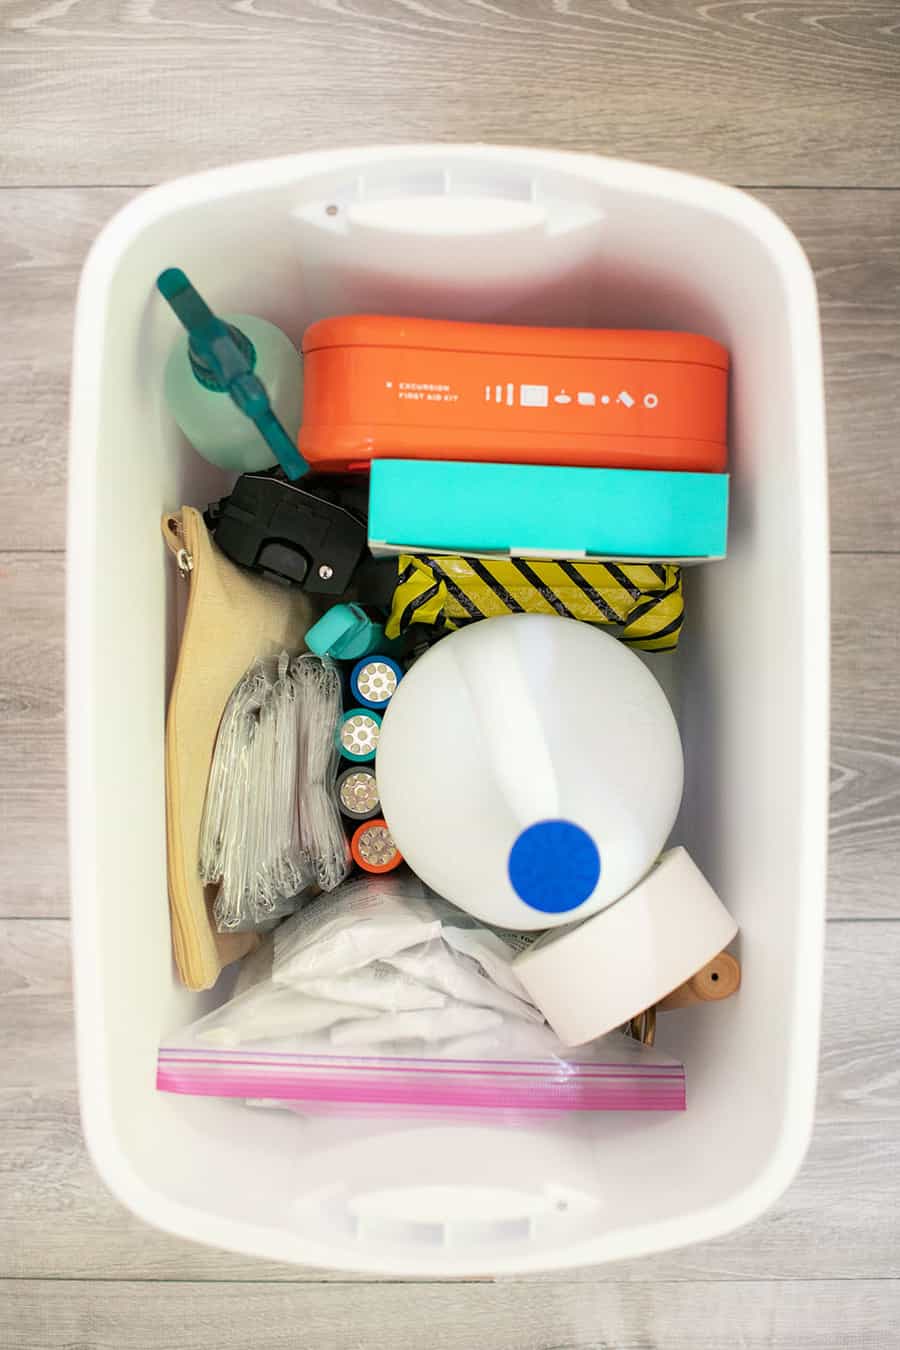
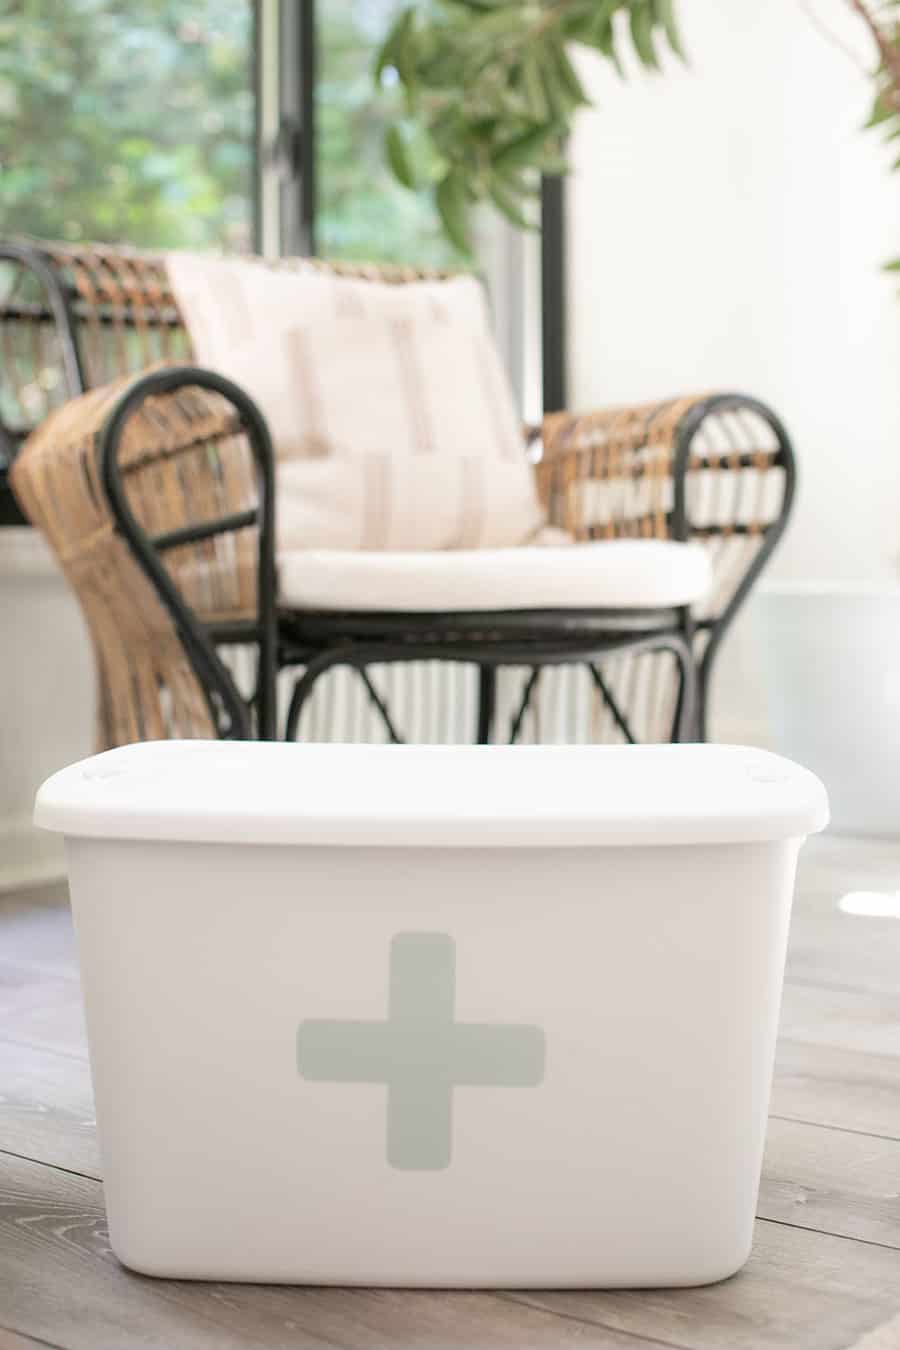
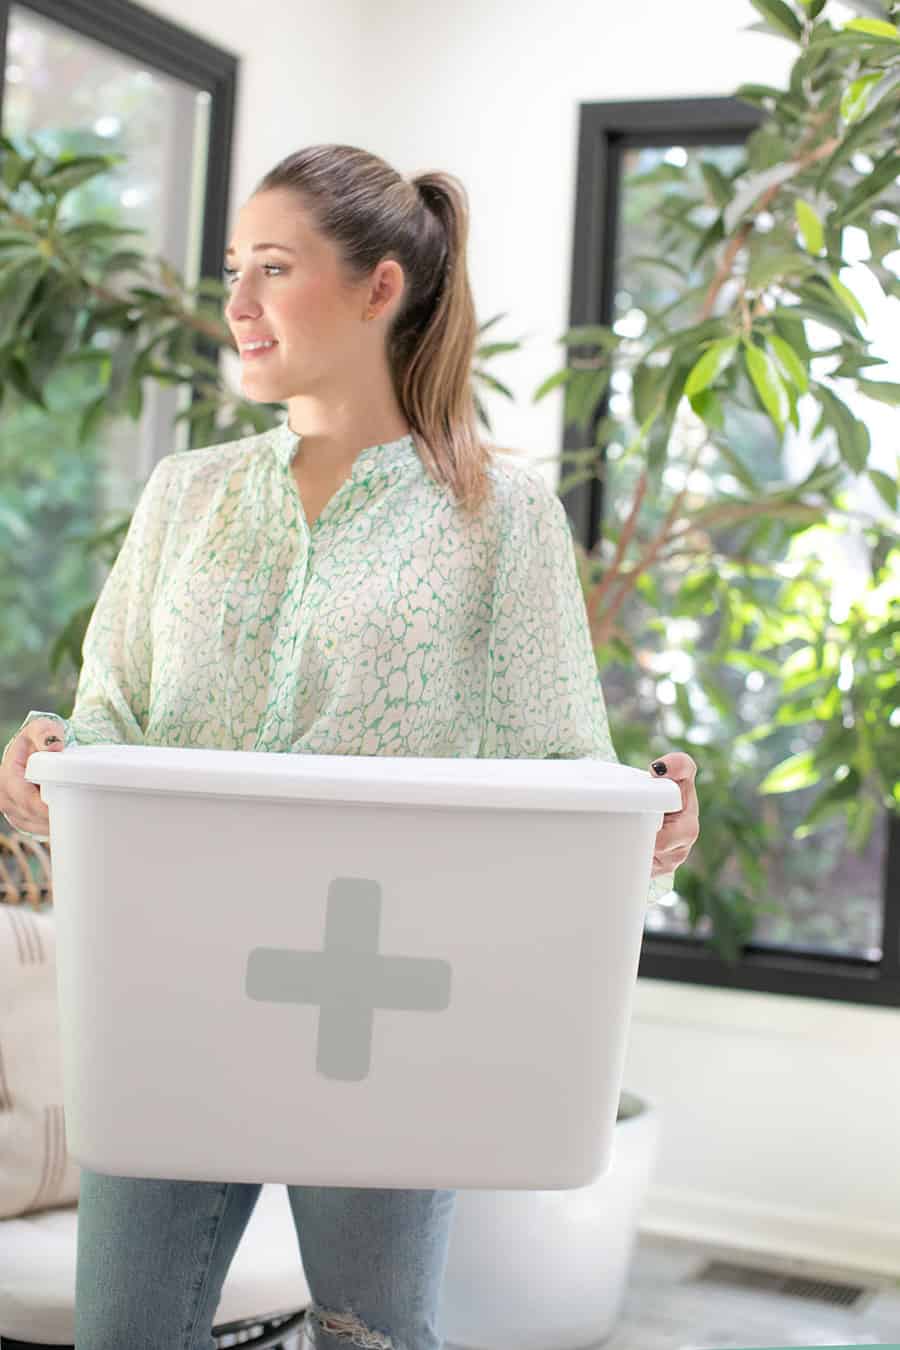
First, buy a large bin with a lid that can fit all of the items you’ll need for your kit. I found a white container and added my own charming touch to it with a blue medical symbol cross. I printed it on vinyl sticker paper and stuck it right on the bin!
Then, just follow the list of recommended items to add to your emergency kit. You can also add any additional items that are important to you or the area you live.

My children loved putting this together with me and thought it was truly the coolest thing to have an emergency kit! They were fascinated with all of the “cool” items I was adding to our kit and I let them choose a few of their own special things to add to the bin.
It was also a great time to talk to them about natural disasters and our family’s preparedness plan.
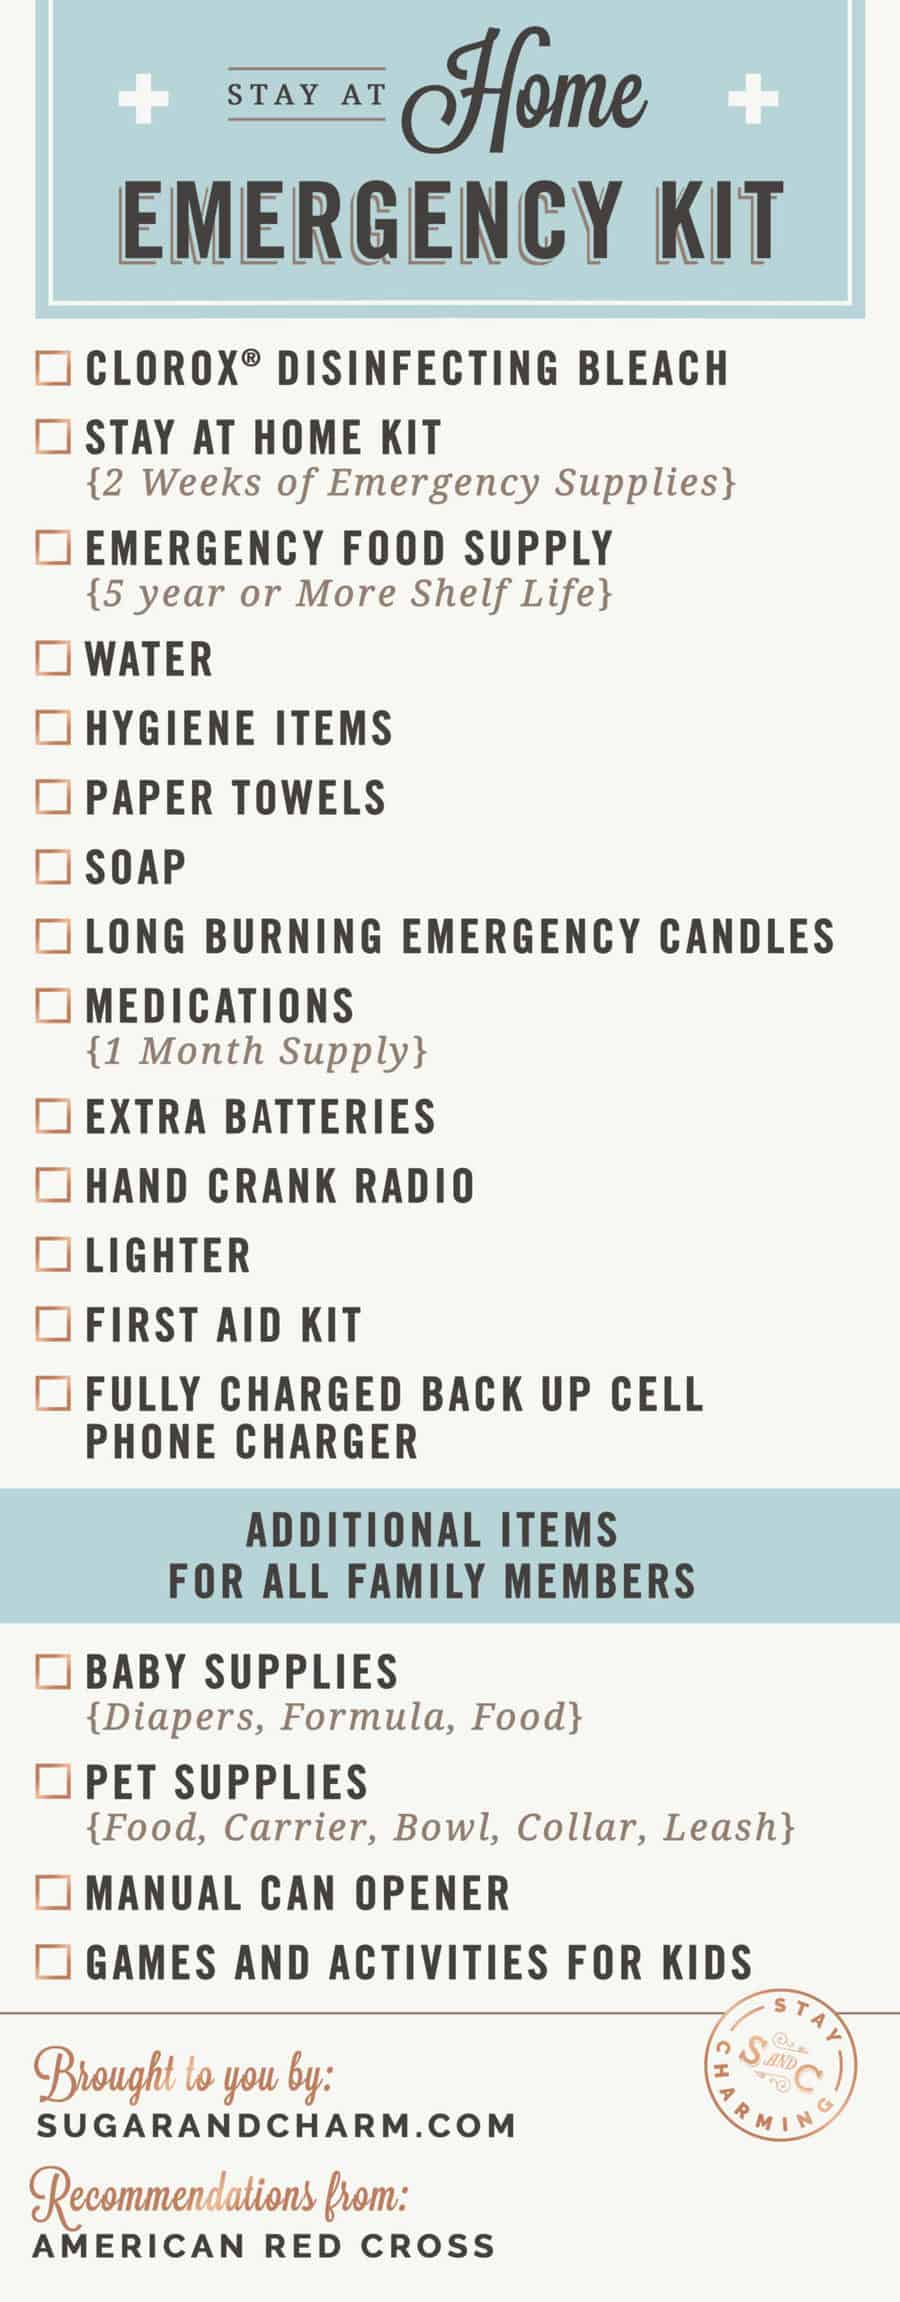
The American Red Cross recommends including all of the below:
- Stay-at-home kit (two weeks of emergency supplies): food, water, household cleaning and disinfecting supplies like bleach, soap, paper products, and personal hygiene items.
- Evacuation kit (three days of supplies): food, water, personal hygiene items, masks, and cleaning and disinfecting supplies like bleach. After following stay-at-home orders, you may have some of these items at home already.
- For parents, have your child help prepare your evacuation kit as well as other prep activities because if they are engaged and feel some ownership over the task, they won’t let you forget it when a storm hits. Children do a great job of reminding parents what needs to be done upon an evacuation.
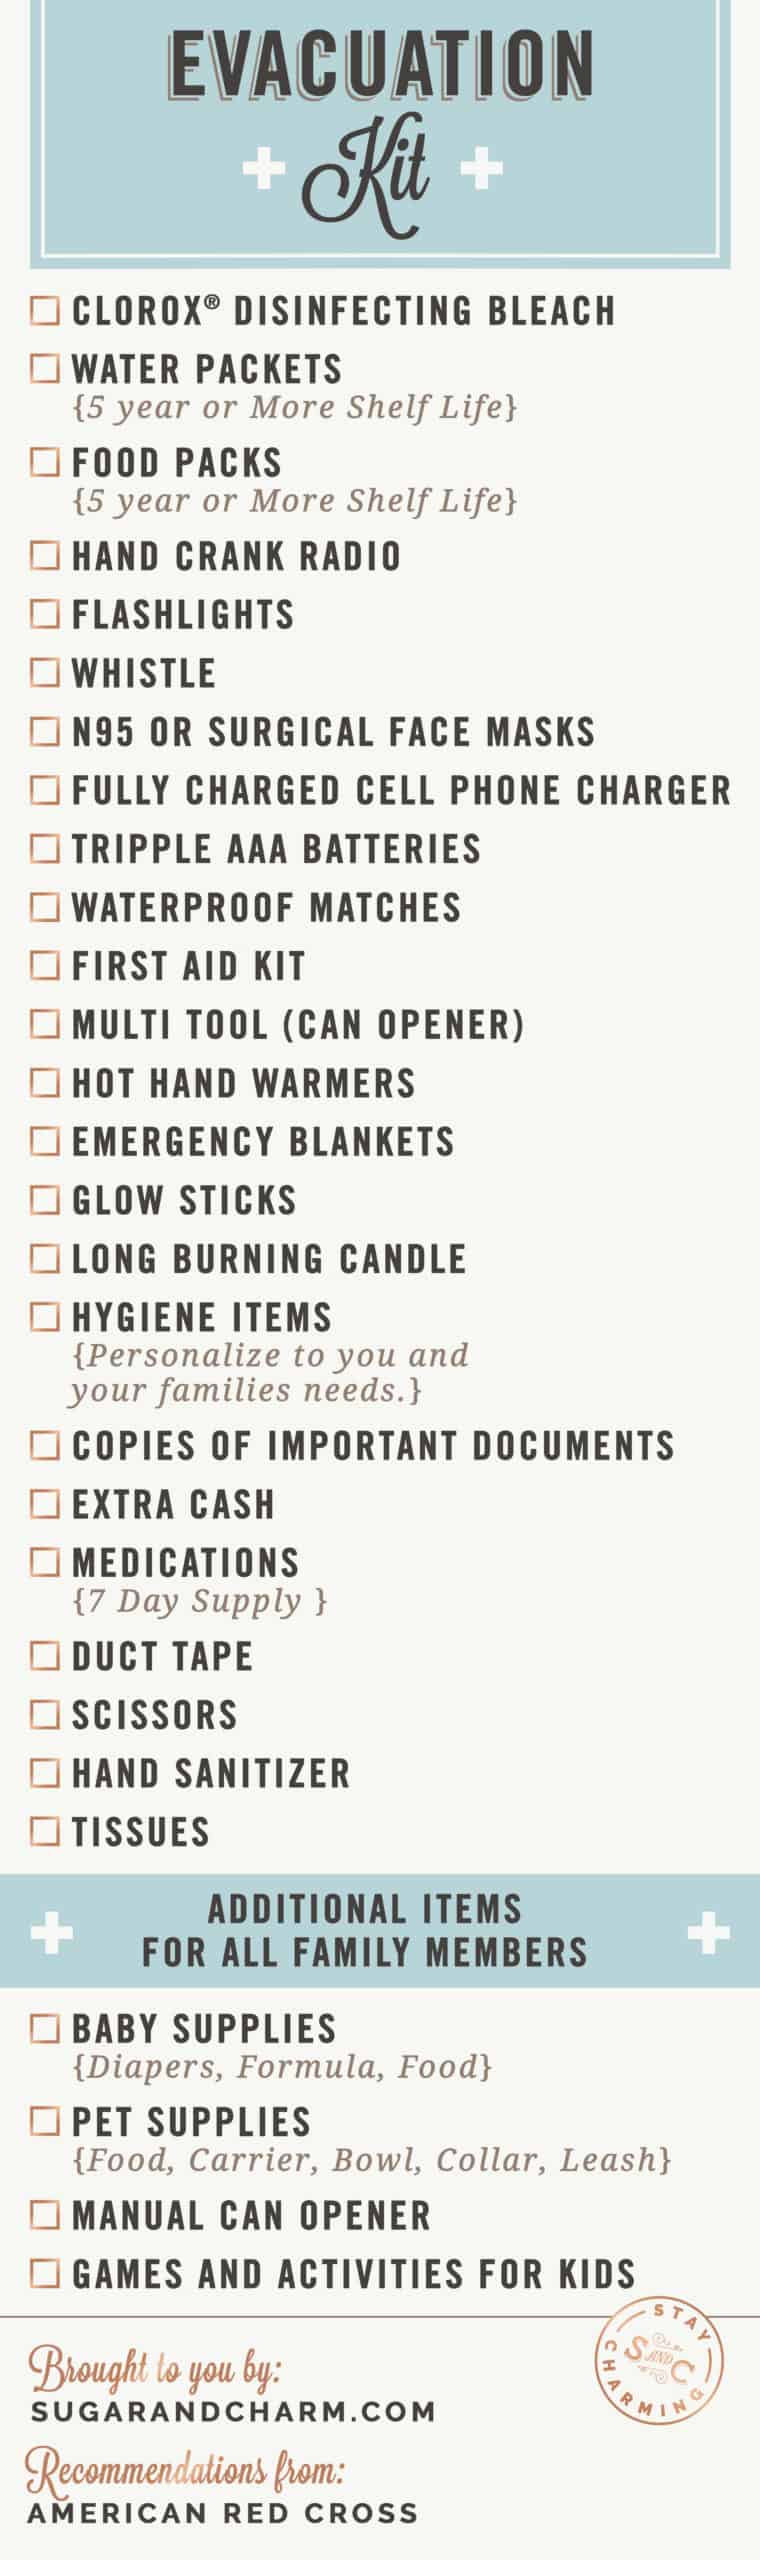
- Using the suggested items from The American Red Cross, we created a checklist that you can Pin or Print when filling your kit. Order these items online to make it easier for you!

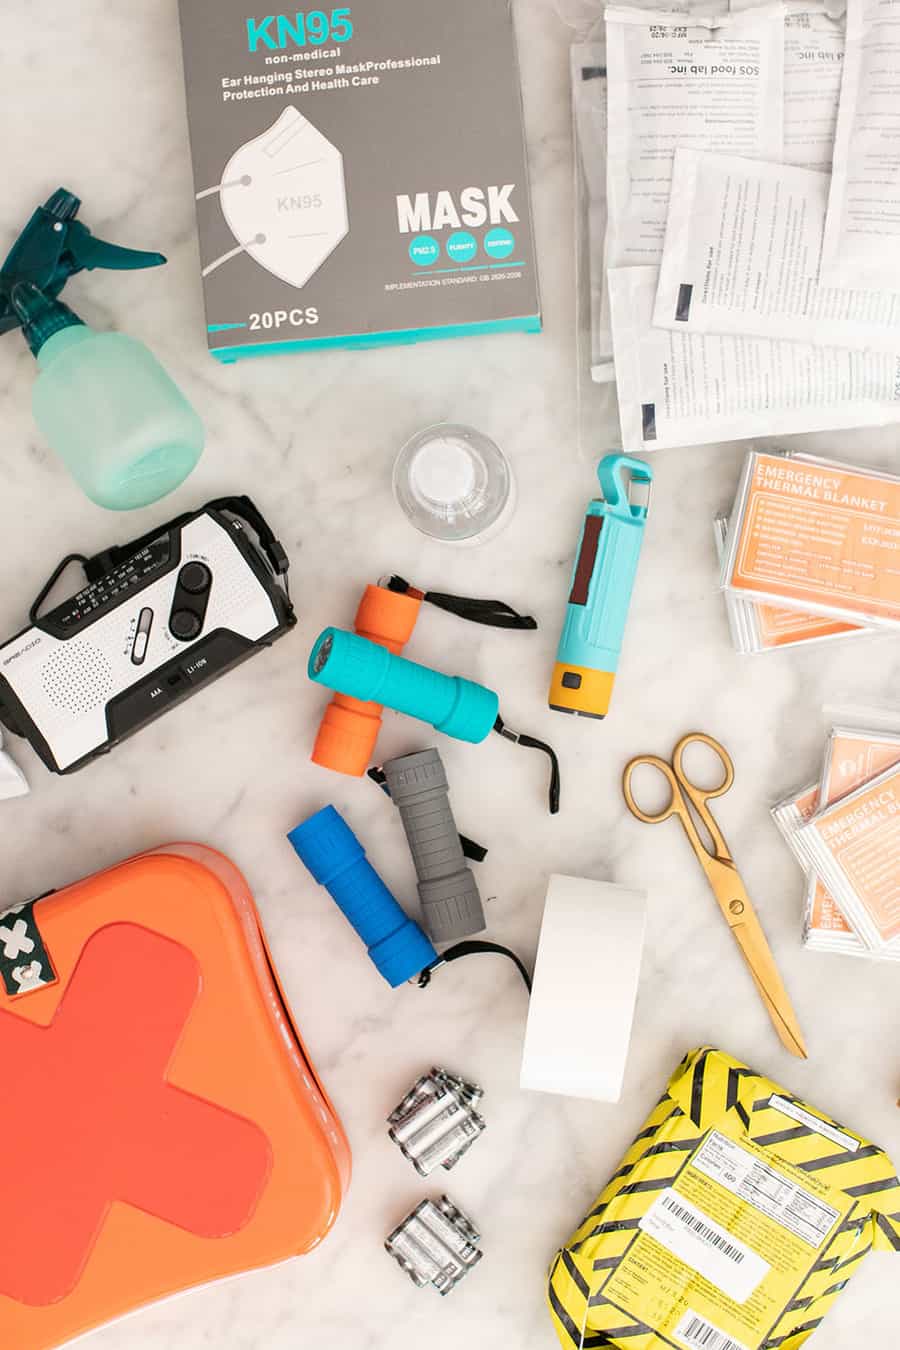
Evacuation Emergency Kit
For my kit, I wanted to add items that would work if we needed to quickly leave the house and would also work if we were at home without water or power. Here’s what my family added into our bin:
- Clorox®Disinfecting Bleach
- Water – hydrating packets
- Food packs
- Hand-crank, battery-powered radio
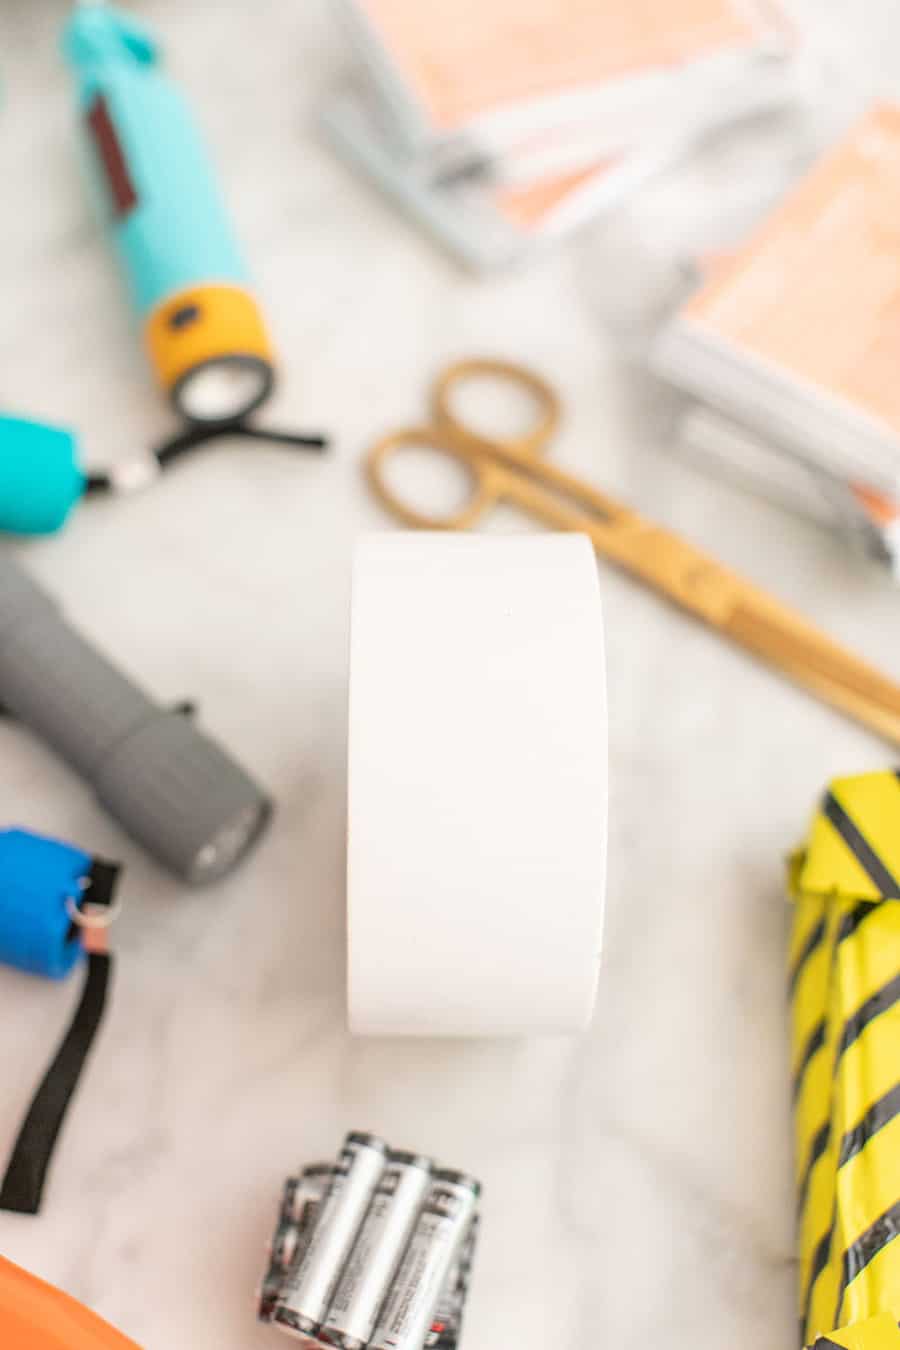
- Flashlights
- Whistle
- Face masks
- Cell phone charger, back up batteries
- Matches in waterproof container
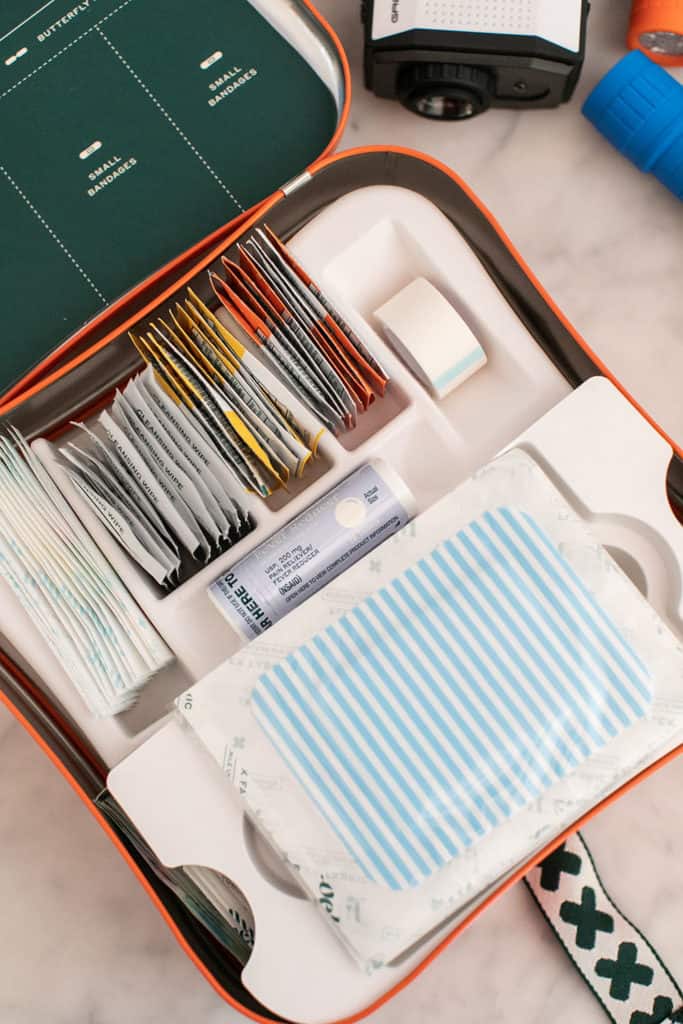
- First Aid Kit
- Multi-tool (can opener)
- Hot hand warmers
- Emergency blankets
- Ponchos
- Glow sticks
- Liquid votive candles
- AAA batteries (make sure you have the correct ones you need for your electronic items)
- Empty spray bottle
- Travel size toiletries for the family


More items you can add are any medical prescriptions that are essential, cash (since going to an ATM might not be an option) and items to entertain kids.
Post Evacuation Cleanup
One important item to have on hand is a versatile disinfectant like Clorox® Disinfecting Bleach. This is because there are several imperative uses for bleach, especially in a natural disaster. Here are a few of the ways you can use it below.
NOTE: Bleach Solutions may vary by product. Check out solution instructions based on the exact bleach you have on hand.
Removing Mold and Mildew
- To remove mold and mildew at home, you can use Clorox® Disinfecting Bleach on hard, non-porous surfaces and items:
- Disinfect all cleaned surfaces with a solution of 1/3 cup of Clorox® Disinfecting Bleach diluted in 1 gallon of water.
- Let the solution stay on the surface for at least 10 minutes before rinsing with clear water and allowing to dry.
- Routinely check potential problem spots (e.g. Bathroom, laundry, mechanical room, etc.) for moldy odors, and disinfect often with a solution of 1/3 cup of Clorox® Disinfecting Bleach diluted in 1 gallon of water.
Kill Bacteria in Your Home
- You can use Clorox products to kill SARS-CoV-2, the novel coronavirus that causes COVID-19, on hard, non-porous surfaces per the EPA’s Emerging Pathogen Policy.
- When using Clorox bleach products, always remember to look at the label to follow product usage instructions and safety precautions.
- Bleach Solutions:
- For 6% sodium hypochlorite, dilute 1 Tablespoon with 2 cups of water.
- For 7.5% sodium hypochlorite, dilute 2 teaspoons with 2 cups of water.
- Do not mix with anything other than water.
Did you know, in an emergency when water may be unsafe to drink and boiling it is not an option, you can actually make water potable with bleach? Here’s how:
- Prior to the addition of Clorox® Disinfecting Bleach, remove all suspended material by filtration using a clean cloth, towel, coffee filter, or by allowing it to settle to the bottom.
- Put the clarified contaminated water into a clean container and add 25 drops or 1/4 teaspoon of Clorox® Disinfecting Bleach to 1.75 gallons of water (4 drops to 1 quart)
- Allow the treated water to stand for 30 minutes. Properly treated water will have a slight chlorine odor.
- If water does not have a slight chlorine odor, repeat dosage and allow the water to stand an additional 15 minutes.
- The treated water can then be made palatable by pouring it between clean containers several times.
- If the water is contaminated with a chemical, adding the product will not make it drinkable.
More Information and Resources for Disaster Preparedness
Click here for more information on how you can use it for post evacuation cleanup.
I hope you’re inspired to create your own, personal emergency and evacuation kits so you can be prepared for yourself and your family!

This is really helpful!! I think it is really important to have this on hand. Thank you so much for sharing!
Thank you Toni!
This is a super helpful post! It seems like there is always something going on in the world today, it makes me feel a little bit better to be prepared! Thanks!
I know, especially this year. I am so happy I finally put one together for my family.
This is such a great idea! My daughter loves doing things just like this! This will be a good idea for us!
Yay! My kids LOVED doing it with me! They thought it was so fun!
This emergency kit for the home is such a great idea! We need one in our home. 🙂
Thank you, Valentina! I put off making one for a long time, but they’re so important!
All good tips that are so important for families if an emergency strikes. Thanks for the checklist.
Thanks Erin 🙂