• Home
  • Recipes
  • Eats & Drinks
    ▼
    • Easy Everyday
    • Desserts
    • Cocktails
    • Drinks
  • Parties
    ▼
    • Party Food
    • Celebrations
    • Everyday Parties
    • Party DIY
    • Party Planning
    • Flowers
  • Home
    ▼
    • Decorating
    • Cleaning
    • Organizing
    • Gardening
  • Holidays
    ▼
    • 4th of July
    • Birthdays
    • Valentine’s Day
    • Saint Patrick’s Day
    • Easter
    • Mother’s Day
    • Father’s Day
    • Halloween
    • Thanksgiving
    • Christmas
    • New Year’s Eve
  • Videos
  • Shop
  • About
  • Press
  • Contact
  • Home
  • About
  • Press
  • Recipe Index
  • Videos
  • Contact
    • Email
    • Facebook
    • Instagram
    • Pinterest
    • RSS
    • Tumblr

Sugar and Charm

  • Eats & Drinks
    • Easy Everyday
    • Desserts
    • Cocktails
    • Drinks
  • Parties
    • Party Food
    • Celebrations
    • Everyday Parties
    • Party DIY
    • Party Planning
    • Flowers
  • Home
    • Decorating
    • Cleaning
    • Organizing
    • Gardening
  • Holidays
    • 4th of July
    • Birthdays
    • Valentine’s Day
    • Saint Patrick’s Day
    • Easter
    • Mother’s Day
    • Father’s Day
    • Halloween
    • Thanksgiving
    • Christmas
    • New Year’s Eve
  • Shop
Home » Most Popular » Enamel Painted Vases – Easy and Beautiful!

Enamel Painted Vases – Easy and Beautiful!

Published on January 11, 2011 Updated on April 10, 2020 by Eden

  • Share
  • Tweet
  • Pin
  • Email

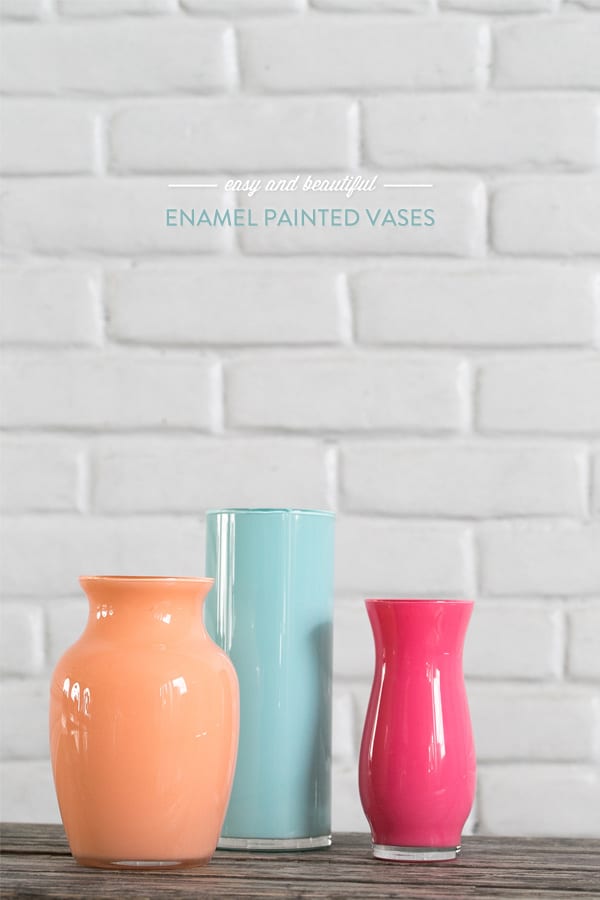
Cost-friendly DIY for beautiful enamel painted vases. These are easy to make and look chic on a shelf or for events!

Orange, blue and pink vases on wooden table.

Enamel painted vases – I’m in love! If you like to paint, I have a really fun project to share today! My inspiration for these easy DIY enamel painted vases came from a restaurant in Sonoma called El Dorado Kitchen.

I’ve always loved the fresh, modern design of the lobby and the eye-catching green and white enamel painted vases that are displayed on white shelves.

I decided to make my own cost-friendly version of this design, which included a quick Martha Stewart tutorial and a trip to the Dollar Store, where I picked up these three vases.
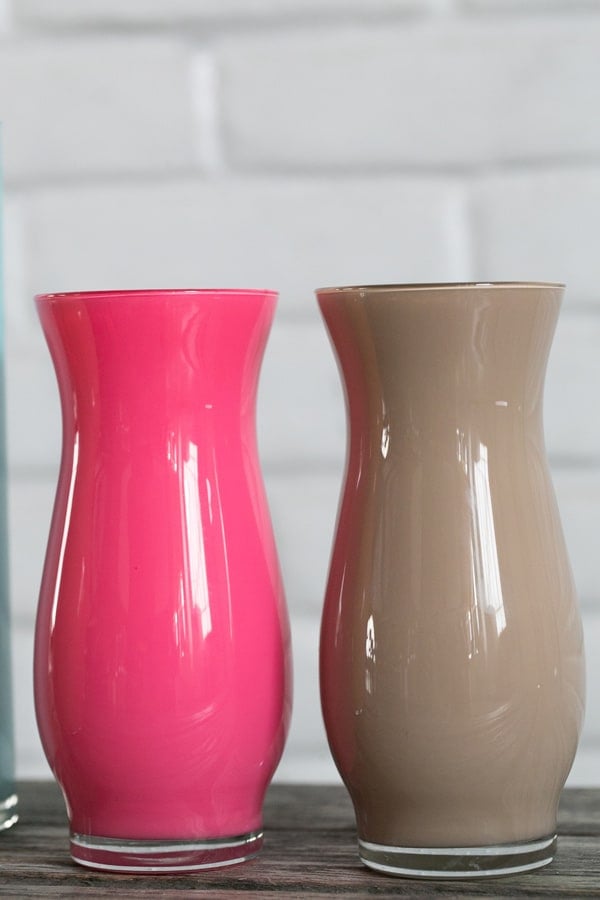
Pink and Brown Vase on wooden table.

I’ve always loved the fresh, modern design of the lobby and the eye-catching green and white enamel painted vases that are displayed on white shelves. I decided to make my own cost-friendly version of this design, which included a quick Martha Stewart tutorial and a trip to the Dollar Store, where I picked up these three vases.
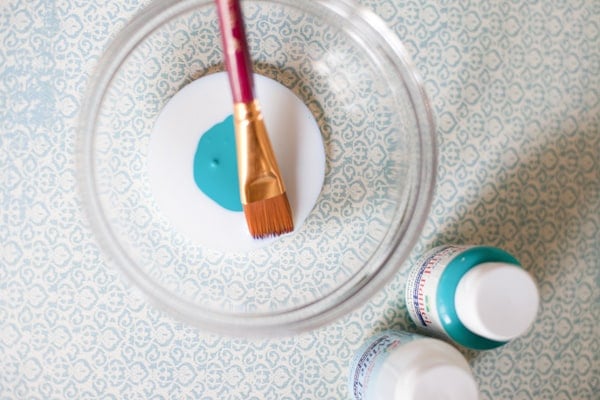
overhead paintbrush with blue paint.

Supplies:  Three different sized vases from the Dollar Store, dishwasher safe PermEnamel paint in Mediterranean Blue and White (or whatever color you prefer), PermEnamel Surface Conditioner from Michaels Arts and Crafts store, paper towels, paint brush, and a mixing bowl.

Hands painting a vase with blue paint.

Directions for DIY Enamel Vases

1. Clean the vases with hot, soapy water.

2. When they are completely dry, pour some surface conditioner in and cover the inside of the vase. Pour out the excess and let the vase dry.

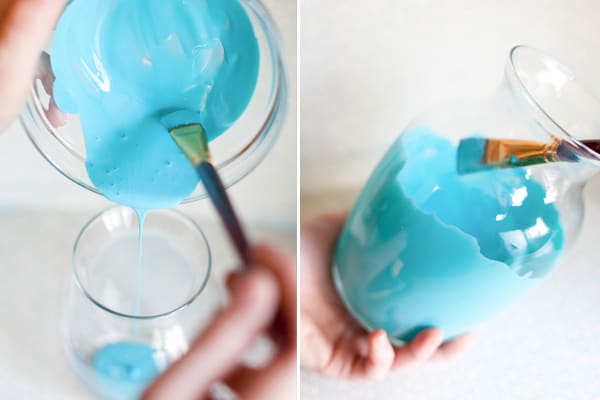
3. Get the exact color you envision by mixing your PermEnamel paints in a mixing bowl, then pour inside the vase.

4. Paint the inside of the glass using ta paintbrush to cover the inside surface.

5. Once the vase is painted, lay it on a paper towel to let the thick paint drip off. You will be amazed at how much comes out! The longer it’s upside down, the thinner the coating will be. I liked the thicker look so I only kept it upside down only for a few minutes.

6. Turn the vase back over and touch up the drips inside. Every fifteen minutes you can even out the thickness on the bottom of the vase as the paint will start to collect.

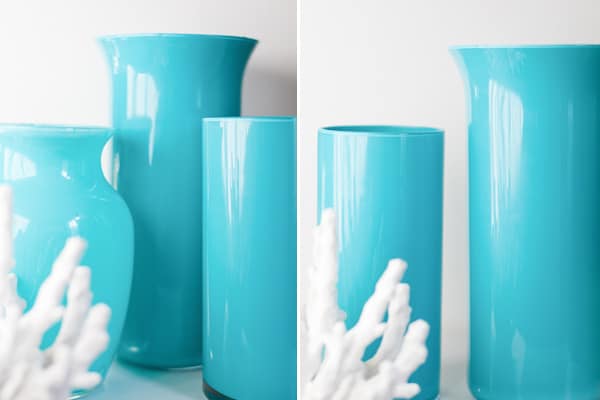
7. Let these dry over night and in the morning you should have a beautiful decor vase! Remember these beautiful enamel-painted vases are only for DECOR. Don’t drink out of them! You can put water in them, but it may damage the finish eventually. I’m simply sitting them on the shelf, like the photos to the right

Blue enamel painted vases.

Follow us for your daily dose of Sugar and Charm on Instagram!

More DIY Projects

  • DIY Fabric Marbling
  • Essential Oil Candles
  • Green Apple Bath Bombs

Let us know if you make these easy enamel painted vases! We’d love to know your thoughts!!


176 Comments

Related Posts

  • Two Beautiful Rose Arrangements

    Two Beautiful Rose Arrangements

  • Money Origami  – A Butterfly Lei for Graduation

    Money Origami – A Butterfly Lei for Graduation

  • The Perfect Halloween Candy Cart!

    The Perfect Halloween Candy Cart!

Stay up to Date

Join our Newsletter to Keep up on Latest

Related Posts

  • Banana Breakfast Sandwiches
  • DIY Tiki Torch Bottles
  • Strawberry Crunch Icebox Cake
  • The Perfect Halloween Candy Cart!
« Beautiful DIY Tin Candles
Photo Drink Sticks DIY! »

Comments

  1. Girl on a Budget says

    January 11, 2011 at 5:32 pm

    These vases look so great! I will definitely try this project. I love the color you chose as well…very Tiffany-inspired. Thanks so much for sharing this information.

    Reply
  2. Maggie says

    January 11, 2011 at 7:11 pm

    Gorgeous!!! Total tranformation of those dollar store vases.

    Reply
  3. Sarah says

    January 11, 2011 at 7:16 pm

    Those vases look sooo great! They would go great in pretty much anywhere in our place! I must try these!

    Reply
  4. April a.k.a. "A. Liz" says

    January 11, 2011 at 8:42 pm

    What a gorgeous color those are! This is going on my to-do list immediately.

    Reply
  5. Leigh says

    January 11, 2011 at 9:24 pm

    So cool and I love the Color!

    Reply
  6. •Kristin• says

    January 11, 2011 at 9:50 pm

    I am in love with this DIY!!! I have been wanting to incorporate some pretty vases into my decor and this is perfect!!! so excited, thanks so much for sharing! 🙂

    Reply
  7. Heather - Dollarstorecrafts.com says

    January 13, 2011 at 2:50 am

    Pretty project! I linked up at the Dollar Store Crafts facebook page! 🙂

    Heather

    http://www.facebook.com/dollarstorecrafts

    Reply
  8. Heather - Dollarstorecrafts.com says

    January 13, 2011 at 2:50 am

    Pretty project! I linked up at the Dollar Store Crafts facebook page! 🙂

    Heather

    http://www.facebook.com/dollarstorecrafts

    Reply
  9. Heather - Dollarstorecrafts.com says

    January 13, 2011 at 2:50 am

    Pretty project! I linked up at the Dollar Store Crafts facebook page! 🙂

    Heather

    http://www.facebook.com/dollarstorecrafts

    Reply
  10. Heather - Dollarstorecrafts.com says

    January 13, 2011 at 2:50 am

    Pretty project! I linked up at the Dollar Store Crafts facebook page! 🙂

    Heather

    http://www.facebook.com/dollarstorecrafts

    Reply
  11. Heather - Dollarstorecrafts.com says

    January 13, 2011 at 2:50 am

    Pretty project! I linked up at the Dollar Store Crafts facebook page! 🙂

    Heather

    http://www.facebook.com/dollarstorecrafts

    Reply
  12. Heather - Dollarstorecrafts.com says

    January 13, 2011 at 2:50 am

    Pretty project! I linked up at the Dollar Store Crafts facebook page! 🙂

    Heather

    http://www.facebook.com/dollarstorecrafts

    Reply
  13. april's craft nest says

    January 13, 2011 at 4:55 am

    gorg!!! love that vivid color and how modern they look! excelente!

    Reply
  14. nila1920 says

    January 13, 2011 at 3:42 pm

    very pretty! love the color you chose aswell!

    Reply
  15. Jessica Miller says

    January 31, 2011 at 9:57 pm

    Love This I’ve been needing some cheap but fab decor for my living room

    Reply
  16. KellyH says

    February 26, 2011 at 2:57 am

    Beautiful! love that Aqua blue color!!!

    Reply
  17. Carri @ Redefining C says

    March 27, 2011 at 3:36 pm

    Awesome! Very cool! Thanks for the tutorial. I am definitely going to give this a try. Do you know if they would be safe to put a candle in?? I have a lil idea brewing but don’t want to start a fire! LoL

    Reply
  18. Jessica Lauren says

    March 27, 2011 at 10:50 pm

    Wonderful idea! What a pretty color!

    Reply
  19. Sugar and Charm says

    March 28, 2011 at 2:55 pm

    Hi Carri, I can’t say it is safe to put candles in them. I use mine strictly for look and they just sit on my shelf. I would be nervous to put a candle in there so I wouldn’t recommend it… If you find anything out about it please pass it along!! 🙂 Thanks for all the comments everyone!! 🙂

    Reply
  20. chelle says

    April 3, 2011 at 4:01 am

    how did you get it so even? I gave it a try and even though I had a generous amount of paint, I still had streaks and blotchy spots… 🙁 I rinsed it out quick so I could try again. Any tips?

    Reply
    • Summer A Clinton says

      December 30, 2017 at 2:49 am

      I bet you could just pour the paint in and let it roll around inside. You won’t even have brush strokes. I never tried this so I am just guessing. I have colored jars with other paints and it has worked. I am going to do this. I hope you will do another or put another coat on it. This time try letting it swirl around in jar. Just my opinion.

      Reply
  21. Sugar and Charm says

    April 3, 2011 at 5:13 am

    Thank you everyone for the comments!! Chelle, I got the paint even by using a paint brush and brushing the sides of the glass… I still had some blotchy spots, but very few. It was a thick coat of paint too 🙂 I hope that helps! If not, maybe you can do another coat after the first one dries…

    Reply
  22. Cindy says

    April 8, 2011 at 5:28 pm

    this is a fabulous project….i have been looking for a paint in that color but have only found a much darker turquoise in the enamel paint. thanks for posting that picture, now i can look for it.

    i love how they turned out!!

    hugs, cindy

    Reply
  23. Aimee Steckowski says

    April 15, 2011 at 2:49 am

    totally inspired… can i share?? next month we’re doing vase/bottle projects on our site: http://www.FancyLittleThings.com – please let me know if i can link up!! thanks!

    Reply
  24. Southern Fried Gal says

    April 30, 2011 at 4:50 pm

    Gorgeous! They look so high end. Thank you for sharing.

    Reply
  25. AllisontheImp says

    May 22, 2011 at 12:21 pm

    I did this (15?) years ago with a ginger jar lamp. Still use the lamp and it still looks great. It really helps when you are trying to color coordinate.

    Reply
  26. Debbie says

    May 29, 2011 at 5:01 am

    This looks like a fun project! I suppose if you wanted to put flowers in it you could use another, smaller glass and put water in that and put it inside careful not to scratch the side of the painted vase, also there are those little battery tea light candles, no flame just a bit of light maybe those would work.

    Reply
  27. Paty says

    October 27, 2011 at 5:16 pm

    I love this idea…
    end the colour? so gorgeous…
    brazilian hugs

    Reply
  28. Jenn says

    November 6, 2011 at 4:13 am

    Oh my gosh – just saw this on Pinterest! What a brilliant idea and I love how the color turned out.

    Reply
  29. Chinell says

    November 10, 2011 at 3:49 pm

    Did you get all supplies at the 1$ store… like the paint too?

    Reply
  30. Anonymous says

    November 17, 2011 at 1:15 am

    I too would like to know where you picked up the paints. Michaels or Hobby Lobby? Thanks for the great DIY!

    Reply
  31. Charity says

    December 14, 2011 at 12:12 am

    Question: can regular acrylic paint be used? I did get the surface conditioner, though. 🙂

    Reply
  32. Kristi says

    December 24, 2011 at 6:22 am

    Those look beautiful! Thanks for sharing, you’ve got a new follower!

    Reply
  33. Stephanie says

    December 27, 2011 at 3:05 am

    I love this idea- I have a ton of empty jars. Im going to have to give this a try!

    Reply
  34. Anonymous says

    December 27, 2011 at 9:08 pm

    This project inspired me! I bought 20 vases from Goodwill for less than $1 each and set out to create a masterpiece. However, I thought the paint you have pictured was too expensive, so I decided to try a different paint from the craft store (Folk art) BIG MISTAKE! The paint cracked and sunk down the edges, and NOT in a cool way. Luckily it washed right out. I ended up spray painting mine instead, and since I finished them with a clear gloss, they ended up looking very shiny also. So those of you who decide to do this project, make sure you use the paint pictured!

    Reply
  35. Amy says

    December 28, 2011 at 3:26 pm

    Great idea! I’ve spray painted the outside of a vase before but I prefer the look of yours. Love the color too!

    Reply
  36. BluKatDesign handmade artisan jewelry says

    January 11, 2012 at 12:36 am

    Great idea! I have a bunch of these vases from flower deliveries! I love the color; turquoise is my favorite right now: )

    Reply
  37. pamb says

    January 24, 2012 at 6:52 pm

    I’m using this great idea to paint clear garage sale vases for a baby shower. I’ll be putting curly willow in the vases, possibly gluing a few pink butterflies and flower buds to the branches. Thanks for the great inspiration!!

    Reply
  38. Sugar and Charm says

    January 24, 2012 at 7:51 pm

    Thank you everyone for the comments! This project was done over a year ago and I still receive comments on it, so thank you! Feel free to share with anyone as well 🙂 Also, if you have any question regarding paint colors, etc. email me 😉 THANKS!!!

    Reply
  39. Scentsbybrit says

    January 26, 2012 at 5:36 pm

    this is a absolutelly great idea…going to the dollar store now. Thanks for posting!

    Reply
  40. Megan says

    January 30, 2012 at 9:09 pm

    Followed your directions exactly and it turned out great!! Thanks for the inspiration!
    http://thehomesihavemade.blogspot.com/2012/01/it-all-started-with-mailboxesreally.html

    Reply
  41. Anonymous says

    February 6, 2012 at 5:43 pm

    Lovely and Nice color!! But here’s my question – They show you sticking the brush in and painting away. But what about those real skinny vases like the ones on the table painted orange in the first picture advertising the article?? Can’t get your hand or brush in there. ???

    Reply
  42. Sugar and Charm says

    February 6, 2012 at 5:48 pm

    If you can’t fit a brush inside, the look is still achievable… it just takes a little more time. You have to pour the paint in and swirl until the entire inside it coated. You can cover the top with a napkin and shake the paint around as well 🙂 Thanks for the comment!

    Reply
  43. c.w.frosting says

    February 12, 2012 at 6:58 am

    These are beautiful! I tried painting glass with acrylic paint & it looked ok but the process was so messy! Thanks for sharing the tutorial.

    -caroline @ c.w.frosting

    Reply
  44. Katy says

    February 16, 2012 at 2:09 pm

    Hey I found you on Pinterest, signed up to follow you, love the vases, thank you for sharing.

    Reply
  45. The Pink Pagoda says

    February 16, 2012 at 4:32 pm

    I saw this on Pinterest and came over to check it out. This is something I’m SO exited about trying! Thanks so much!

    Reply
  46. Anonymous says

    February 17, 2012 at 4:05 am

    Been looking for a navy blue vase for my bathroom. Now I can do one like this. Thanks for the tip.

    Reply
  47. tillyweaver.com says

    February 18, 2012 at 12:04 am

    I’ve been itching to try this the minute I saw your post. My glass vases are drying as a type, can’t wait to see how they turn out!!

    Reply
  48. Diatomaceous Earth says

    February 18, 2012 at 3:19 pm

    How beautiful! I’m going to go try this now. So simple, beautiful and creative.

    Reply
  49. *lauren_*_ashley* says

    February 21, 2012 at 1:35 am

    Love this project! This is my first time ever being on this site and your project inspired me. Thanks for such great direction. I was sad because michaels where i live discontinued the blue but i was able to get one bottle. Was worried i wouldnt have enough but i did w/ some to spare. Thanks again, i love my new vases!

    Reply
  50. Anonymous says

    February 21, 2012 at 10:04 pm

    Hello there! I’m following up with this about a year too late, but I was wondering what your recommendation might be if I DID want to seal it so that I could put water in it…any ideas on that?? Thank you!!

    Reply
  51. Anonymous says

    February 27, 2012 at 2:27 am

    Where did you buy the paint? I’ve been look for it and I can’t find it!!

    Reply
  52. Anna says

    March 1, 2012 at 3:16 am

    I just finished doing two vases! one in that gorgeous blue and one in a purple!! so easy to do. For everyone looking for the paints I found mine on sale at Michaels and then the surface conditioner at JoAnn’s. I haven’t checked Hobby Lobby but will go there too just to see if they stock them and get more colors. Love love love this..just need to find a way to seal it so water can go it. 🙂 thank you so much for sharing!

    Reply
    • Vanessa says

      July 23, 2014 at 11:54 am

      Hi there!

      I just LOVE these vases. I was on the Michaels web-site but didn’t see the “Perm Enamel paint.” Is it called something else?

      http://www.michaels.com/paints/glass-paint/809188057

      Thanks so much for your help!!! 🙂

      Reply
  53. Karah says

    March 4, 2012 at 1:35 pm

    I just made these yesterday and they look AWESOME!!! Thank you for such a great idea. I am going to have to blog about it:)

    Reply
  54. Anonymous says

    March 6, 2012 at 7:24 pm

    Do you think this could work on the outside of the vase, so it could be used with water? Or has anyone tried spraypainting vases? I love this, but don’t know what I’d do without a vase I can’t fill with water.

    Reply
  55. Anonymous says

    March 11, 2012 at 9:55 pm

    I have some textured vases, grooved designs in the glass. Do you think this process will work on them if I make sure to get paint in all the indentations?

    Reply
  56. Bonita says

    March 11, 2012 at 11:09 pm

    Saw this on Pinterest and repinned it. Hope you don’t mind. Such beautiful vases!

    Reply
  57. Kayla Kuznicki says

    March 13, 2012 at 2:51 am

    I think these would go great in my room! three vases in a dark purple with flowers coming out of them! so cute!

    Reply
  58. Anonymous says

    March 21, 2012 at 7:50 pm

    How many oz of paint does it take to do 1 vase?

    Im searching for paint online and most of it sells in 2 oz bottles.

    I am about to order some, but wanted to make sure I get enough 🙂

    Reply
  59. Sugar and Charm says

    March 21, 2012 at 8:03 pm

    The small bottles I used (2 oz) did three vases and I still had a small amount left over 😉

    Reply
    • Anonymous says

      December 7, 2012 at 2:23 am

      How many 2 0z bottles did it take to do the 3 vases. I am guessing 1-2 oz frost white and 2-oz blue?

      Reply
  60. Anonymous says

    March 21, 2012 at 10:18 pm

    Awesome!! Thank You 🙂
    I cant wait to try this!!

    Reply
  61. Anonymous says

    March 30, 2012 at 4:07 pm

    Did this recently. After they were all dried I coated the inside with a waterproof acrylic sealer!

    Reply
  62. BookGirlNJ says

    April 5, 2012 at 4:00 pm

    Just found this via Pinterest. Wondering if anyone’s learned if there’s a way to seal it so it can be used as a regular vase, i.e. with water. Spray painting the outside, as a couple of you have mentioned, might also be a great way to repurpose these dull vases.

    Very cool site, too, lots of great ideas here.

    Reply
    • Joseph says

      May 22, 2013 at 10:52 pm

      check the paint that you are using. I bought an enamel paint and it calls to bake it at 350 for 30 mins and will be hand washabable or top rack of the dishwasher.

      Reply
  63. Anonymous says

    April 6, 2012 at 11:13 pm

    where did you purchase that beautiful piece of white coral you have photographed near it?

    Reply
  64. Chloe West says

    April 9, 2012 at 6:56 am

    I just LOVE how these look! Definitely going to have to try this.

    Reply
  65. patti vincent says

    April 16, 2012 at 6:41 pm

    Thanks for the awesome tutorial. May I suggest upcycling at Goodwill for any future project. They almost always have tons of vases. Great blog!!

    Reply
  66. Becca Christensen says

    April 18, 2012 at 5:40 pm

    I found this via pinterest and did it over the weekend and I LOVE it! Thanks so much for sharing!

    Reply
  67. Sara Jo says

    April 28, 2012 at 1:42 pm

    I don’t see why you couldn’t put water in it. When I looked up the PermEnamel paint, it stated it was dishwasher, microwave and oven safe!

    Reply
  68. Maggie @ Snag A Bargain says

    May 6, 2012 at 10:40 pm

    I am going to try this with some bottles that I got at Goodwill. Thanks!

    Reply
  69. Anonymous says

    May 11, 2012 at 12:58 pm

    Hi,

    Love the project!

    A few quick questions. 1. How do you “even out” the paint at the bottom? Rag? Paintbrush?
    2. Is the enamel safe for flowers if I do want to use them as a vase?
    3. How do I print this project out for future use? (web site doesn’t seem to offer the option?)

    Reply
  70. juliemarg says

    May 25, 2012 at 1:44 pm

    thanks for sharing it! i thought doing it is hard but amazing its very easy!

    Reply
  71. Amy says

    May 30, 2012 at 7:36 pm

    love this thanks!

    Reply
  72. Anonymous says

    June 2, 2012 at 5:19 pm

    Thanks for sharing…these are beautiful. I’ve been thinking of doing this myself but wasn’t sure how to start.

    Reply
  73. Suzanne says

    June 6, 2012 at 1:21 pm

    Yeah I wanted to know about flowers too!? These are perfect for a bridal shower I’m throwing in a month and I love the color!

    Reply
  74. Thomasina says

    June 8, 2012 at 1:04 am

    I LOVE the colors of your vases!! Never kne the Dollar Store could such pretty stuff1 🙂 I’m new to the dipping, so I thank you for your post!!

    Reply
  75. Megan Tinley says

    June 20, 2012 at 6:14 pm

    I did this and love it thank you!

    Reply
  76. Natural-Nesters says

    June 21, 2012 at 7:07 pm

    love this!!

    Reply
  77. Kate says

    June 25, 2012 at 11:21 pm

    I thought I was doing this right, but the enamel paint I bought is much thicker and doesn’t really coat the inside without the help of a paintbrush, resulting in a very streaky look. It won’t pour like you have in the first photo. Is it important to use a paintbrush like the one pictured, or can I use the kind with the foam head? Thanks, this is a really cool idea.

    Reply
  78. Anonymous says

    July 9, 2012 at 12:56 am

    Can I use acrylic paint? do you have to get the surface conditioner?

    Reply
  79. Kassie @ Purely Papers says

    July 10, 2012 at 2:03 pm

    I’m in love with the color of these vases! They are beautiful.

    Reply
  80. Petula Wright says

    July 20, 2012 at 6:57 pm

    This is an absolutely fabulous and gorgeous idea.

    Reply
  81. Anonymous says

    July 28, 2012 at 4:00 am

    My sisters and I do this with clear Christmas balls. You just have to pour the paint inside and swirl it to cover, then turn it upside down to dry.

    Reply
  82. Anonymous says

    August 5, 2012 at 1:14 am

    Can acrylic paint be used or does it have to be the enamel?? We only have Hobby Lobby here and did not have the ones that you used. Could not find the conditioner also, is it needed to finish it? Thank You

    Reply
  83. Chrissy says

    August 14, 2012 at 2:03 pm

    I did this project using Folk Art paint. I basically took the whole bottle (it was a large vase) and it rolled the vase around kind of in a swish motion. After I mostly had it covered I turned it upside down for several days to let the excess paint drip out. It checked it and changed the paper plate daily. It was beautiful! However once I put water in it the paint started to peel and float in the water. Such a big bummer since I spent to much time on it!

    Reply
  84. Shani says

    October 6, 2012 at 8:48 pm

    does it need to be enamel paint or can I use regular acrylic do you think? I don’t plan on filling them with water or anything, just for decoration…

    Reply
    • Sugar and Charm says

      October 6, 2012 at 9:43 pm

      If it’s just for decor, I think you can probably use an acrylic paint. I have not done that, but I think it would work 🙂

      Reply
  85. Anonymous says

    October 8, 2012 at 8:28 pm

    what is the frost paint used for? the outside of the paint looks so shiny and I wasn’t sure you got it to look that or if the paint in the glass just appeared that way.

    Reply
    • Sugar and Charm says

      November 25, 2012 at 4:52 am

      I mixed the frost paint with the blue to lighten the color. It also gives it a nice shine 🙂

      Reply
  86. my rebel took over says

    October 14, 2012 at 1:17 am

    Awesome! I want turquoise lamp bases in my living room. I now know how I’m going to get them! I’ll be on the hunt for clear glass lamps!

    Reply
  87. Anonymous says

    October 19, 2012 at 3:28 am

    Would like to try these, looked for the paint enamel and cant find it. Can you tell me where you got your materials, thanks cheryl

    Reply
    • Sugar and Charm says

      October 19, 2012 at 3:52 am

      I got everything from Miachael’s Arts and Crafts 🙂

      Reply
  88. Anonymous says

    October 22, 2012 at 1:10 pm

    I JUST LOVE IT……………….

    Reply
  89. Philip Chang says

    January 10, 2013 at 5:01 pm

    Wonderful idea. It can sometimes be very difficult to find vases in your specific color especially when it comes to wedding centerpieces. The paint seems to come out looking much more classy when you paint from the inside. I can’t wait to try this out on a couple of vases we had left over form our wedding centerpieces, finally a good use for all those vases! If anyones looking for some vases to purchase and paint you should check out http://www.dfwvases.com they have alot of the cylinder shapes that she has pictured above as well as the ginger jar shape. Works out great!

    Reply
  90. TitiCrafty says

    February 15, 2013 at 10:26 am

    I love it! I’m totally trying it if I can find those paints in here:P. Thanks for the aideas.

    Reply
  91. Suzanne Vandusen says

    March 7, 2013 at 5:55 pm

    Do you need to have different heights for the vaes or just 3 different styles. I have a tall one and 2 that are similar in size but are different styles.What are your thoughts?

    Reply
    • Anonymous says

      March 17, 2013 at 6:10 pm

      Different sizes and styles would look great!

      Reply
  92. Glenda Tyski says

    March 12, 2013 at 7:36 pm

    For those who wish to put water in for flowers just keep an eye out for an plastic bottle the right shape and cut to length. No scratching the paint and no water damage. I use this method to line pots for house plants (everything from pails and milk jugs to medicine bottles work)

    Reply
  93. Anonymous says

    March 17, 2013 at 6:03 pm

    how do you get the top of the vases not to have the dried paint when it is upside down from getting heavy on the rim?

    Reply
  94. free DVD copy says

    March 26, 2013 at 11:49 am

    They look’s so good! I never can repeat your work! Eden you are very talented!

    Reply
  95. Missy says

    March 28, 2013 at 7:28 pm

    I love the color you picked. It matches perfectly with my color scheme. I’m definitely going to be giving this a try.

    Reply
  96. Lisa says

    June 3, 2013 at 10:40 am

    I have made several if these vases but I don’t use a paintbrush, I just pour the paint in and twirl to spread the color. Works great….

    Reply
  97. CLAUDETTE LAGACE says

    June 26, 2013 at 6:37 am

    very nice project

    Reply
  98. Shelly Hewett says

    July 2, 2013 at 12:25 pm

    Yay!! Final a craft a non-crafty person (me) can do!!

    Reply
  99. carol says

    August 8, 2013 at 3:26 am

    You have done it beautifully, i am really going to try this at home. This things are really good to gift to somebody.

    Reply
  100. elena says

    September 1, 2013 at 7:15 pm

    me gustaria seguirlos por el mail o el face, ¿como puedo hacerlo?, me gusto mucho este tutorial

    Reply
  101. Rinchen (HIGHonDIY.com) says

    September 17, 2013 at 9:13 pm

    beautiful idea!

    Reply
  102. Katie says

    October 14, 2013 at 9:59 am

    Hi 🙂 I loved your vases and used them in a post I wrote about shopping Goodwill for fun items. I hope that’s okay!

    Blessings,
    Katie
    PS: You can see it here: http://www.dearmushka.com/2013/10/31-days-kitchen-14.html

    Reply
  103. Pinpopular says

    November 1, 2013 at 10:01 am

    Pretty project!
    i love the colors !

    Reply
  104. Linda Laster says

    November 8, 2013 at 11:44 pm

    So creative, thank you for sharing this information fir such amazing transformations.

    Reply
  105. Crystal says

    April 3, 2014 at 10:40 am

    I have a a big smooth floor vase that I bought 15 years ago, but my house colors have changed. I kept it in hopes of painting it to match our current decorations and hopefully putting either greenery or those tall twig things in them. Do you think the process above will work the same on my vase?

    Reply
  106. Jill says

    April 30, 2014 at 10:52 am

    I tried to do this but when it tried the top part of my vase shows paint brush strokes. Do you think if I use a sponge brush that would solve my problem?

    Reply
    • Samantha says

      May 14, 2014 at 8:30 am

      I tried the sponge and makes no difference, BUT that was with regular acrylic paint, I hate the brush strokes
      :,(

      Reply
  107. Samantha says

    May 14, 2014 at 8:27 am

    This is Amazing !

    Reply
  108. Elaine says

    May 16, 2014 at 7:57 am

    Can you put water and real flowers in those vases?

    Reply
  109. Tracey says

    June 28, 2014 at 9:12 am

    can you add flowers ( fresh )?

    Reply
  110. rachel says

    July 17, 2014 at 6:28 pm

    would the paint stay if I were to put a candle inside of the jar????

    Reply
  111. Krissy says

    July 29, 2014 at 10:49 am

    I am wanting to do this product. I can not find the Permenamel paint anywhere but online. I would rather see the color in hand before purchasing. Do you recommend any other brands? Please be specific if so.

    Thanks

    Reply
  112. Margaret says

    August 3, 2014 at 3:46 am

    Hi, I love this idea. I have some lovely enamel paint samples I just bought from Home Depot, can I not use those with the perm enamel conditioner?
    Thanks

    Reply
  113. heavenly massage gold coast chicago says

    August 30, 2014 at 12:13 am

    Oh my goodness! Amazing article dude! Thank you so much,
    However I am having troubles with your RSS.
    I don’t know the reason why I cannot join it.

    Is there anyone else having identical RSS issues? Anybody who knows the solution will
    you kindly respond? Thanks!!

    Reply
  114. ailze freire says

    September 30, 2014 at 6:21 pm

    tudo muito lindo,parabens!!

    Reply
  115. jen montgomery says

    October 7, 2014 at 10:44 am

    That lamp is gorgeous! I might try it out for my reading nook. Thanks!

    Reply
  116. shubhra says

    October 31, 2014 at 1:28 pm

    can i use acrylic paint instead of perm enamel

    Reply
  117. ailas says

    December 2, 2014 at 5:37 pm

    Is there anyone else having identical RSS issues? Anybody who knows the solution will
    you kindly respond? Thanks!!

    Reply
  118. julsofparadise says

    January 1, 2015 at 9:59 am

    These are stunning!
    I will definitely put them on my list of
    “New Projects for 2015”
    !!! Thanks a bunch!

    Reply
  119. Charlee says

    January 23, 2015 at 5:18 am

    Did you have an issue with air bubbles in the paint?

    Reply
  120. Linda Barker says

    February 4, 2015 at 3:04 pm

    Hi,
    I made your beautiful vases with a young friend of mine a couple of days ago and they turned out beautiful! However, I did have one problem maybe you could help me with. The insides of the vasees do not look pretty – lots of brush strokes visible – although not from the outside. I was wondering whether you may be using a LOT of paint because I did not have a lot drip out as you did when I turned the vases upside down. I was thinking of the alternative of painting the top two inches or so of both the inside and the outside in silver. What do you think?

    Thanks for this idea. I really love the results.

    Reply
  121. michelle says

    April 22, 2015 at 12:34 pm

    I will SO be painting vases soon! Thanks for the tutorial.

    Reply
  122. Lindsay says

    July 28, 2015 at 1:16 pm

    LOVE the look of theses vases! I have so many left over from my wedding that I would love to do something like this with them! The only thing is that I cannot find the paint anywhere at michaels 🙁 do you know of anything else I can use?!

    Reply
    • Eden says

      July 28, 2015 at 1:30 pm

      Hi Lindsay! Any enamel paint will do the trick!! Martha has some great all-purpose paint that would work too!

      Reply
      • Lindsay says

        July 29, 2015 at 9:47 am

        Thanks! I did find the Martha Stewart brand and picked up a couple of them. What do you recommend for the PermEnamel Surface Conditioner since I can’t find that? It is necessary?

        Also, I noticed that you mixed the blue and white together in a picture above. Was that just to achieve the color you wanted? Or was there another purpose for the white?

        Thanks again!

        Reply
  123. Donna Harvey says

    August 15, 2015 at 4:00 am

    I love the look of these vases, they look so expensive, I can see filling them with flowers from the Dollar Tree, I got some beautiful Spring flowers there for my Wedding. Thanks for the info. Donna

    Reply
  124. arlene kaplan says

    August 25, 2015 at 7:22 am

    I am going to try those vases.

    Reply
  125. Martha Elba mar Villalobos says

    August 28, 2015 at 7:07 am

    Me encantan como se ven, yo reciclo todos los frascos de vidrio y desearía pintarlos, vivo el La Paz B.C.S. México se consiguen aquí o me los pueden enviar? Saludos y gracias por compartir tanta belleza. Un saludo!

    Reply
  126. Martha Elba mar Villalobos says

    August 28, 2015 at 7:08 am

    Me refiero a las pinturas!

    Reply
  127. Moxie & Oliver says

    November 5, 2015 at 3:07 pm

    These are SO SWEET!!! I love them. I think that painting the insides of some of my mason jar lanterns would be adorable (we use them as vases, too). Do they do pretty well with water in them?

    Reply
  128. K.MILLA says

    February 29, 2016 at 12:04 am

    !!!

    Reply
  129. Marcela Eliane de Oliveira Moraes Furtado says

    March 1, 2016 at 6:01 am

    Tudo muito lindo. Quero fazer também.
    Que talento!!!
    Transformar coisa simples em belas peças,tem que ser muito habilidosa.
    Parabéns.

    Reply
  130. Cheryl says

    April 16, 2016 at 8:00 pm

    How about painting the outside instead have you trued that then you can put anything on the inside

    Reply
  131. Anita says

    June 10, 2016 at 2:37 am

    These vases look absolutely stunning in white! What a fantastic way to dress them up, Gail! ????

    Reply
  132. Dolores Howell says

    September 12, 2016 at 1:58 pm

    I love the vases but I was looking for a way to fix what I did. I painted the outside of the vase an it was not a glossy paint an I put it in the oven to bake it on but it is dull looking an I was wondering what to do to get the glossy look. The vases you showed are so pretty I just wish I could make my that pretty. Can you help?

    Reply
  133. RETA GREEN says

    April 2, 2017 at 7:40 am

    WHAT IS SURFACE CONDITIONER, AND WHERE DO YOU BUY IT?

    Reply
    • Eden says

      April 2, 2017 at 9:23 pm

      You can buy it at a craft store next to the where you will buy the paints.

      Reply
  134. Alexander says

    April 10, 2017 at 2:50 am

    Beautiful enamel plates! Nice colors and shapes!

    Reply
  135. Lydia says

    May 24, 2017 at 2:48 pm

    Thanks

    Reply
  136. Kimmy says

    August 31, 2017 at 6:45 pm

    Holy wow! I have lots of vases from the thrift shop and never even thought of doing this!! I now have another DIY project to make! Thank you for this!!

    Reply
  137. Carly Ritchie says

    October 2, 2017 at 1:39 am

    Wow, these look awesome Eden!! I’ve got a huge glass vase-thing in the garden that I’ve been looking to make use of so I might follow this technique but blast it inside with a spray gun instead!

    Never thought to paint the inside rather than the outside, love the gloss finish it gives 😀

    Thanks 🙂

    Reply
    • Eden says

      October 2, 2017 at 11:37 am

      Yay!! So glad you like it and thank you for the sweetest comment! Hope it turns out amazing!!!

      Reply
  138. MEAl5 says

    November 13, 2017 at 11:40 pm

    Hi, I love this idea. thanks you!

    Reply
  139. Susan Cox says

    November 28, 2017 at 4:37 pm

    I followed your directions and my vases are gorgeous. I painted three vases of different heights (purchased at different times) and they now make a lovely, cohesive accent for my entry table.

    Reply
    • Eden says

      November 29, 2017 at 8:29 am

      Yay! Love hearing this! Thank you for the sweet comment!!

      Reply
  140. Stephany says

    February 20, 2018 at 7:38 pm

    I absolutely love this. Beautiful colors

    Reply
    • Eden says

      February 26, 2018 at 8:05 am

      Thank you!

      Reply
  141. Robert Hatcher says

    April 13, 2018 at 7:24 am

    I love the vase, it is so shiny and pretty! I will totally have to try this!

    Reply
  142. Messy says

    May 29, 2020 at 12:23 pm

    I will SO be painting vases soon! Thanks for the tutorial

    Reply
  143. Cocomelon Nursery Rhymes says

    November 19, 2020 at 9:52 am

    The tutorial is really simple and would be so much fun to do for the teen girls at home. Here is the link to know more details of the project and add it to the next to do list of the weekend. sugarandcharm

    Reply
  144. Beautifulymess says

    January 6, 2021 at 3:44 pm

    I followed your directions and my vases are gorgeous. I painted three vases of different heights (purchased at different times) and they now make a lovely, cohesive accent for my entry table.

    Reply

Trackbacks

  1. 15 DIY Dollar Epic Shop Decoration Ideas You Need After Holiday Expenditures says:
    January 7, 2020 at 11:49 pm

    […] […]

    Reply
  2. 50 Dollar Store Coastal DIY Home Decor - Prudent Penny Pincher says:
    March 9, 2020 at 5:31 pm

    […] Coastal Enamel Painted Vases from Sugar and Charm […]

    Reply
  3. 20 COASTAL DIY HOME DECOR - Pinsinfo says:
    March 14, 2020 at 4:50 pm

    […] Coastal Enamel Painted Vases from Sugar and Charm […]

    Reply
  4. 60 Brilliant DIY Room Decor Ideas for Teens ⋆ DIY Crafts says:
    March 30, 2020 at 7:10 pm

    […] The tutorial is really simple and would be so much fun to do for the teen girls at home. Here is the link to know more details of the project and add it to the next to do list of the weekend. sugarandcharm […]

    Reply
  5. 60+ Nautical Decor DIY Ideas To Spruce Up Your Home : News Readly says:
    April 9, 2020 at 5:53 pm

    […] Add a gorgeous pop of blue to any neutral decoration with these painted enamel vases, which you can use for a number of purposes. via sugarandcharm […]

    Reply
  6. 80 Cheap DIY Dollar Store Decor Ideas says:
    April 10, 2020 at 10:05 am

    […] sugarandcharm […]

    Reply
  7. DIY Vases - 39 Gorgeous Home Decor Ideas - Katherine Dedul says:
    April 12, 2020 at 5:01 pm

    […] love how bold these vases look, and you can check them out at Sugar and Charm. The tutorial is quite easy to follow, and you just need a few materials to go after the look you […]

    Reply
  8. 100 Dollar Store DIY Summer Decor Ideas | DIY Opic -Your Favorite crafts, Diy Ideas says:
    May 10, 2020 at 11:25 pm

    […] Coastal Enamel Painted Vases from Sugar and Charm […]

    Reply
  9. 20 DOLLAR STORE COASTAL DIY HOME DECOR – best 20 tips says:
    May 19, 2020 at 1:59 am

    […] Twine Fishnet from It All Started With Paint Coastal Wine Glass Centerpieces from Etsy Coastal Enamel Painted Vases from Sugar and Charm Dollar Store DIY Coastal Lantern from Prudent Penny […]

    Reply
  10. 20 DIY Dollar Store Decorating Ideas - Craftsy Hacks says:
    July 1, 2020 at 8:59 pm

    […] Credit: sugarandcharm.com […]

    Reply
  11. 20 Easy Dollar Store DIY’s That You Need To Make Your House A Home – The Angelina Archives says:
    July 2, 2020 at 1:10 pm

    […] Credit: Sugar & Charm […]

    Reply
  12. Easy and Cheap Dollar Tree Crafts You Can Do Over The Weekend – Shawnee KS Homes and Lifestyle says:
    August 28, 2020 at 2:29 pm

    […] of vases, we have another really cool idea to share with you. It comes from sugarandcharm and it involves plain glass vases and dishwasher-safe paint and surface conditioner in any colors […]

    Reply
  13. 31 Dollar Store Rustic Home Decor Ideas says:
    September 4, 2020 at 2:10 pm

    […] Via Sugarandcharm […]

    Reply
  14. 20 idées de décoration de magasin à un dollar bricolage – Dépêchez-vous d'aimer says:
    September 15, 2020 at 6:34 am

    […] Crédit: sugarandcharm.com […]

    Reply
  15. 51 DIY Apartment Decorating Ideas says:
    December 14, 2020 at 10:45 am

    […] Via Sugarandcharm […]

    Reply

Leave a Reply Cancel reply

Your email address will not be published. Required fields are marked *

Recipe Rating


Eden of Sugar and Charm

Adding a little charm to the everyday life with entertaining and lifestyle inspiration, sweet recipes and classic style… your daily dose of sugar and charm!

Meet
Eden
Signup for the Newsletter
View our Most Charming Posts

Popular Posts

The Best Coconut Loaf Cake

The Best Coconut Loaf Cake

How to Build a Gingerbread House Like a Pro

How to Build a Gingerbread House Like a Pro

A Refreshing Watermelon Cocktail Punch

A Refreshing Watermelon Cocktail Punch

Lavender Gin and Tonic Punch

Lavender Gin and Tonic Punch

The Most Delicious Chocolate Chip Cookie Pie Recipe

The Most Delicious Chocolate Chip Cookie Pie Recipe

How to Create a Tea Garden

How to Create a Tea Garden

You Might Also Like

How to Make a Classic Moscow Mule

How to Make Chocolate Ganache

Classic Mimosa Recipe

Small Kitchen Remodel

Classic Peanut Butter Cookies

Featured In:

Featured In Logos

Copyright © 2021 · Sugar and Charm · Privacy Policy · Accessibility Statement