
Fabric & Ceramic Marbling DIY (The Easy Acrylic Method)
Jul 06, 2015, Updated Feb 11, 2026
This post may contain affiliate links. Please see our disclosure policy.
Water marbling is one of my absolute favorite creative entertaining projects. There is something so magical about watching fluid patterns come to life on the surface of the water, knowing that every single piece you create will be a complete one-of-a-kind original.
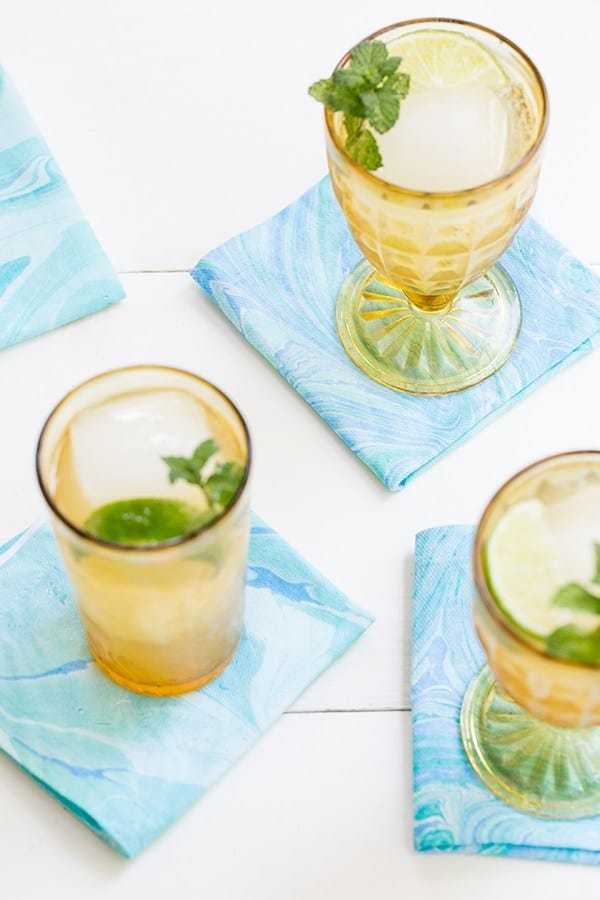
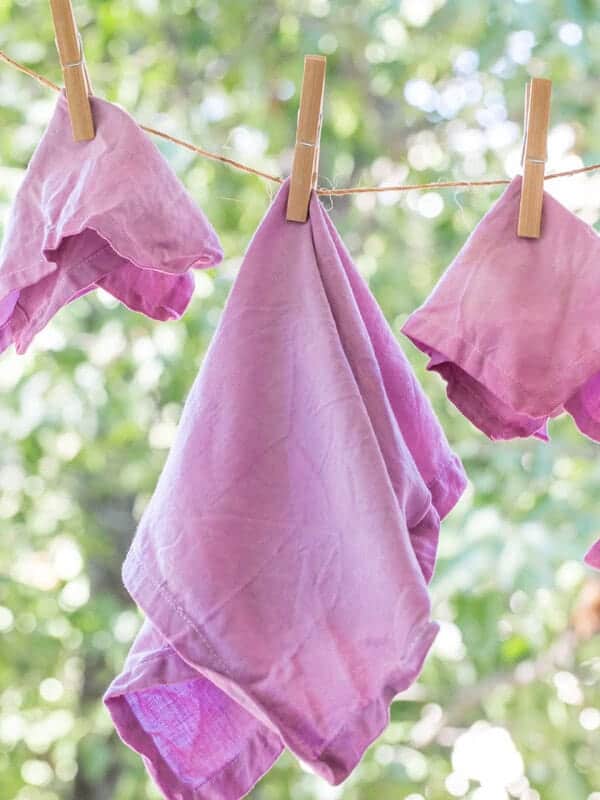
I’ve been using this technique for years to create custom cocktail napkins, dinner linens, and even ceramic coasters for parties. It’s an effortless way to create “artistic and elevated” party supplies that look like they came from a high-end boutique, but are actually a fun afternoon DIY.

Pin this now to find it later
Pin ItWhile traditional marbling can feel intimidating with its chemical steps, I’ve refined this process to be much more approachable. Whether you want to go the professional route or keep it super simple, this guide covers it all. Once you start, you’ll want to marble every porous surface in your home!
I also love naturally dyeing linens using berries and herbs — it’s another beautiful way to create one-of-a-kind entertaining pieces. You can see my full tutorial for naturally dyed linens here.
The Science of the “Marbling Bath”
To make the paint float, you have to create a “bath” (also called a size) that is thicker than plain water.
The Recipe: * 4 tablespoons Methocel per 1 gallon (16 cups) of warm water.
- Whisk until completely dissolved.
- Wait: Let it sit for 1–2 hours. You want the bubbles to dissipate and the mixture to become thick and clear.
- You can add+ 1 tablespoon Ammonia to improve paint spread – A properly thickened bath allows acrylic paint to float and spread cleanly on the surface instead of sinking or breaking apart. But I have used it with and without and it works without too.

Why You’ll Love This Technique
- One-of-a-Kind: No two napkins or coasters will ever look the same.
- Versatile: Works beautifully on cotton, ceramic, wood, and thick paper.
- Party-Ready: A perfect creative activity for bridal showers or a “craft and cocktails” night.
Supplies for Fabric & Ceramic Marbling
I’ve added a list of supplies to my Amazon storefront for easy shopping.
- High-flow acrylic paint: Use a liquid, high-flow acrylic paint (such as Golden High Flow) rather than thick craft paint so the colors spread smoothly and create clean marble patterns.
- Marbling bath (“size”): Methocel or liquid starch mixed with water. Thickening the water helps the paint float properly.
- Golden Flow Release (wetting agent): An optional additive used in very small amounts to help acrylic paint spread smoothly across the marbling bath by reducing surface tension.
- Large flat bin or tray: Deep enough to hold about 2 inches of the marbling bath.
- Items to marble: Cotton napkins, fabric pieces, ceramic coasters (unfinished or matte work best), or heavy cardstock.
- Wooden skewers or sticks: For swirling designs.
- Small cups: For mixing and thinning paints.
- Bucket of clean water: For rinsing finished pieces.
- Clear acrylic sealer (optional): Recommended for sealing ceramic items after they dry.
- Gloves (optional): To keep hands clean while working.
Pro Tip for Washability: If you plan to wash your linens frequently, soak your fabric in an Alum solution and let it dry before marbling. This “mordant” acts like glue for the pigment, keeping colors vibrant through the wash.
How to Marble Fabric and Ceramics
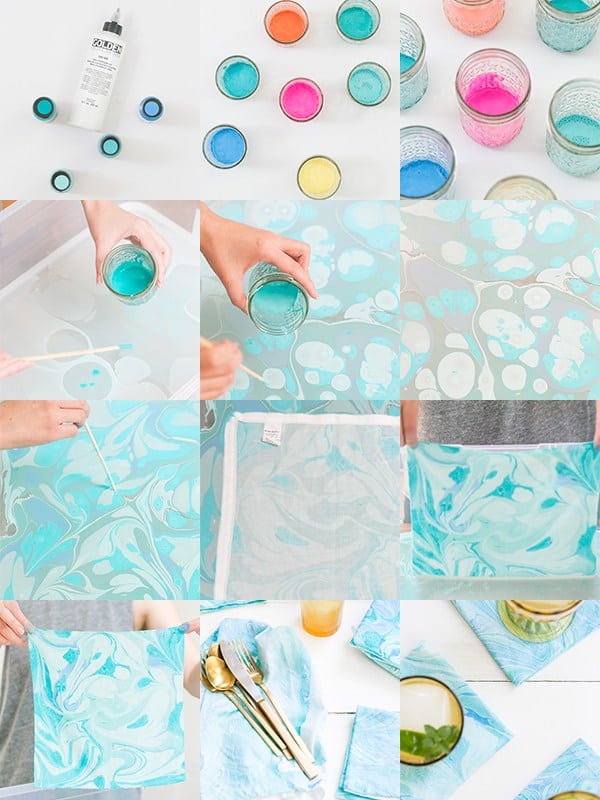
1. Prepare the Marbling Bath
In a large flat bin, mix 4 tablespoons Methocel per 1 gallon warm water. Whisk thoroughly until dissolved, then let the mixture sit for 1–2 hours until thickened and most bubbles disappear. This thickened bath allows the paint to float and spread properly.
2. Prep the Fabric (Optional)
If you want linens to be permanent and washable, soak them in an Alum solution (3 tbsp Alum per 1 quart hot water) for 20 minutes. Hang to dry and iron before marbling.
Note: For decorative coasters or one-time-use party linens, you can skip the Alum soak.
3. Prepare the Paint
Squeeze about 2 tablespoons acrylic paint into a small cup and thin with water (or Golden Flow) until it reaches a milky consistency. If using high-flow acrylic paint, only a few drops of golden flow may be needed.
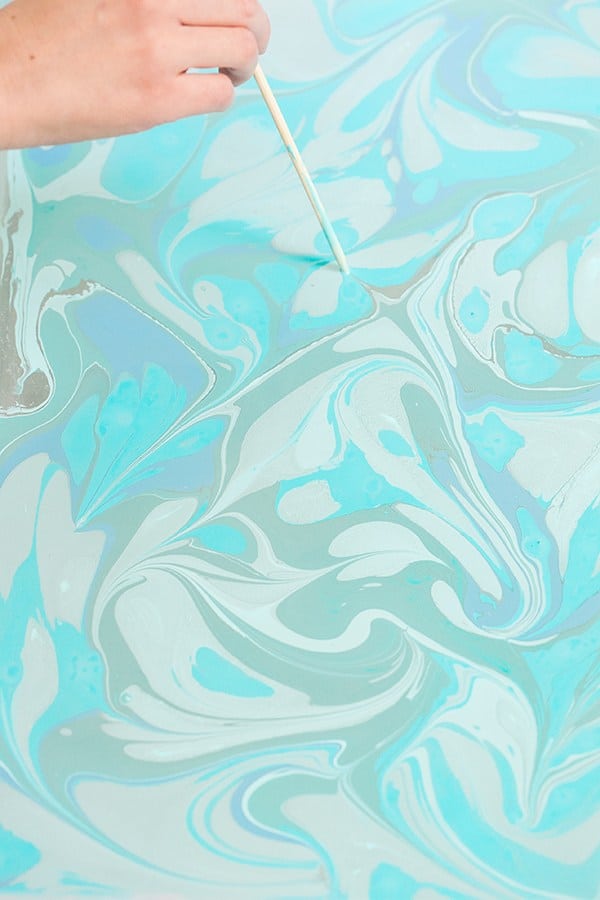
4. Create the Pattern
Once the Methocel bath is clear and bubble-free, gently drop paint onto the surface using a stick. The paint will spread into circles. Layer colors, then drag a skewer lightly through the surface to create marble swirls and veins.
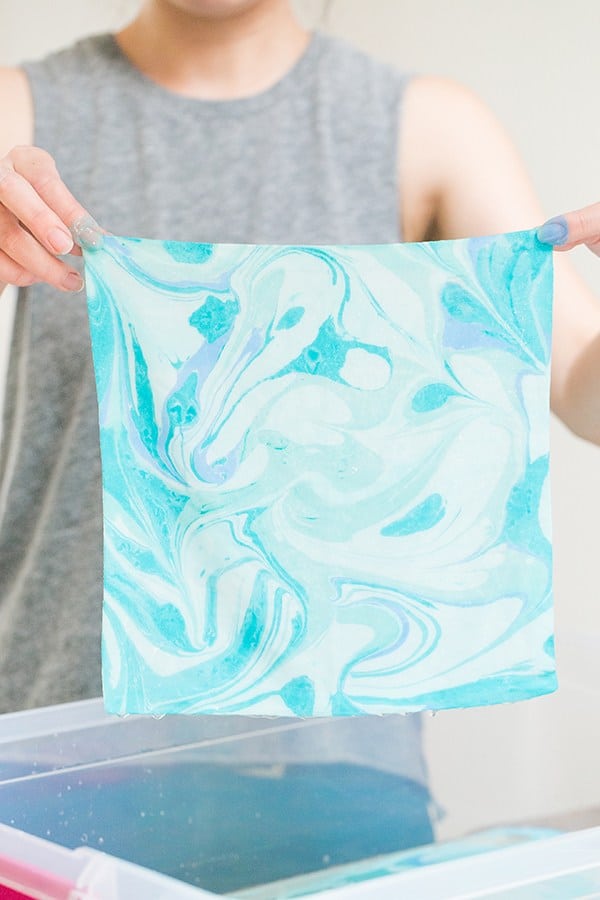
5. Transfer the Design
Hold your fabric or coaster flat and lower it onto the surface. For fabric, start from the center and allow the sides to fall slowly to avoid air bubbles. The pattern will instantly transfer.
6. Rinse and Dry
Lift the item straight up and immediately dip it into a bucket of clean water to rinse off the excess marbling medium. Hang linens to dry or lay coasters flat.
7. Heat-Set and Seal
Once the fabric is completely dry, iron on a high setting for 2–3 minutes to set the paint. For ceramic coasters, spray with a clear acrylic sealer to protect from moisture.

Eden’s Marbling Tips
Surface Tension is Everything: If your paint is sinking, it’s either too thick or your water bath isn’t thick enough. Test one drop first!
The “Porous” Rule: This works on anything that can “absorb” the paint. Unglazed ceramic, matte wood, and 100% cotton are your best friends. Glass and wax do not work for this DIY.
Don’t Over-Mix: It’s tempting to keep swirling, but “less is more” for that crisp marble look.
Metallic Magic: Adding a pop of gold or copper acrylic paint makes the finished product look incredibly expensive.
Troubleshooting & FAQs
This is the most common issue. If the paint sinks, it’s usually for one of two reasons:
The paint is too thick: Add a few more drops of water or polymer to your paint cup. It needs to be light enough to sit on the “skin” of the water.
The bath isn’t thick enough: If you didn’t let the Methocel sit long enough, or if the measurements were off, the water won’t have the surface tension to hold the paint.
Over-swirling: It’s tempting to keep moving the skewer, but too much agitation blends the colors into each other rather than keeping them in distinct “veins.”
Too much water in the paint: If you thinned your paint too much, it will spread uncontrollably across the surface.
Air Bubbles: If you have white spots in your design, it’s likely because an air bubble was trapped between the fabric and the water. Next time, lay the fabric down in a gentle “rolling” motion from the center outward.
Synthetic Fabric: This technique works best on natural fibers like 100% cotton, linen, or silk. If your fabric has too much polyester, the paint won’t have anything to “grab” onto.
Mixing Method: If you see clumps, the Methocel wasn’t whisked thoroughly enough or the water was too cold. Using warm water and a vigorous whisk (or even a hand mixer!) usually prevents this. If clumps persist, you can strain the mixture through a fine-mesh sieve or pantyhose.
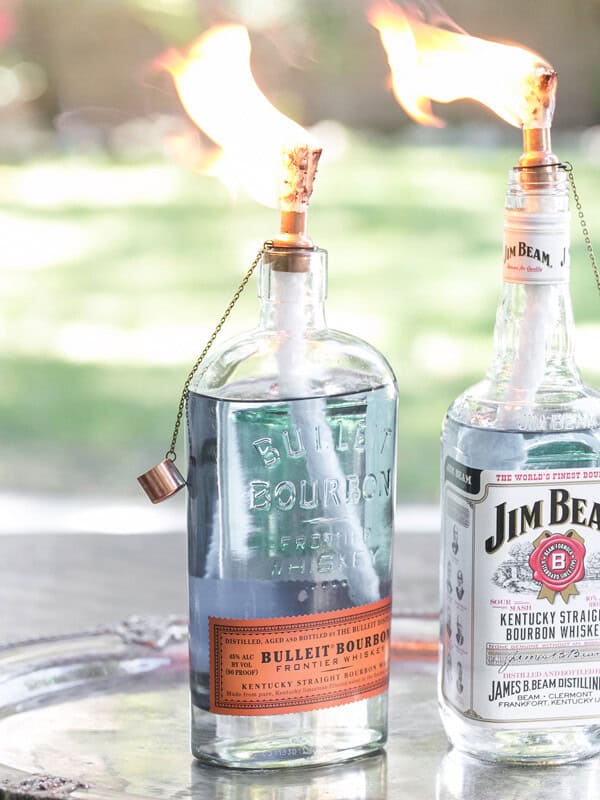
More DIY PArty Decor Ideas

Party DIY
How to Make Beautiful Oil Candles
Entertaining
Naturally Dyed Linens using Berries and Herbs

Entertaining


Thank you so much!❤️
Love this! Thanks for sharing! Are these napkins safe for wiping face after eating or are they purely decorative?
Hello! I’m excited to try this. I plan to make napkins. Do I need both the Golden Flow and the Golden GAC 900? I’m a little confused about what is the difference between different items in the amazon cart. Thank you!
You actually don’t need both for this project. The Golden Flow Release just helps paint spread on the surface, but if you’re using high-flow acrylic paint, you can skip it. And the Golden GAC 900 is a fabric medium to help with washability, but if you’re doing the alum soak and heat-setting the fabric after, you don’t need that either. I like to keep it simple, I didn’t soak the cocktail napkins and they turned out great.
Sou Brasileira,queria aprender muito essa técnica, mas fica impossível,não sei falar inglês,o que uma pena.Faz muito tempo que quero aprende- lá.Lindo trabalho . Parabéns. 💐
Hi,
This is a fun and exciting technique.. I see I must make some adjustments with the fluid of paint and more methocel..my question is..what do you do with the ‘bath’ .? Toss when done ? How long will it be useable ?
Ok thank you
L
Hi! Yes I just toss it when I am done 🙂
Thank you for sharing the step-by-step instructions for this beautiful technique. Your work is amazing. I’m going to make some beautiful pieces. 🥰
Thank you SO Much!! XO
Wow the Methocel is expensive. I really wanted to do the napkins but when you total up this and that it comes pretty expensive. Love the job you did.
Great tutorial. I will just give you one tip- when you prepare your fabric with alum, flatten it and get the wrinkles out before drying. Alum will break down the fibers in the fabric and ironing it will weaken the fibers further- making them weak enough to fall apart- disintegrate- the first time you launder the napkins. If you don’t get a chance to marble all of your alum sized fabric in one day- rinse the alum out of the unmarbled fabric until you have more time- otherwise your fabric will fall apart. …ask me how I know this….☺
Will the colors last after washing in the washing machine multiple times?
They do!
Will this marbling method work on glass Christmas ornaments?
It can! You’ll have to roll the ornament over the pattern, not dunk it. The surface of the ornament has to touch the surface of the paint.