• Home
  • Recipes
  • Eats & Drinks
    ▼
    • Easy Everyday
    • Desserts
    • Cocktails
    • Drinks
  • Parties
    ▼
    • Party Food
    • Celebrations
    • Everyday Parties
    • Party DIY
    • Party Planning
    • Flowers
  • Home
    ▼
    • Decorating
    • Cleaning
    • Organizing
    • Gardening
  • Holidays
    ▼
    • 4th of July
    • Birthdays
    • Valentine’s Day
    • Saint Patrick’s Day
    • Easter
    • Mother’s Day
    • Father’s Day
    • Halloween
    • Thanksgiving
    • Christmas
    • New Year’s Eve
  • Videos
  • Shop
  • About
  • Press
  • Contact
  • Home
  • About
  • Press
  • Recipe Index
  • Videos
  • Contact
  • Nav Social Menu

    • Email
    • Facebook
    • Instagram
    • Pinterest
    • RSS
    • Tumblr
  • Skip to main content
  • Skip to primary sidebar
  • Skip to footer

Sugar and Charm

  • Eats & Drinks
    • Easy Everyday
    • Desserts
    • Cocktails
    • Drinks
  • Parties
    • Party Food
    • Celebrations
    • Everyday Parties
    • Party DIY
    • Party Planning
    • Flowers
  • Home
    • Decorating
    • Cleaning
    • Organizing
    • Gardening
  • Holidays
    • 4th of July
    • Birthdays
    • Valentine’s Day
    • Saint Patrick’s Day
    • Easter
    • Mother’s Day
    • Father’s Day
    • Halloween
    • Thanksgiving
    • Christmas
    • New Year’s Eve
  • Shop
Home » Home » DIY Watercolor Plates

DIY Watercolor Plates

Published on May 26, 2015 Updated on May 13, 2021 by Eden

  • Share
  • Tweet
  • Email
This post may contain Affiliate Links. Please read our privacy policy here.

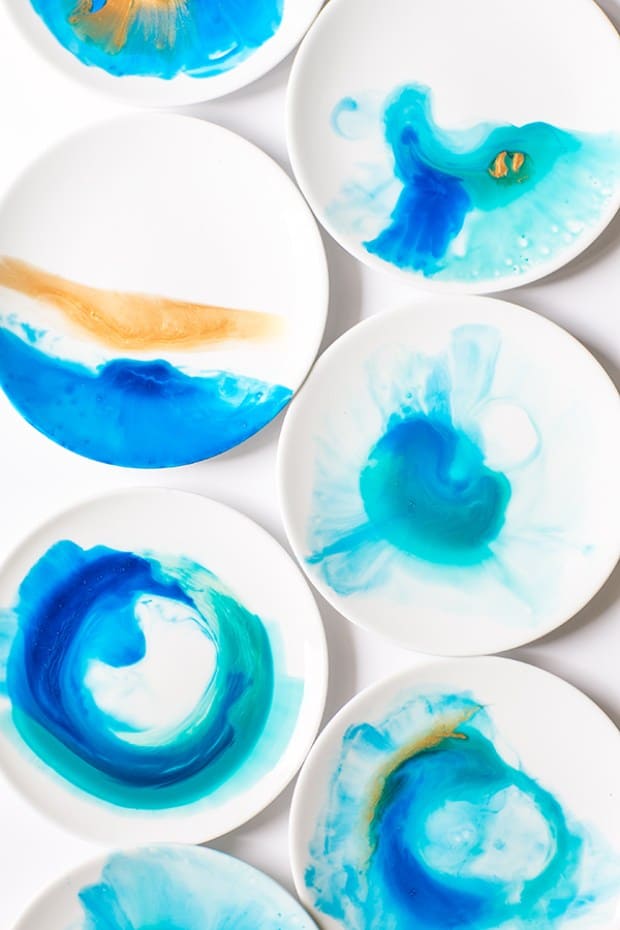
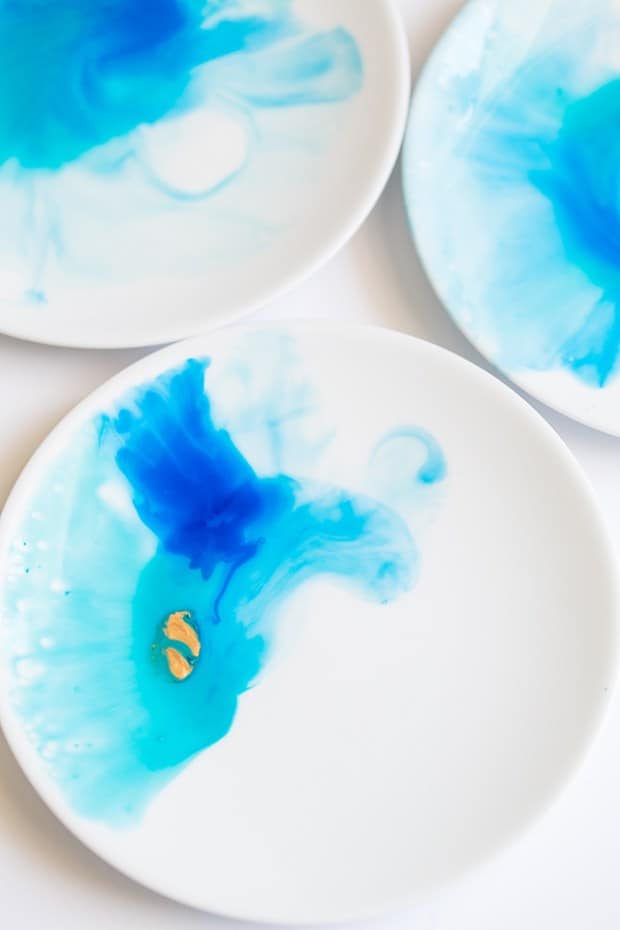
White plates are my favorite dishware staple and we use them every day, but with this technique, you can create beautiful DIY watercolor plates that will add a pop of color to your dishware collection! You can also add this charming look to bowls, cups, platters, etc.

Watercolor plates overhead.

Use any color of paint to go with your theme and get your craft on because these were extremely fun to make! We used porcelain paint with a paint thinner on oven-safe porcelain plates as the foundation for the look.

Blue watercolor plates overhead.

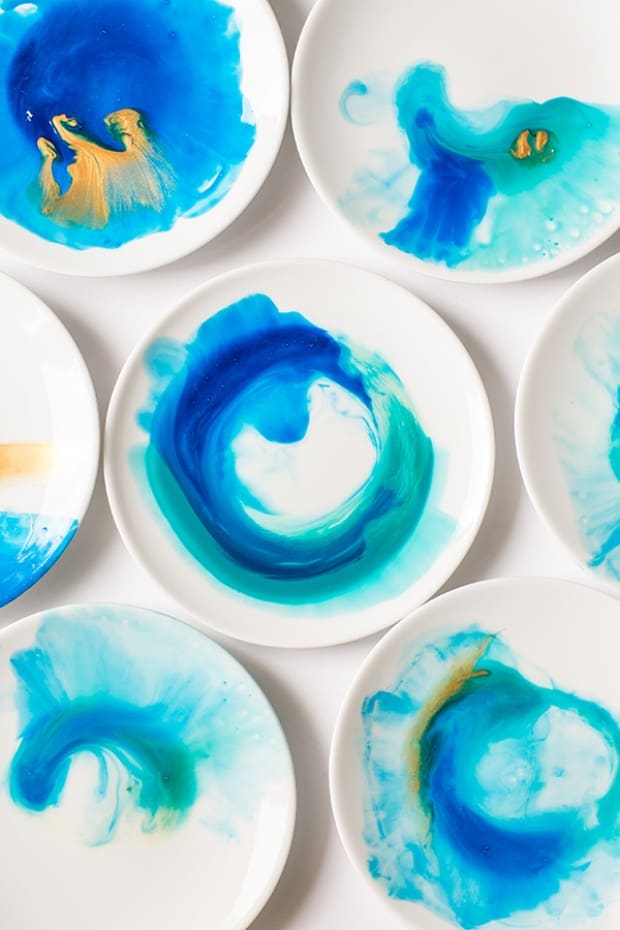
Then we used brushes, droppers, and sticks to make them look like watercolor! Abstract art at its best! Once they are baked, you can wash them in the dishwasher and they’re safe to use!

Watercolor plates overhead.

DIY Watercolor Plate Supplies

Table of Contents

  • DIY Watercolor Plate Supplies
  • DIY Watercolor Plate Directions
    • Watercolor Plate Variations
  • More DIY Craft Projects You’ll Love!

Water-based porcelain paint.

Pebeo Paint in turquoise, blue, gold and a thinner. BUT they’re not all food safe, so do your own research on what is food safe and what’s not.

Porcelain oven-safe plates

Paint rushes

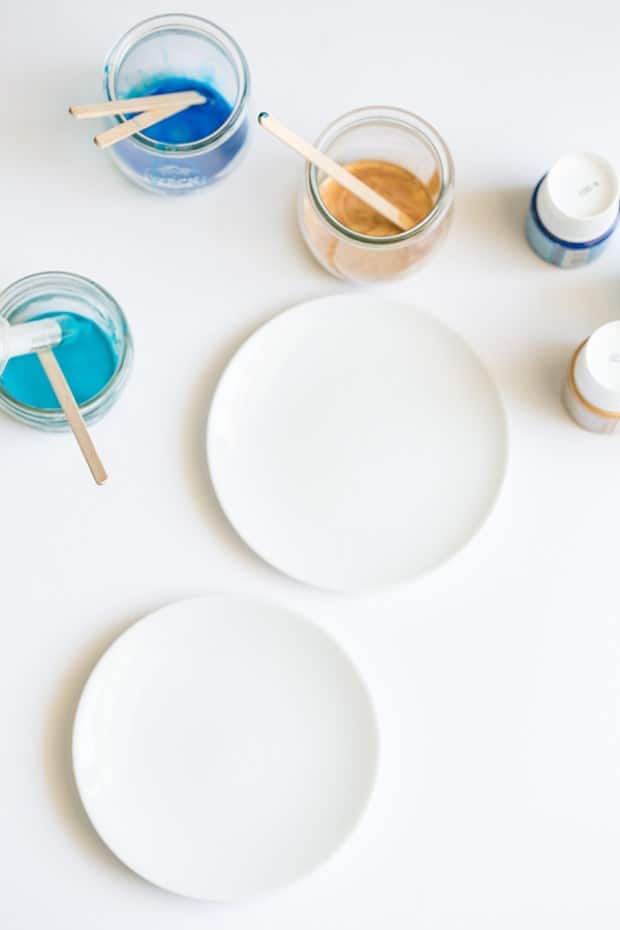
Small glass jars for mixing.

Turquoise watercolor plates

DIY Watercolor Plate Directions

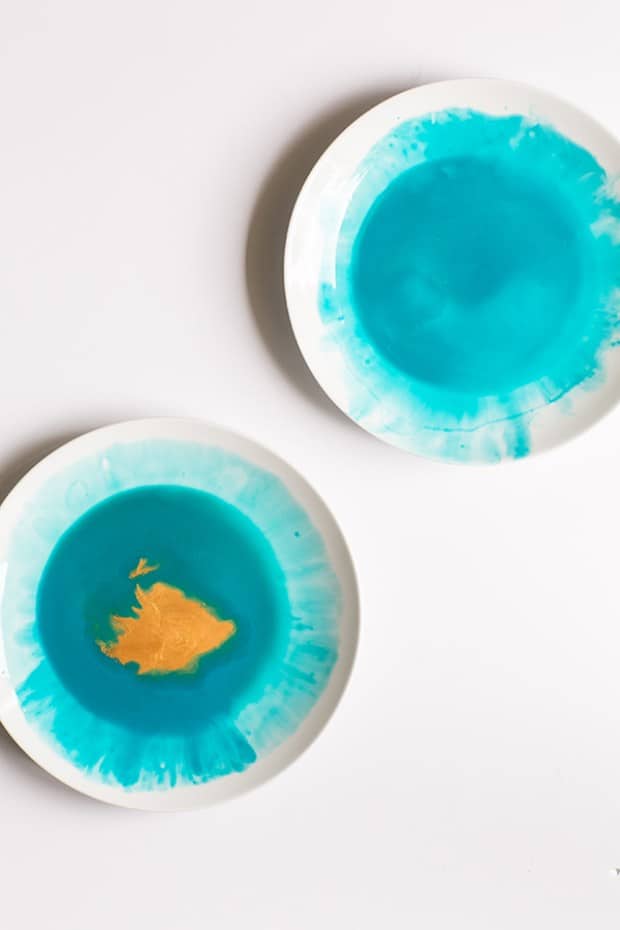
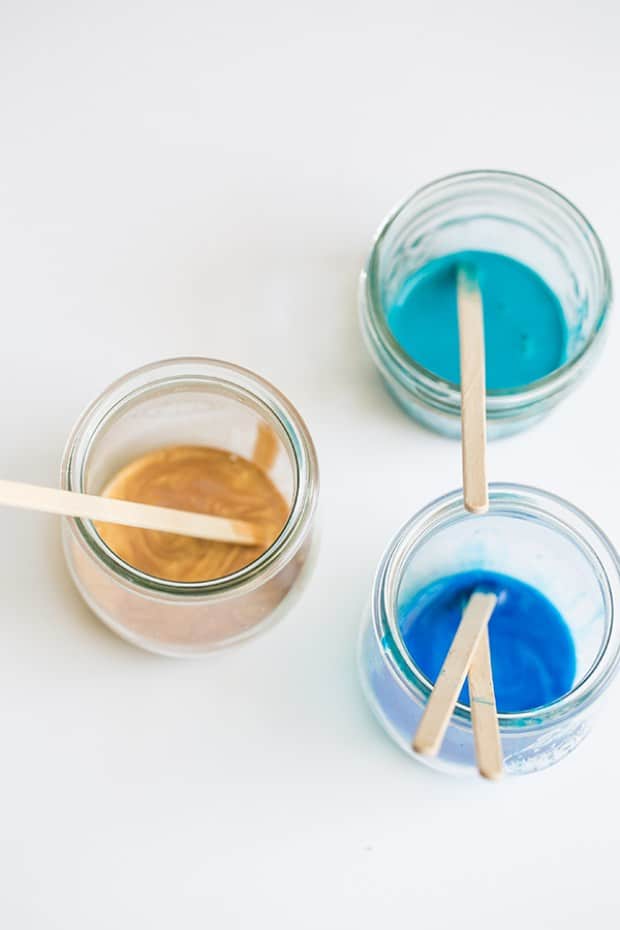
  • Add a small amount of color into each glass jar.
  • Add in the thinner until you reach a watercolor consistency.
  • Mix using a wooden stick or spoon.
white plate with colored paint in small jars.
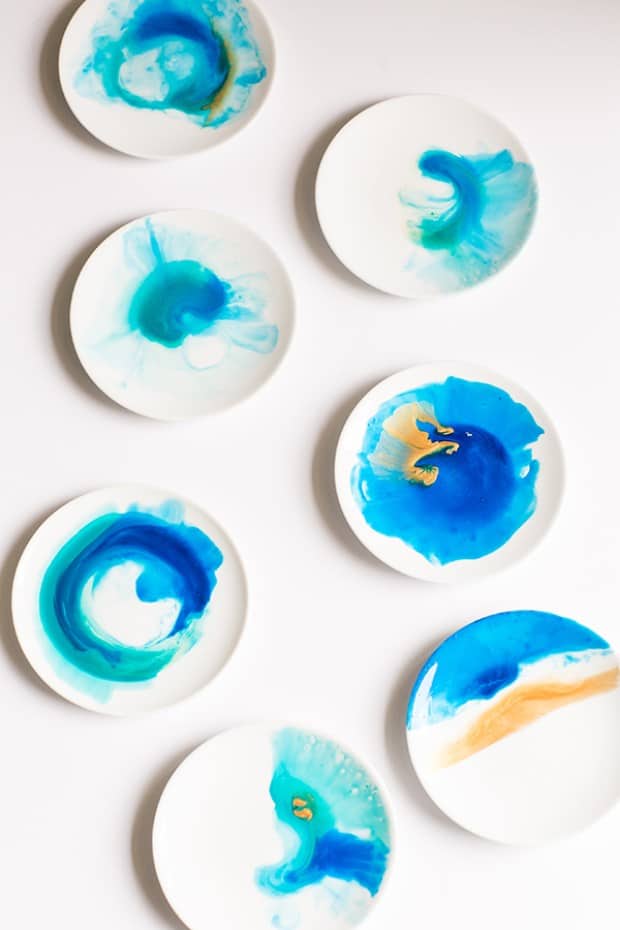
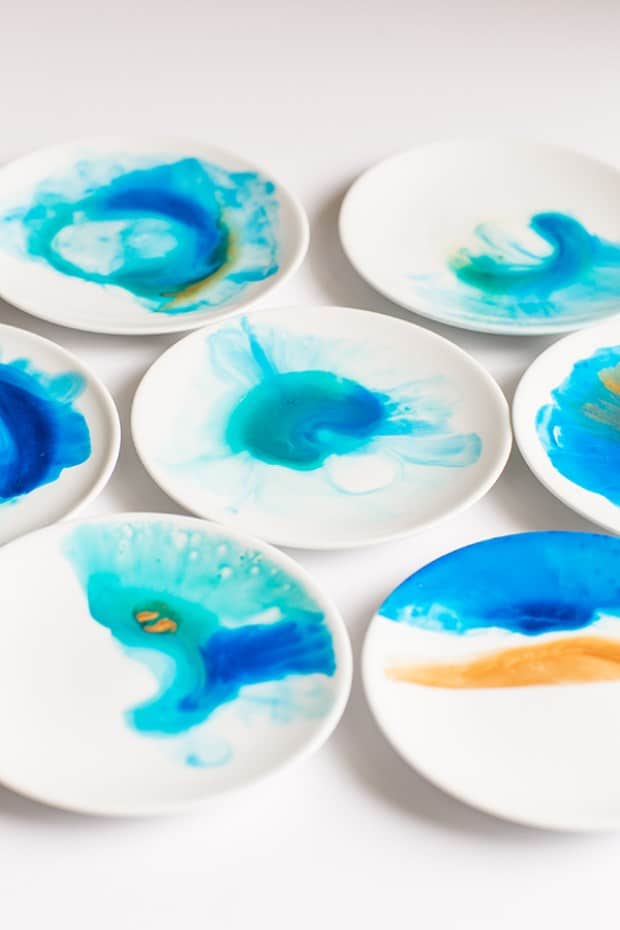
  • Using a dropper and brushes, drop the paint onto a clean plate. Swirl, brush, dot… use whatever technique you want to achieve your desired look!
blue, gold and turquoise paint in jars with wooden stir sticks.
  • Let the plates dry for 24 hours.
  • Once the paint is dry (24 hours later), bake for 35 minutes in a 300-degree oven.
Seven blue and gold watercolor plates on a white background.
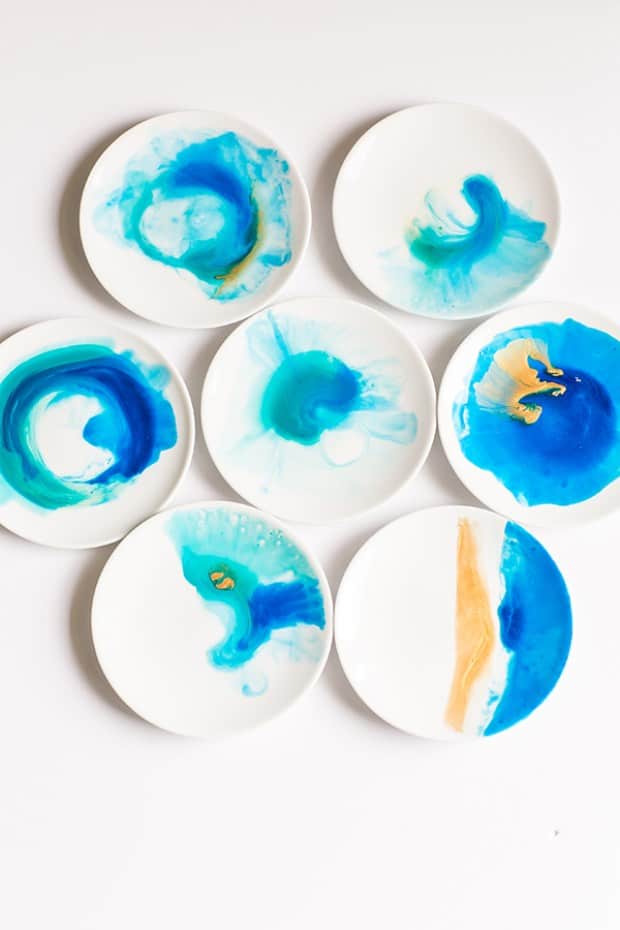
  • They will be fully cured and ready to use. Also, your DIY watercolor plates will be microwave and dishwasher safe!
Watercolor plates with blue and turquoise paints.

Watercolor Plate Variations

If you’re worried about the paint being safe to eat off of after it’s cured, you can also try a different method. Instead of white plates, purchaeclear plates and create the watercolor pattern on the back/bottom of the plate. Then turn it around to see the design through the top.

Close up picture of watercolor paint on white plate.

You’ll be eating off of the clear, unpainted side. Here is a good tutorial for that method.

You can also use the paints on mugs and vases too.

More DIY Craft Projects You’ll Love!

  • DIY Fabric Marbling
  • Essential Oil Candles
  • Mini Marble Cake Stands

Let us know if you make these plates! We love to see what you create, so tag us @sugarandcharm on social!


17 Comments

Related Posts

  • Backyard Renovation Plans by Yardzen

    Backyard Renovation Plans by Yardzen

  • How to Arrange Cut Tulips in a Vase

    How to Arrange Cut Tulips in a Vase

  • How to Style a Spring Bar

    How to Style a Spring Bar

Stay up to Date

Join our Newsletter to Keep up on Latest

Related Posts

  • How to Make Fall Glass Terrariums
  • 11 ways to use Lemon Essential Oil
  • Ideas for How to Style a Fall Porch
  • The First Step to a Backyard Makeover
Previous Post: « DIY Tassel Wine Charms
Next Post: Flamingo Themed Pool Party »

Reader Interactions

Comments

  1. Lois VanGilder says

    August 1, 2020 at 2:37 am

    Hi, I’m having a really hard time getting my paint to look similar to yours. I LOVE the look that you painted but I can’t get mine anywhere near that. If I put in some paint thinner it acts like it wants to separate. HELP, I really love these and would love to put them in my new house. Any suggestions welcome. Do you want to come paint for me?

    Reply
  2. Terry says

    December 4, 2018 at 1:09 pm

    Looking for dishes – having trouble finding a nice set that will go in the oven above 250 degrees. Can the plates be cured at 250 for a longer time?

    Reply
  3. Muriel Jelsma says

    October 12, 2018 at 10:08 am

    Are these plates safe to eat food off? Also. How long and high a temperature is necessary t seal them? Thank you.

    Reply
  4. Manda says

    June 28, 2016 at 2:31 pm

    You mean 300 degrees Fahrenheit?

    Reply
  5. charisma says

    April 27, 2016 at 12:59 pm

    love this and your other DIY tutorials! Check out some of my DIY posts at http://www.charismashah.com

    Reply
  6. Sarah says

    April 3, 2016 at 3:26 am

    Love them. Planning on doing this with our class for a school fundraiser art auction. Wondering how far the paint goes – as in how much should I buy? Trying to keep cost down (not overbuy) but have enough for each student to create a plate. Thanks for the beautiful idea!

    Reply
  7. Clare says

    February 3, 2016 at 1:04 pm

    Hi, I’ve just been trying this with Marabu paints and some white spirit – but I’m having trouble getting the beautiful kinds of affects you’re getting here – yours look just like water colours bleeding into one another, mine aren’t very vibrant and don’t seem to want to play with each other – any suggestions?

    Reply
  8. Morgan says

    January 27, 2016 at 8:30 am

    I cant seem to find Water-based porcelain paint, where did you buy yours at?

    Reply
    • Eden says

      January 27, 2016 at 12:58 pm

      Hi Morgan! We linked to it in the post. We found it at Amazon. I just recommend doing your own research on food safety! You can always to the outside of plates and mugs too 🙂

      Reply
  9. Arwa says

    November 13, 2015 at 6:55 am

    Hi… These look beautiful…. I want to try this. I had a query.
    Are these plates glazed and baked already or they are raw porcelain plates?

    Reply
  10. swapna says

    September 30, 2015 at 9:40 pm

    are these plates food safe ?

    Reply
  11. Alivia says

    June 15, 2015 at 2:14 pm

    Hi here, I think these are gourgous. I do want to warn you though that the Pebeo paints state on them that they shouldn’t be used on food or drink surfaces. They haven’t been tested for safety. 🙁 I wish they were though. I love using them!

    Reply
  12. Zest it Up says

    June 1, 2015 at 12:55 pm

    Love these! We just made some polish splatter mugs the other day…similar look <3

    Reply
    • Eden says

      July 25, 2015 at 7:45 pm

      Oh that’s a great idea too!!

      Reply
  13. sharon says

    May 26, 2015 at 12:08 pm

    hahaha, i’m at work and just said, NO WAY! really loud! this is so awesome, wow a world of possibilities!!! thanks!!!!!

    Reply
    • Eden says

      July 25, 2015 at 7:45 pm

      Haha!! Thanks Sharon!!!!

      Reply

Leave a Reply Cancel reply

Your email address will not be published. Required fields are marked *

Recipe Rating


Primary Sidebar

Eden of Sugar and Charm

Adding a little charm to the everyday life with entertaining and lifestyle inspiration, sweet recipes and classic style… your daily dose of sugar and charm!

Meet
Eden

Eden’s Corner

Eden's Corner

Sign Up for our Newsletter

Signup for the Newsletter
View our Most Charming Posts

Seasonal Recipes

The Best Banana Bread Recipe Ever

The Best Banana Bread Recipe Ever

Complete Guide to Making Homemade Popsicles + Recipes

Complete Guide to Making Homemade Popsicles + Recipes

How to Make Delicious and Easy Monkey Bread!

How to Make Delicious and Easy Monkey Bread!

How to Create the Perfect Cheese Platter

How to Create the Perfect Cheese Platter

A Colorful Backyard Carnival Party Theme

A Colorful Backyard Carnival Party Theme

Easy Homemade Caramel Sauce

Easy Homemade Caramel Sauce

Popular Posts

The Best Cookie Recipes

The Best Cookie Recipes

Cranberry Orange Cornbread Recipe

Cranberry Orange Cornbread Recipe

Super Moist Easy Pumpkin Bread Recipe

Super Moist Easy Pumpkin Bread Recipe

Frozen Gin and Tonic Recipe

Frozen Gin and Tonic Recipe

Valentine’s Day Charcuterie and Dessert Platter!

Valentine’s Day Charcuterie and Dessert Platter!

Guide to Hosting a Tropical Summer Party!

Guide to Hosting a Tropical Summer Party!

Footer

You Might Also Like

frozen strawberry cocktail

The Best 4th of July Cocktails

garlic dip recipe

Super Easy Garlic Dip Recipe

meatball appetizers

Amazing Easy Meatball Appetizer Recipe

honey simple syrup with lavender

How to Make Honey Syrup

mint julep recipe

Easy Mint Julep Recipe

Featured In:

Featured In Logos

Copyright © 2022 · Sugar and Charm · Privacy Policy · Accessibility Statement