
This post may contain affiliate links. Please see our disclosure policy.
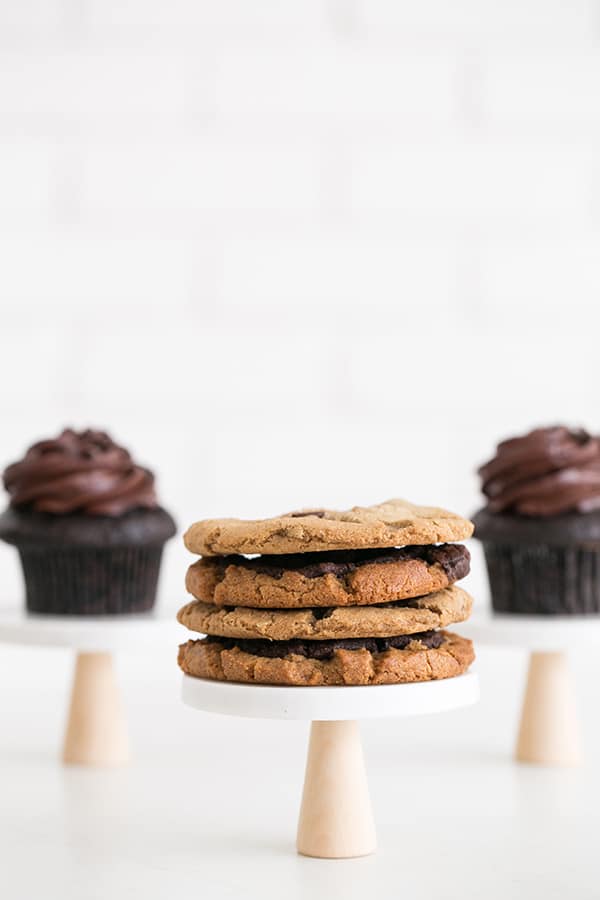
You know we love an easy and charming DIY around here!! So we created the easiest DIY mini cake stand using only 3 supplies!
Pin this now to find it later
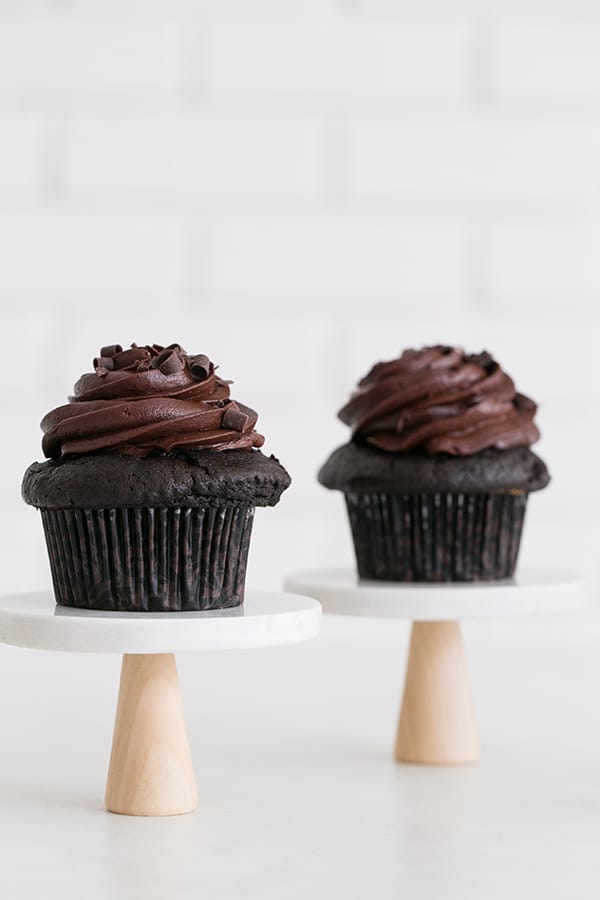
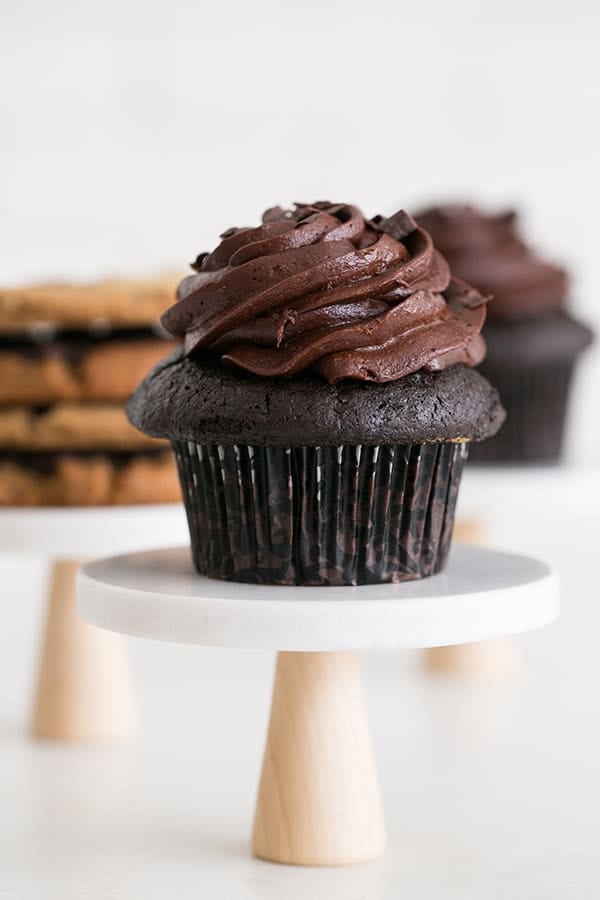
Pin ItThe best part is you only need 3 supplies to make these!! They’re great for serving dessert at individual place settings or filling a table with them!
Brief History of Cake Stand
The cake stand is a symbol of elegance and wealth. The use began in late Victorian times when afternoon tea became popularized among English people, who wanted to be classy enough for this new craze that had taken over their country.
They also needed something more durable than china dishes to enjoy flawless service from housekeepers without worrying about breakage or getting mixed up with other food items on dinner tables during courses.
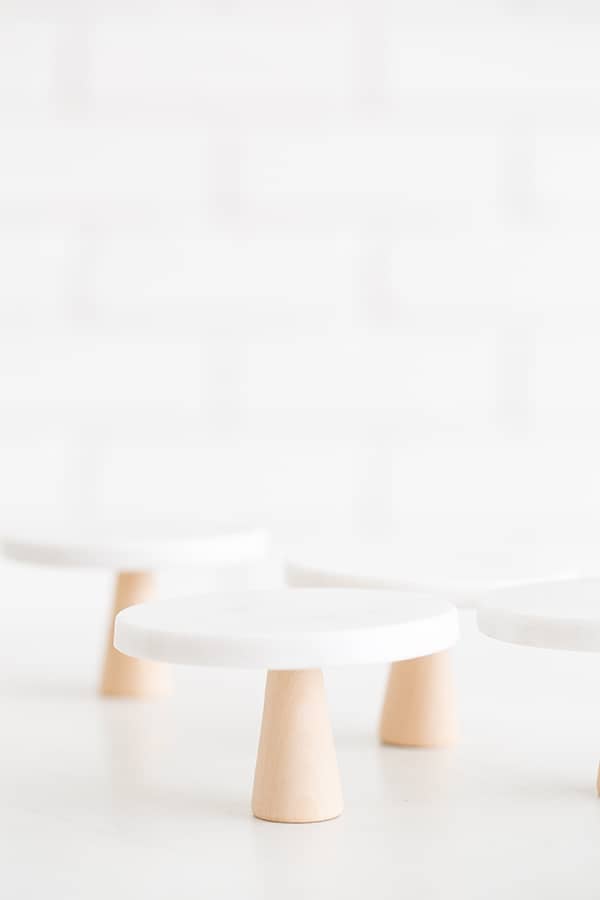
How to Make DIY Mini Marble Cake Stands
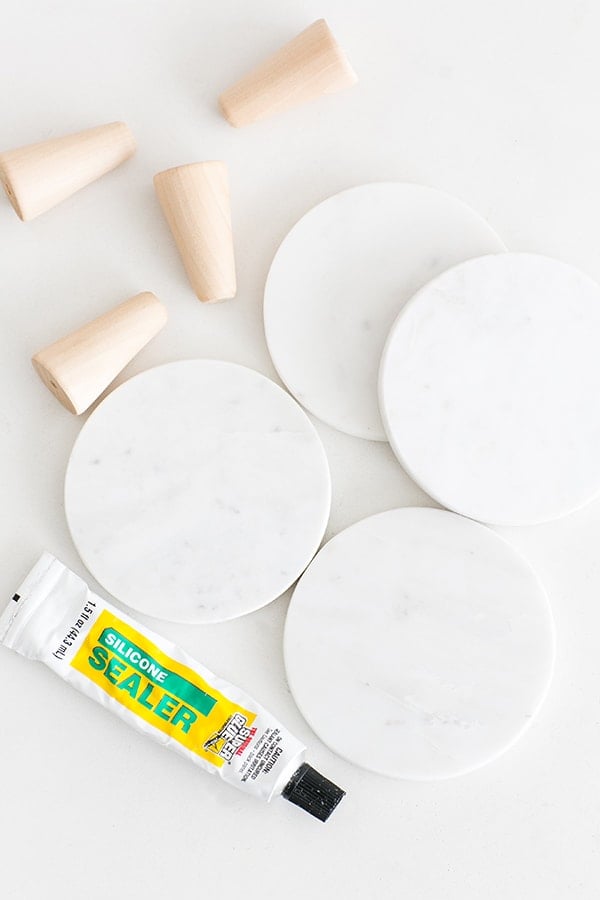
Supplies
- Marble Coasters – This hexagon coaster would be cool too.
Directions
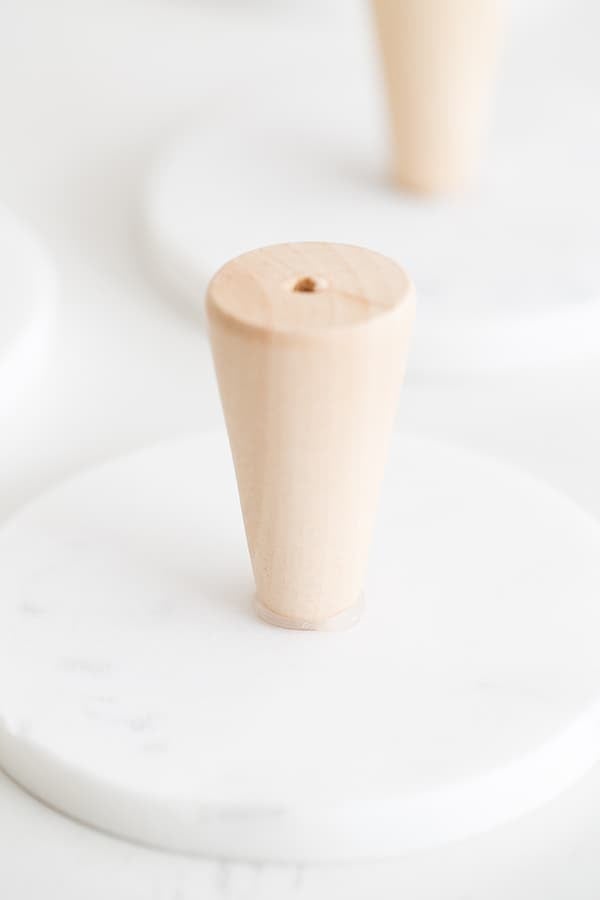
- Glue the wooden part to the center of the coster. You can use a ruler to measure each side to get it exactly in the middle.
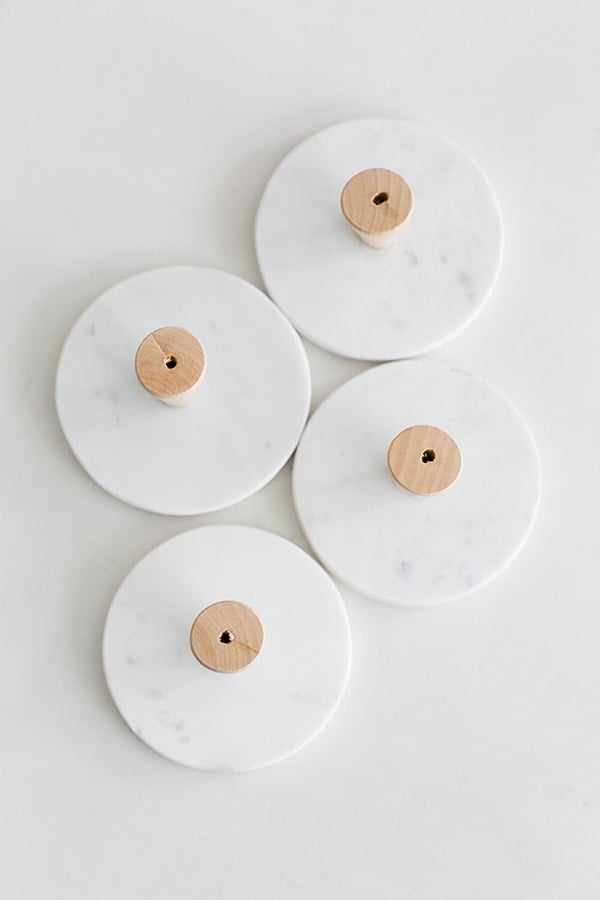
- Then let the glue dry for 24 hours face down, meaning the coster is resting on the table.
Your
I really love these for individual place settings for a baby shower, bridal shower, or birthday party.
Each guest can have a cupcake waiting for them when they sit down to eat. I mean, who doesn’t like dessert before dinner?!
You can even customize the cake stands by using alphabet coasters! These would make great party favors for guests.
These DIY Mini Marble Cake Stands are modern and charming. They also go with any theme, which is great too.
Also, if you like making cake stands check out more than 50 Gorgeous Do-It-Yourself Cake Stands!
Mini Cake Stand Guide
Type
There are two types of cake stands which are functional and display: Functional stand allows you to ice and decorate every inch of your masterpiece. They’re made from materials like acrylic or stainless steel to ensure durability for years in this world!
Meanwhile, display cake stands flaunt your cakes after you are done decorating them. They are made from food-grade acrylic, metal or wrought iron. Often times enhanced with tassels, beads and fun colors.
Size
To prevent any damage from occurring during transportation or storage, your mini cake must be at least as big as your tier and cake board. A little bit bigger will be fine, but never smaller!
Color
The cake stand should complement the design and color of your special day, remaining unobtrusive while it takes all attention. white goes well with every look; however, if you want something more matching on style, then go ahead and choose one in colors that match what’s underneath!
Frequently Asked Questions
The scalloped pie or tart pan is a fantastic option for those who love the idea of cake stands with frilly edges.
If you don’t already own one, pick up an inexpensive candlestick holder at your local dollar store to use as the base and paint it whatever color matches what’s on offer from this fabulous piece!
A cake is not complete without its beautiful presentation, and this can be achieved by using a stand. Some people prefer the more traditional way of displaying their cakes, while others may want something budget-friendly or tall enough for them to see over easily; your choice!
So what are you waiting for? Get started on your own set of DIY mini cake stands! They’re really easy to make and so versatile you’ll be using them all the time!
More Easy DIY Craft Projects
- DIY Fringe Napkins
You can also FOLLOW US on FACEBOOK, INSTAGRAM, and PINTEREST to see more delicious recipes, cocktails, desserts, and parties!

DIY Mini Marble Cake Stands
Ingredients
- 4 round marble coasters
- 4 wooden doll bodies
- 1.5 ounce silicone sealer
Instructions
- Glue the wooden part to the center of the coster. You can use a ruler to measure each side to get it exactly in the middle.
- Then let the glue dry for 24 hours face down, meaning the coster is resting on the table.
- You’re cake stands will be ready the next day!


one more question, how did you get the cork off the back of the coasters? Hopefully it’s an easy enough task since I have about 30 to make.
Hi Erin, the coasters I bought didn’t have cork on the back. However, I think you can glue on the cork if you had to!
I want to make these for a baby shower! Could you give some suggestions on the wood part? thank you
What beautiful marble cake stand! I love the way it is designed.
Coaster, not coster.
I absolutely love these mini marble cake stands. So perfect for any occasion…
Thank you so much!!