This post may contain affiliate links. Please see our disclosure policy.
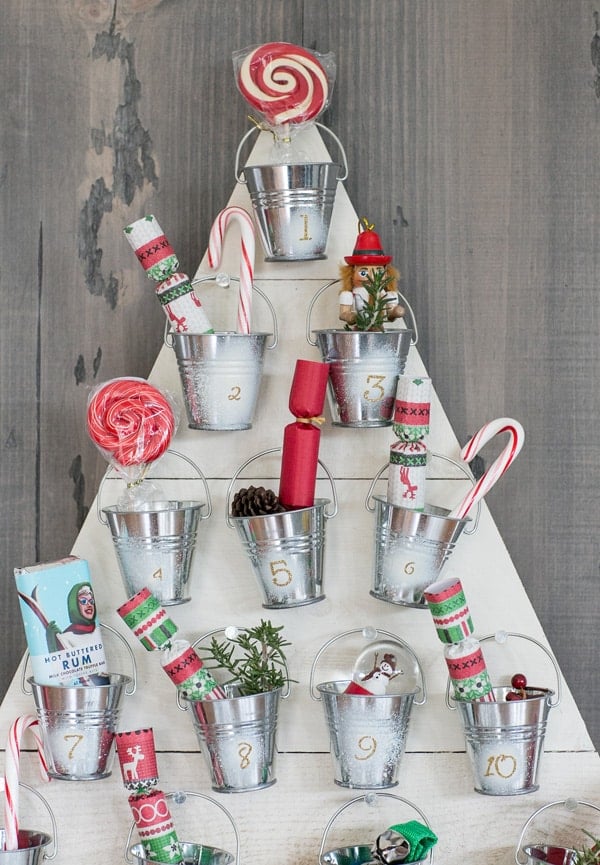
This DIY wooden advent calendar is an awesome festive project! Relatively easy to put together and reusable for Christmas year after year. Fill it full of treats for the family!
Also, check out our mini DIY wooden advent calendar houses! They are so charming and fun to make.
Pin this now to find it later
Pin ItI grew up with the $2 Advent calendars sold at the grocery store with the really cheap milk chocolate stashed inside… I know it sounds tragic. So I was determined to make something extra special for Romeo to enjoy every day until Christmas.
Since I don’t own a power saw I had a friend’s wood workin’ hubby make the wooden triangle for me. And with his help, I was able to make my dream wood Advent calendar come to life!
I bought adorable 2″ galvanized buckets to nail into the wooden tree. Since I had help with the wooden triangle, the rest was pretty easy!
Below is a little recap of how to make this adorable DIY wooden Advent calendar. The countdown is almost on – only 10 days until December!
How To Make This DIY Wood Advent Calendar
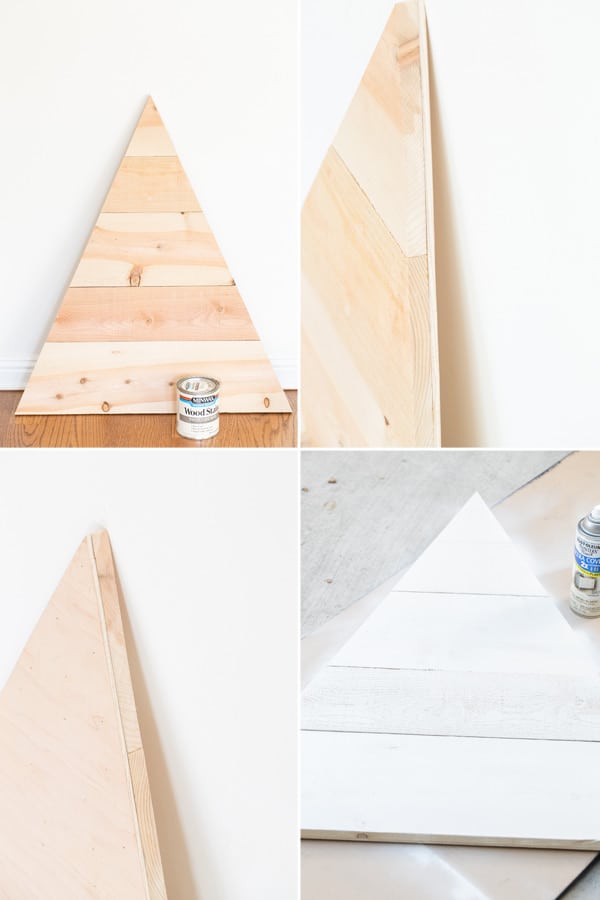
Once you have your triangle board, stain it the color you want.
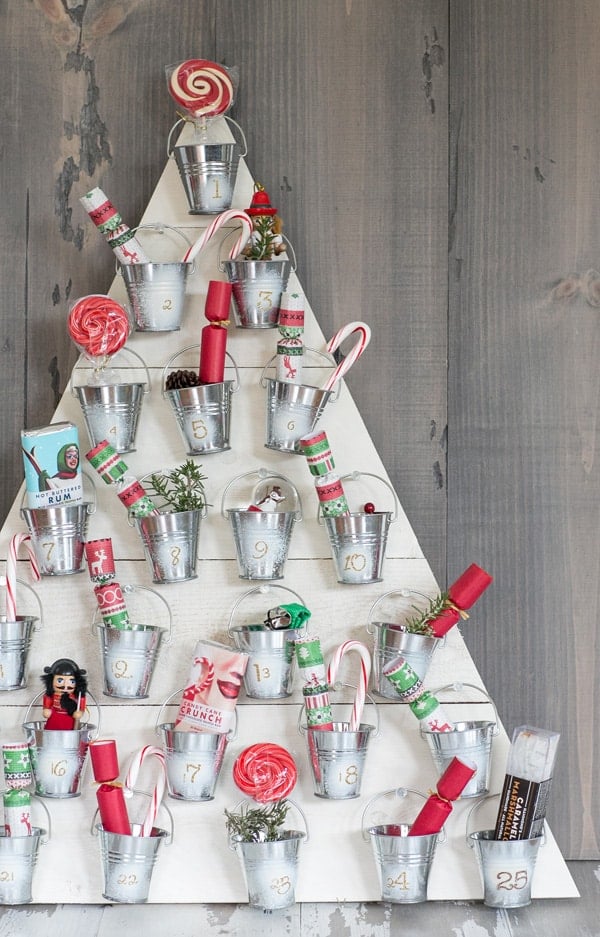
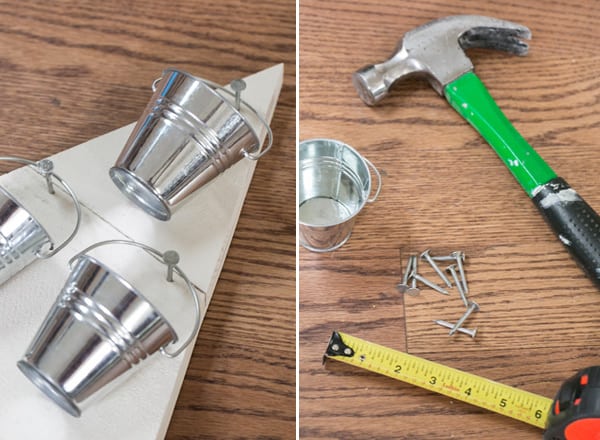
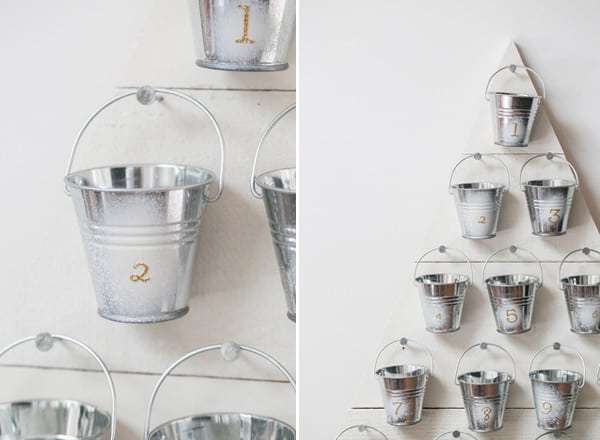
Arrange all of the buckets on the board before you start to nail. You’ll have seven rows of buckets (two of the rows have 4 buckets)
Mark each spot with a pencil to remember the placement. Make sure you leave room for the buckets to hang. They hang a little bit lower when the board is vertical.
Hammer the nails in place.
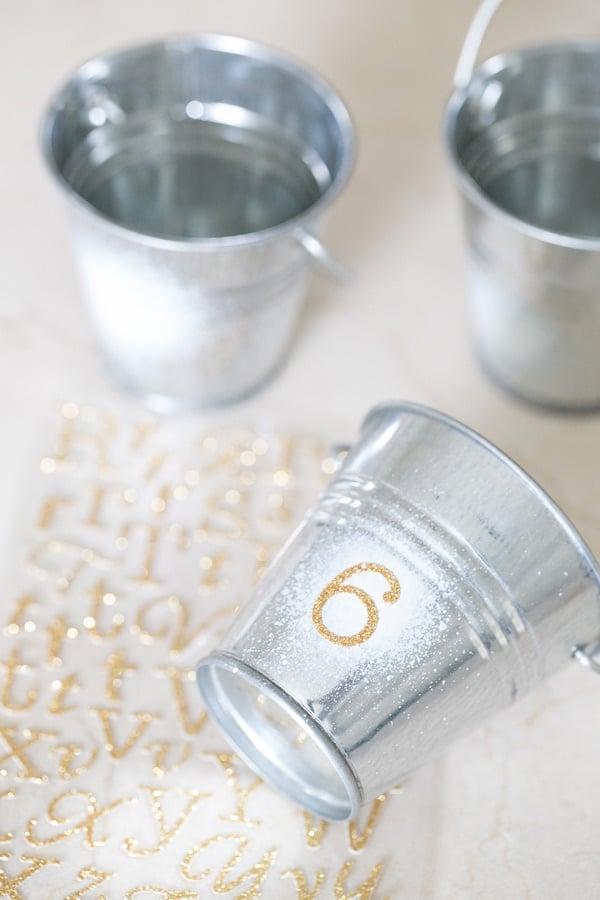
Mist the buckets with a dash of white spray paint to look like a snowball hit it.
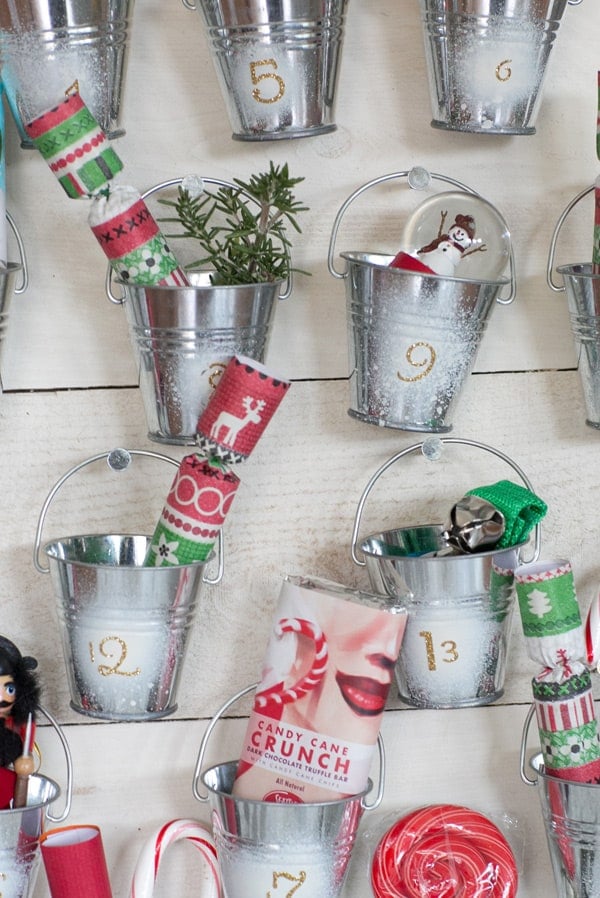
Stick the numbers (1-25) on each bucket, then hang them on the nails and stuff them with special treats! Yay for the holidays!!
A Classic Wood Advent Calendar
I wanted it to be a classic Advent calendar with big enough bins to put fun nicknacks in, easy to store and something I could pull out every year.
I had him make me a wooden tree-shaped triangle then I used a white wood stain and some white spray paint to give it a rustic, snowy look.
Gifts in your Wood Advent Calendar
I stuffed each bucket with little treats like Christmas poppers, a mini snow globe, tiny Nutcrackers, candy cane lollipops and some other cute toys.
I’m also going to print out fun advent calendar ideas for the month of December to add to each bucket.
Personalized Messages
Personalized notes are great fun! This could be a verse from a Christmas-themed poem, a passage from the Bible, or a seasonal quote. Think of a thoughtful and uplifting message that could be the highlight of your loved one’s morning.
You could even write down a silly cracker-style joke or an inspiring quotation to be enjoyed at the start of the day or at the end of a stressful one.
You can look online for some kid-friendly Christmas-themed jokes or quotations for the kids. Not every day has to have a physical gift. You could even find a quote for every day!
Tips For This Wood Advent Calendar
If you are not handy with a saw, then you can get the wood cut easily at a local carpenter’s.
Stain the wood however you want – get creative!
Personalize your advent gifts by adding thoughtful notes or inspirational quotes.
Make sure, when placing points for your nails, you ;leave room for the buckets to hang.
If you make this DIY Wood Advent Calendar, then please rate it and let us know how it turned out in the comments below!
You can also FOLLOW ME on FACEBOOK, INSTAGRAM, and PINTEREST to see more delicious recipes, cocktails, desserts and party ideas!

Ingredients
- You need a wooden triangle. Triangle sides are: 34-3/4″
- The bottom of the triangle is: 28″ It’s 1-7/8″ thick, but you can make it as thick as you want.
- 25 galvanized buckets 2" each, I bought these ones
- 1-1/4 ” Grip Rite galvanized roofing nails, 25 of them. I bought a small box of these.
- Wood stain: I did a white wood stain first, then did a light layer of white spray paint on top. You can stain it any color you want!
- Number stickers to place on the buckets., I found some I liked at Michaels Arts and Crafts. Just look in the scrapbook section of your craft store. Just remember you need a lot of 1's11, 12, 13, 14, 15, 16… so get enough for each bucket. I had to make a second trip ; )
Instructions
- Once you have your triangle board, stain it the color you want.
- Arrange all of the buckets on the board before you start to nail. You’ll have seven rows of buckets (two of the rows have 4 buckets)
- Mark each spot with a pencil to remember the placement. Make sure you leave room for the buckets to hang. They hang a little bit lower when the board is vertical.
- Hammer the nails in place.
- Mist the buckets with a dash of white spray paint to look like a snowball hit it : )
- Stick the numbers (1-25) on each bucket, then hang them on the nails and stuff them with special treats! Yay for the holidays!!






Wow – so much detail here. I love the little buckets you use. Its a lovely touch.
We have just started our blog and we are doing a Christmas countdown until the BIG day. I just hope that some of our posts are 1% as good as yours.
Love SmileyCulture 😀
http://www.smileyculture.com/diy-advent-calendar/
I love the versatility of this Advent calendar, and I especially like how the white background and silver buckets allow the colors of the contents to pop. So cute!
I seriously have to make this!!! it is so cute…i just showed the hubby and it needs to happen. is it just leaning on the wall or did you hang it?
thanks for the amazing idea!
Favorite advent calendar we’ve seen thus far! What a clever and sweet idea!
I LOVE this!! I am totally showing this to Erik and asking him to make Olive one. I’ve been trying to figure out what kind of advent calendar to make — this is perfect. 😉