
This post may contain affiliate links. Please see our disclosure policy.
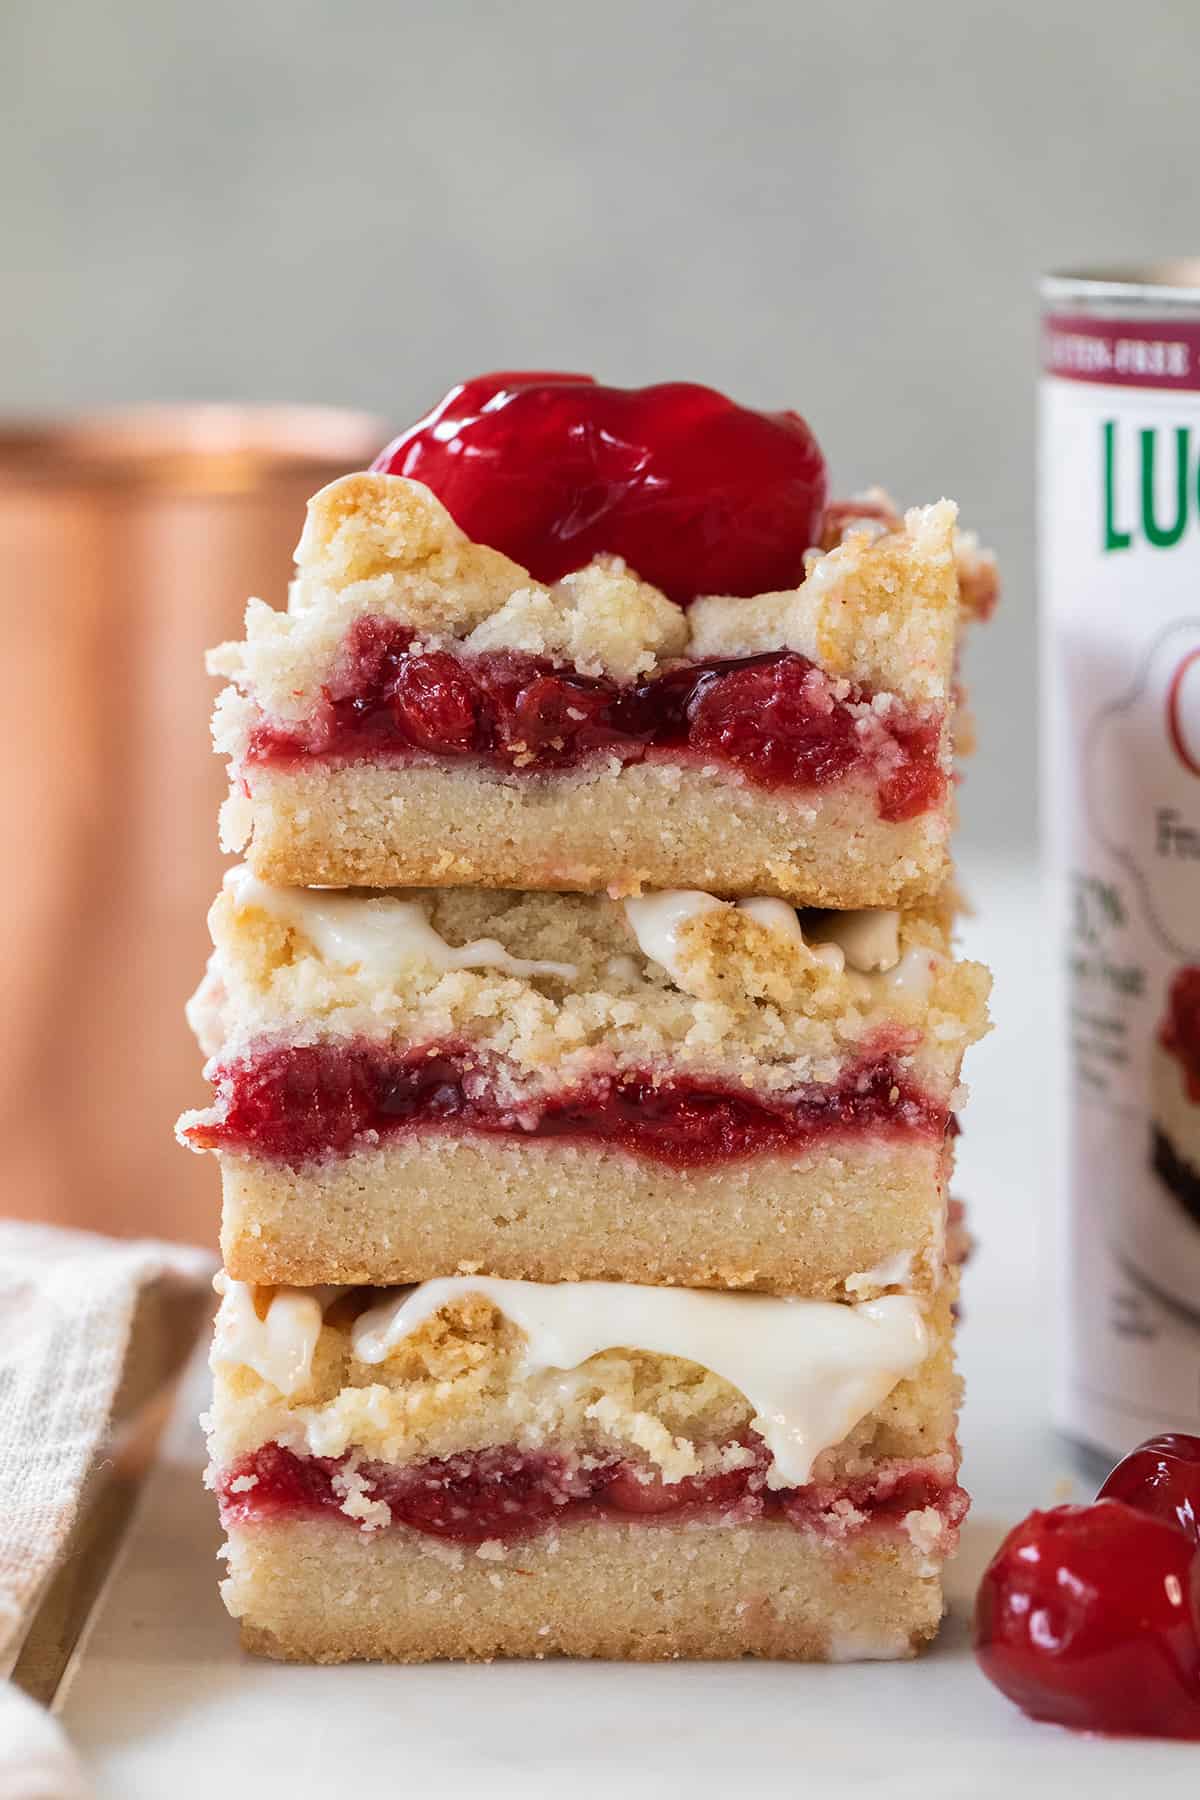
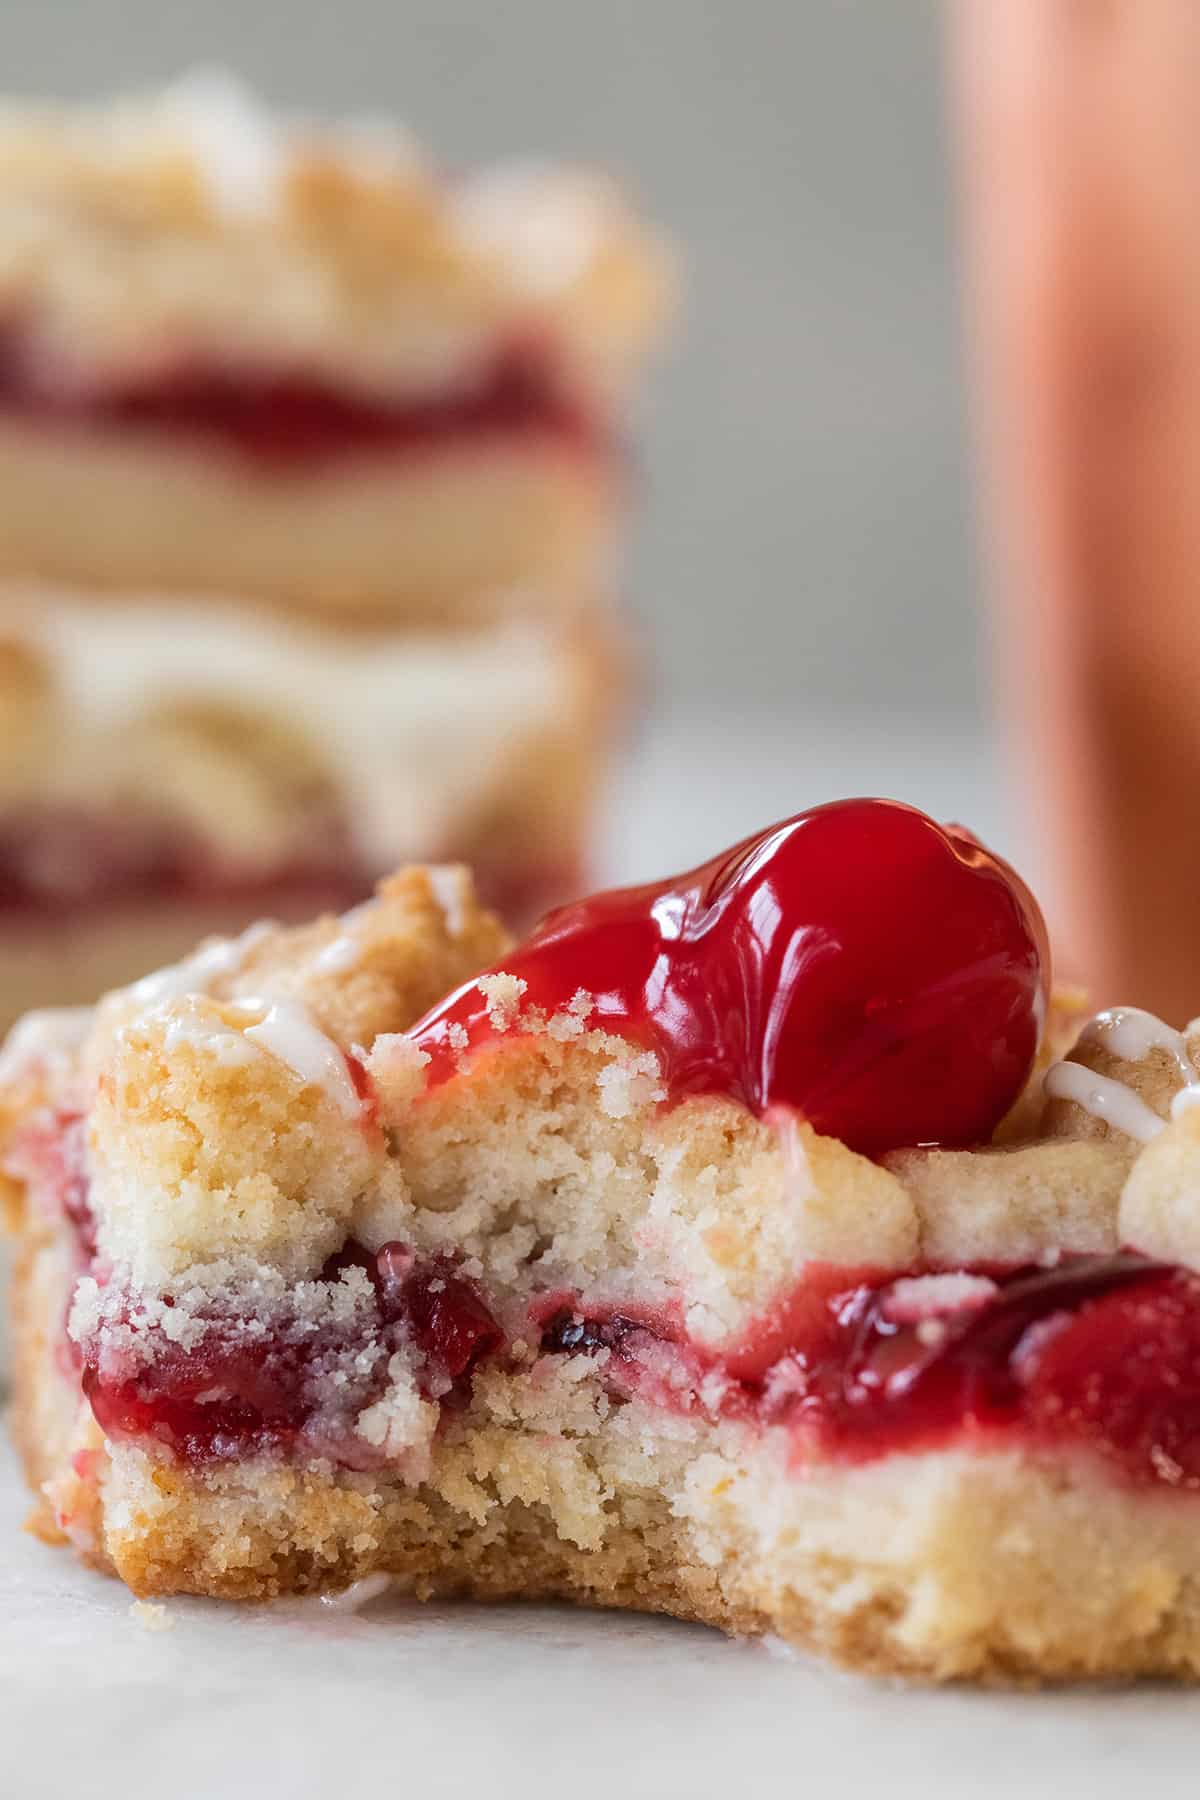
These cherry pie bars are made with a buttery shortbread crust, sweet cherry filling, and a creamy glaze on top. They’re easy to make, full of flavor, and perfect for any occasion – everything you love about cherry pie in a simple bar form!
If you’re looking for more cherry desserts try my cherry crisp, best ever cherry pie and my chocolate cherry cookies!
Pin this now to find it later
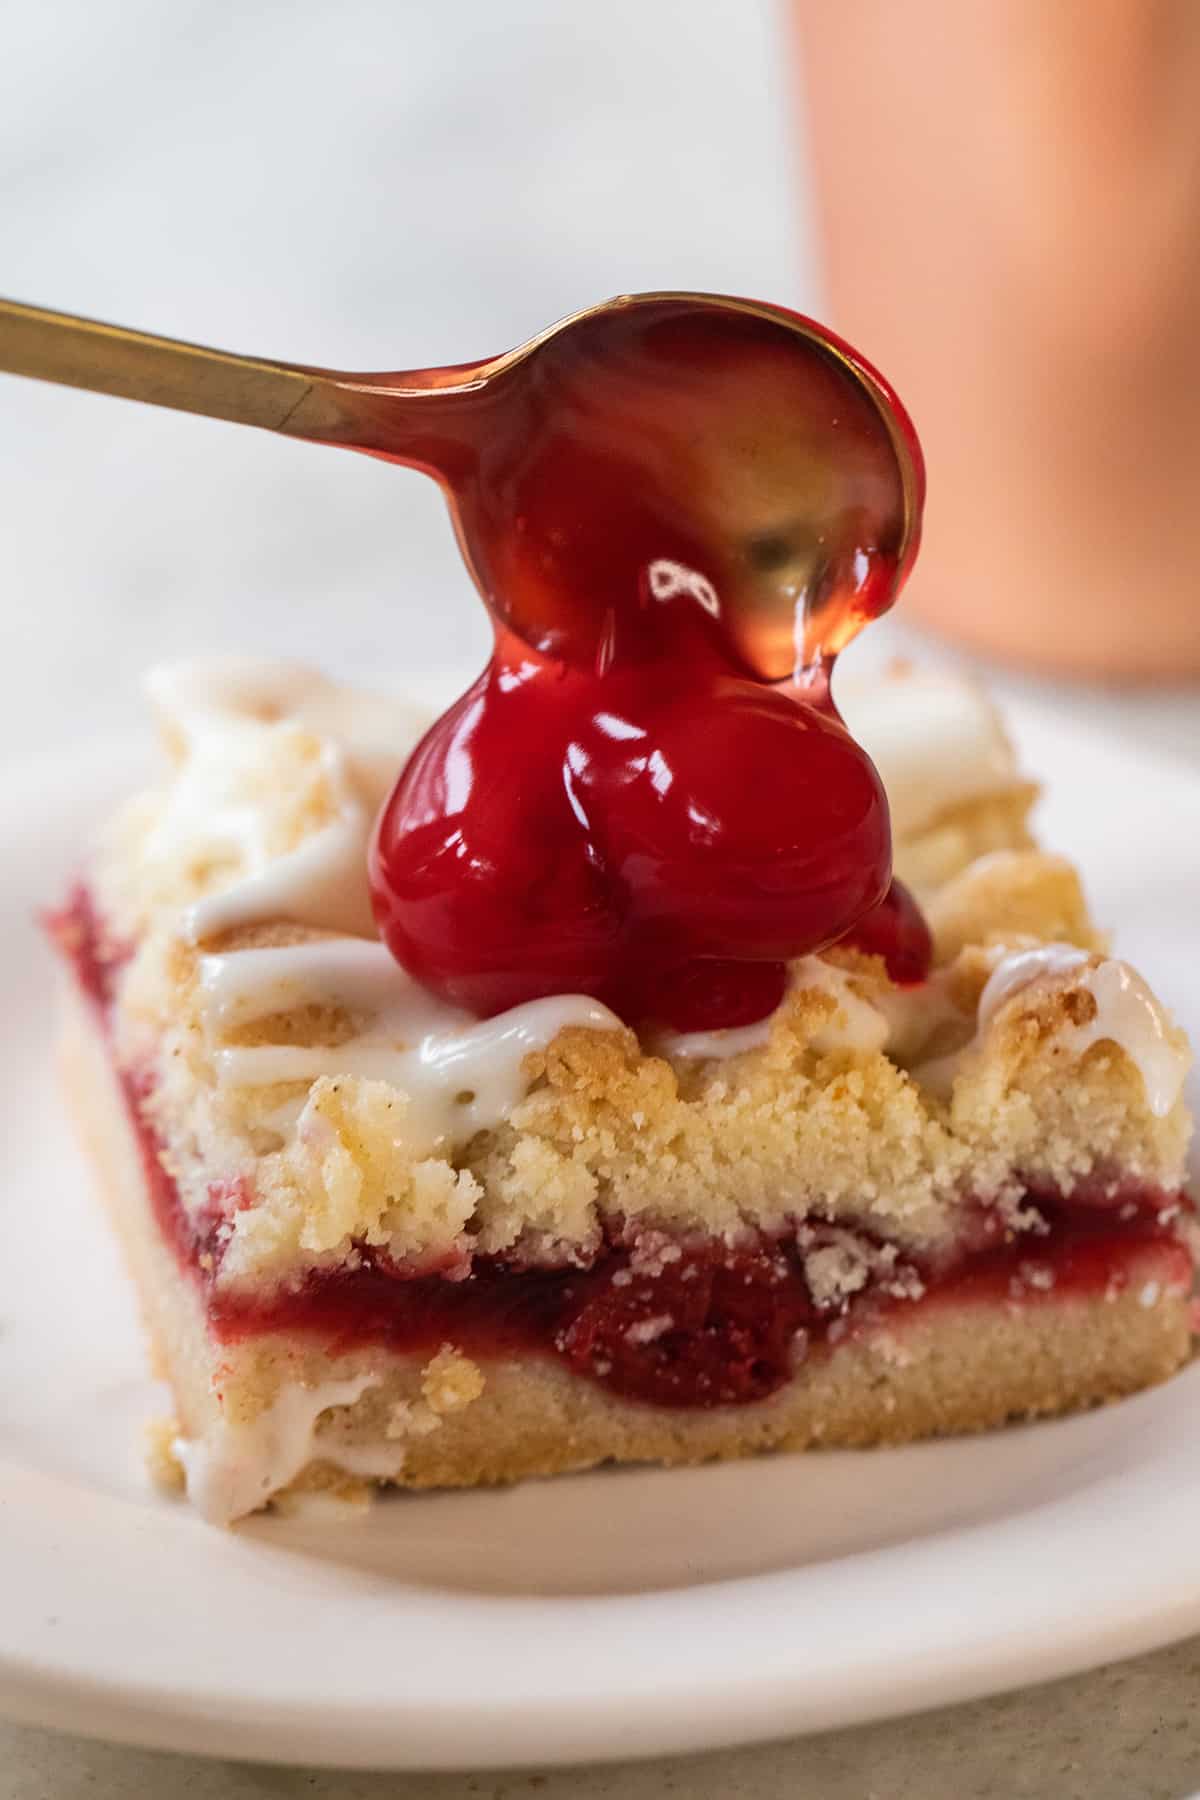
Pin ItThese cherry pie bars are soft, buttery, and easy to make with canned cherry filling. The shortbread crust has hints of orange and cloves that pair perfectly with the cherries. I use Lucky Leaf’s gluten-free fruit filling made with real fruit and no high fructose corn syrup.
I love making bars because they’re so much easier than pie – no rolling, or shaping dough. My shortbread crust, which I also use for my popular shortbread bars and lemon bars (both reader favorites), works beautifully here as both the base and the crumble topping.
It’s one simple dough that delivers all the flavor and texture of a traditional pie, but with half the effort. If you love cherry pie but want a quicker, fuss-free version, these bars are the perfect solution.
Why You’ll Love These Cherry Pie Bars
- Made with cherry fruit filling – no pitting or chopping needed!
- Easier to make than a traditional pie, but just as delicious.
- Buttery shortbread crust with hints of orange and clove for extra flavor.
- Naturally egg-free, perfect for those with allergies or dietary preferences.
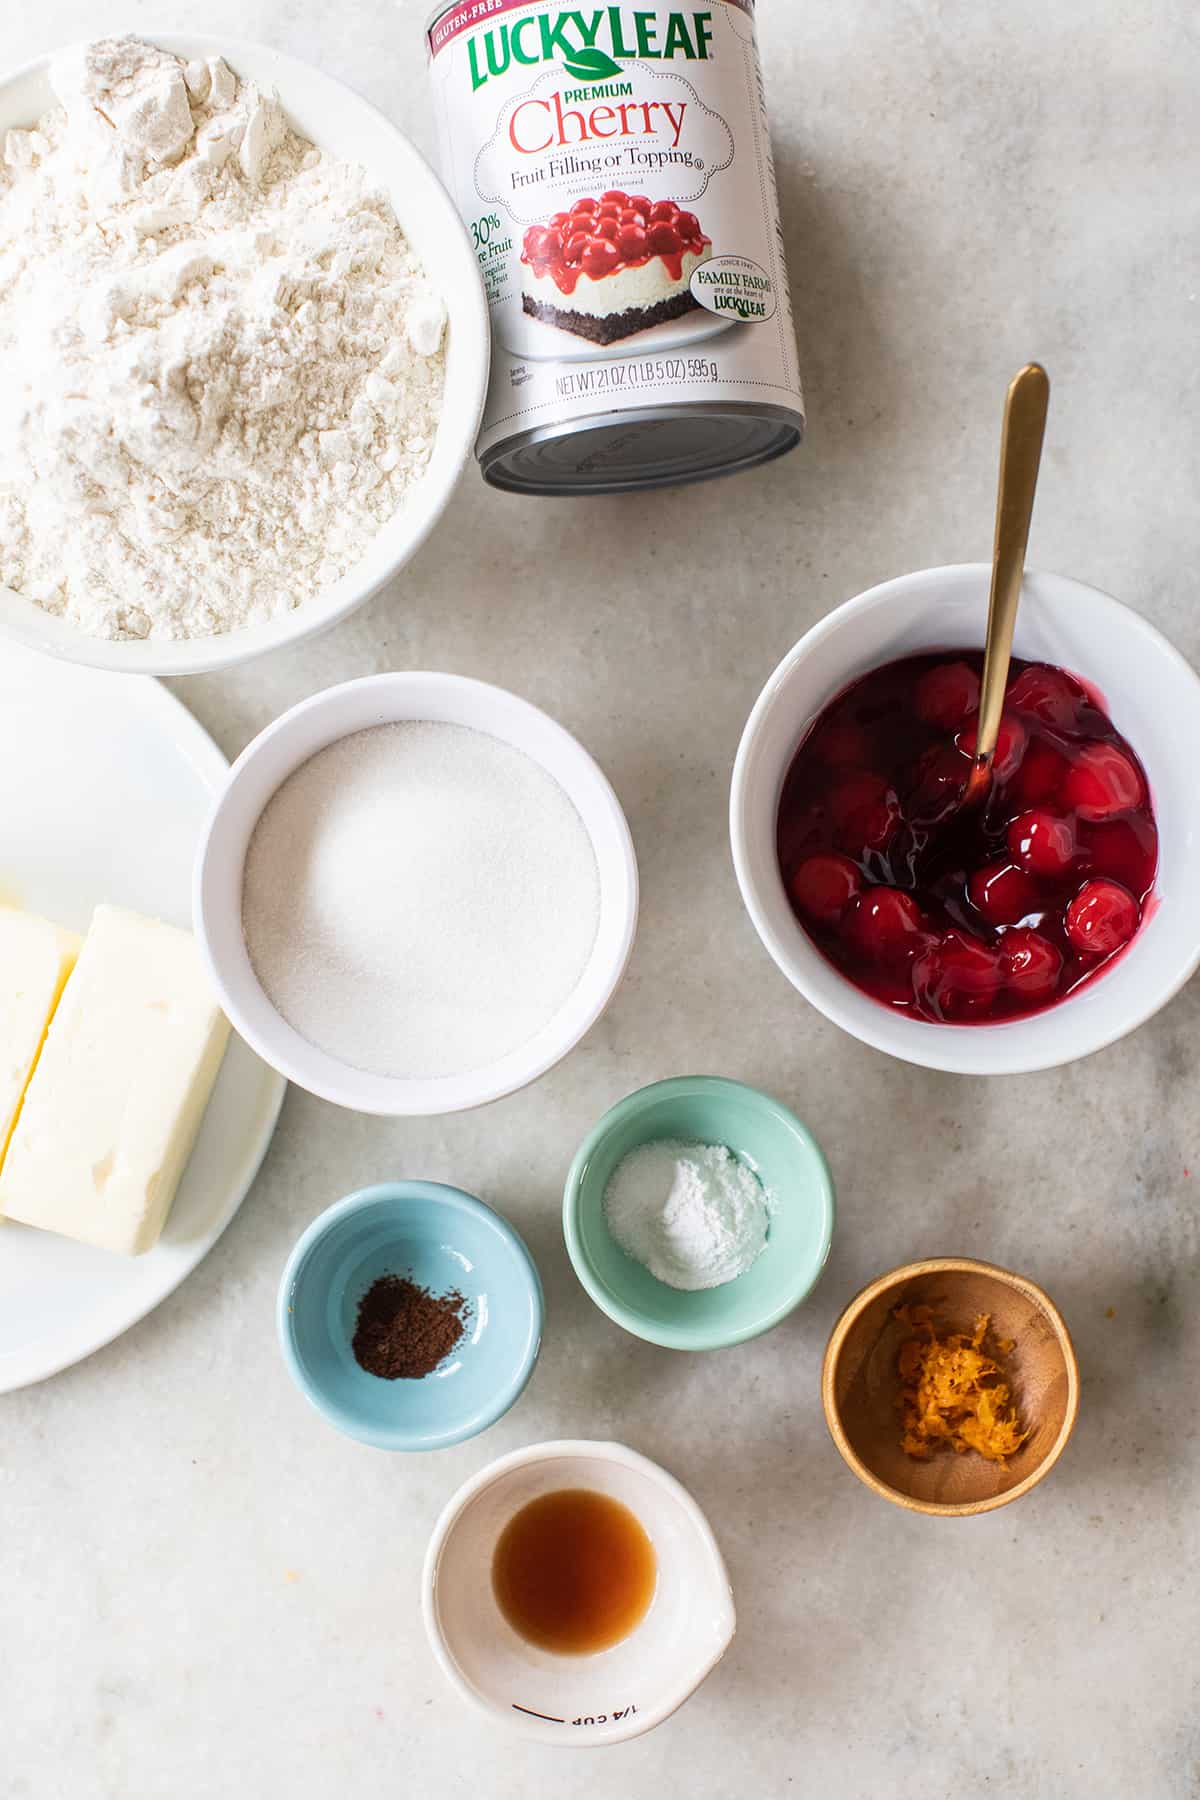
Cherry Pie Bar Ingredients
Cherry Fruit Filling: Sweet and tart cherry pie filling that creates the perfect fruity layer. You can substitute with homemade cherry filling or another fruit filling like blueberry or apple if desired.
Butter: Adds richness and moisture to the bars. Use unsalted butter for better control over salt levels, or swap with plant-based butter for a dairy-free option.
Granulated Sugar: Sweetens the crust and balances the tart cherries. You can substitute with coconut sugar for a less refined option.
Orange Zest: Brightens the flavor and pairs beautifully with cherries. Lemon zest is a great substitute if needed.
Vanilla Extract: Adds warmth and enhances the overall flavor. Almond extract can also work well with cherry desserts.
Cloves: A hint of spice that deepens the flavor. You can use cinnamon or omit if you prefer a more classic taste.
Baking Powder + Salt: Helps the crust rise slightly and enhances flavor. Don’t skip these – they’re essential for texture and balance.
Flour: The base of the crust and topping. All-purpose flour works best, but you can use a 1:1 gluten-free flour blend if needed.
For the Glaze:
Powdered Sugar: Creates a smooth, sweet glaze. You can sift it for an extra smooth finish.
Butter: Adds richness and helps the glaze set. Can be swapped with dairy-free butter if needed.
Cream Cheese: Makes the glaze creamy and tangy, adding depth. For a lighter option, use Greek yogurt or a dairy-free cream cheese.
Vanilla: Adds warmth and flavor to the glaze. A touch of almond extract would also pair nicely.
Orange Zest: Gives the glaze a fresh, citrusy kick that complements the cherries. Lemon zest works too if you prefer.


How to Make Cherry Pie Bars
Here’s an easier-to-read version of the instructions for How to Make Cherry Pie Bars:
- In an electric mixer, beat the butter and sugar until creamy.
- Mix in the vanilla extract.
- Add flour, salt, and baking powder. Blend on low until fully combined.
- Butter the bottom of a 13×9 baking dish.
- Divide the dough in half: Press one half evenly into the dish. Place the other half in the fridge to chill.
- Bake the bottom crust for 10 minutes, then remove from the oven.
- Spread 21 ounces of cherry fruit filling over the crust.
- Crumble the chilled dough evenly over the top.
- Bake for 25 more minutes, or until the top is lightly golden.
- Whip up the glaze and drizzle it over the top.
You can use fresh cherries instead of frozen, but it will take more time. You’ll need to pit them and cook them down with sugar and a thickener like cornstarch to create a filling. I like to use organic cherry pie filling for these bars – it’s quick, easy, and delicious. For this recipe, I recommend using canned or jarred filling for the best results with less effort.
Cherry pie bars should be refrigerated. Once they’ve cooled, store them in an airtight container in the fridge for up to 4-5 days. This helps keep the filling fresh and the bars firm. You can also bring them to room temperature before serving if you prefer!
How to Store Cherry Pie Bars
These bars are perfect for making ahead and store really well:
- Room Temperature: Keep in an airtight container for up to 4-5 days.
- Refrigerator: Store in the fridge for up to 7 days to keep them extra fresh.
- Freezer: Freeze cut bars between layers of parchment paper in a sealed container for up to 3 months. Thaw at room temperature before serving.

More Recipes You’ll Love
Rosemary Shortbread Cookies with Brown Sugar
Chocolate Chip Cookie Pie with Shortbread Crust
Let me know if you make these cherry pie bars by leaving a comment and review below!
FOLLOW ME on FACEBOOK, INSTAGRAM, and PINTEREST to see more delicious recipes, cocktails, desserts, and parties!
My new Entertaining book is here! Order Now!

Easy Cherry Pie Bars
Ingredients
Cherry Pie Bars
- 21 ounces Cherry Fruit Filling , Extra can top the cherry bars.
- 1 1/2 cups unsalted butter
- 1 cup granulated sugar
- 1/2 tsp vanilla extract
- 1 tsp orange zest
- 1/8 tsp cloves
- 3 cups all-purpose flour
- 1 tsp baking powder
- 1/4 tsp salt
Cream Cheese Glaze
- 1 cup confectioners sugar
- 4 ounces cream cheese, super soft, room temp.
- 2 tbsp milk
- 1/2 tsp orange zest
- 1/8 tsp ground cloves
Instructions
- Preheat the oven to 350 degrees.
- In electric mixer, beat butter and sugar until combined.
- Add in the vanilla extract and orange zest.
- Add in the flour, salt, and baking powder and blend on low until incorporated.
- Prepare a 13×9 baking dish by buttering the bottom.
- Divide the dough in half and place one half in the refrigerator and evenly press the other half into the bottom of the baking dish
- Bake the dough for 10 minutes, then remove
- Spread 21 ounces of cherry fruit filling over the top and then crumble the other half of the dough over the preserves
- Bake for another 25 minutes. Note, that baking times vary. If you need an extra 5 minutes then that’s okay! You need to be able to check and tell when your bars are finished.
- The top of the bars will have a slight, golden brown color and that’s when you know they’re done.
- To make the glaze, whip all of the ingredients together in an electric mixer until smooth.
- Drizzle the glaze over the cherry bars.
- Add a few more cherries, from the filling, over the bars to add a festive and delicious topping.
Notes
- Always use room temperature ingredients for a smooth, even mix.
- Chill half the dough to make crumbling on top easier.
- Line your baking dish with parchment paper for easy removal.
- Let bars cool completely before adding the glaze.
Nutrition
Nutrition information is automatically calculated, so should only be used as an approximation.


YOU FORGOT TO PUT IN THE OVEN AT WHAT TEMP?
Fixed and thanks for letting us know! 350 degrees 🙂
These bars seem to be the most perfect sweet treat that I have ever seen! Thank you for sharing this recipe!
I don’t know what I like more, the cherry filling or the shortbread crust! WOW!
Thank you so much for sharing this amazing cherry pie bars recipe! Will surely have this again! It’s really easy to make and it tasted so delicious! Highly recommended!