
This post may contain affiliate links. Please see our disclosure policy.
Create a decoupage photo craft pumpkin that you can decorate with every year! Be sure to check out more of our Halloween ideas below!

Pin this now to find it later
Pin ItSince Romeo can’t decorate his own pumpkin this year I thought I would do it for him! I created a decoupage photo pumpkin with some of my favorite pictures of him… I know it seems a little obsessive, but how cool is it?!
Also, I used a faux pumpkin so I can have it for years to come. This perfect decoupage photo pumpkin can be a Halloween decoration for his room!
How To Decorate Craft Pumpkins – Step By Step
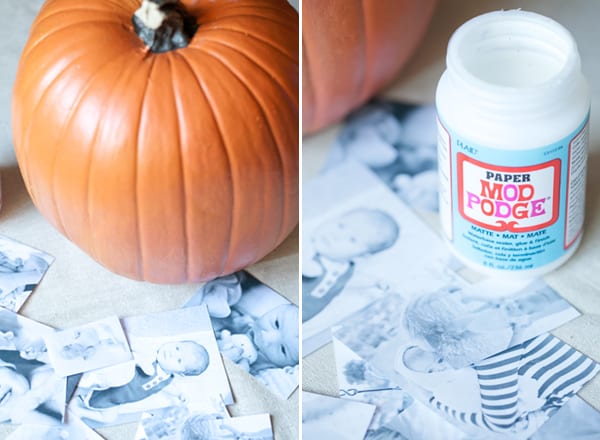
1. Gather your materials: A faux pumpkin, black and white photos, Mod Pog and a paintbrush.
2. Print about 50 of your favorite photos in black and white on regular paper. All different sizes and cut them out.
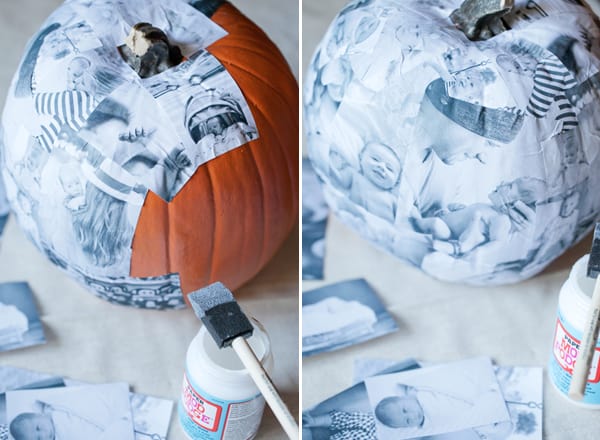
3. Paint a thin layer of Mod Pog on the back of a photo then place on the top of the pumpkin. I started from top to bottom, no order, just went with an organic pattern.
4. Continue adding pictures on, layering from top to bottom until the entire pumpkin is covered. Embrace the crinkles… It’s decoupage so it’s supposed to have them and it gives it a cool rustic look!
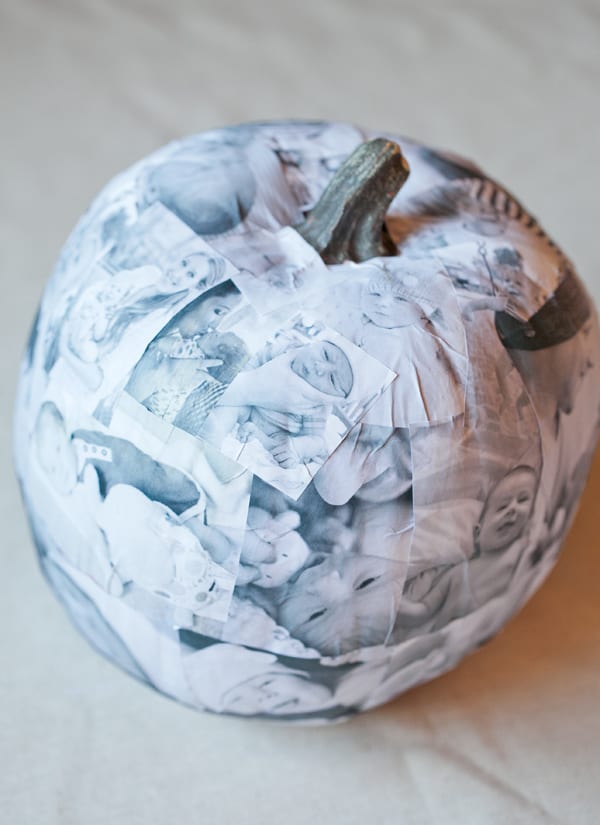
5. Let it dry for an hour then paint a layer of Mod Pog over the entire pumpkin. 6. Let that dry for 2 hours and paint another layer. Continue to paint layers until you get the texture you like on the outside. I did 4 layers of Mod Pog. Enjoy!
Craft Pumpkins
You can use a fresh pumpkin, but if you want to reuse it then go for a craft or faux pumpkin.
The craft pumpkins look like an idealized pumpkin. They are a little thin for carving but will work perfectly for this project. Funkins are molded from real pumpkins and so they retain the imperfections of the original. The foam is thicker and the paint job they get is a little more realistic.
A Fun Project For the Whole Family!
This craft pumpkin project is perfect for the whole family. It’s so fun to work on a craft project together, you can lay out all your photos and reminisce, then pop them on the pumpkin. Creative and nostalgic!
Applying Mod Podge
For your Mod Podge glue, you can either use a flat paintbrush or a foam brush when applying it to you craft pumpkin. If you are going to use a paintbrush, look for something that has firm, but smooth, bristles, such as taklon. Avoid boar-bristle brushes, as they are too stiff and will leave streaks. Camelhair brushes are too soft to be used with Mod Podge.
Tips For Decorating Craft Pumpkins
- Print around 50 photos
- Have different sized photos, for variety and to make the collage look really interesting.
- Embrace the crinkles in the photos – it gives a great rustic look.
- Keep adding layers, year on year!
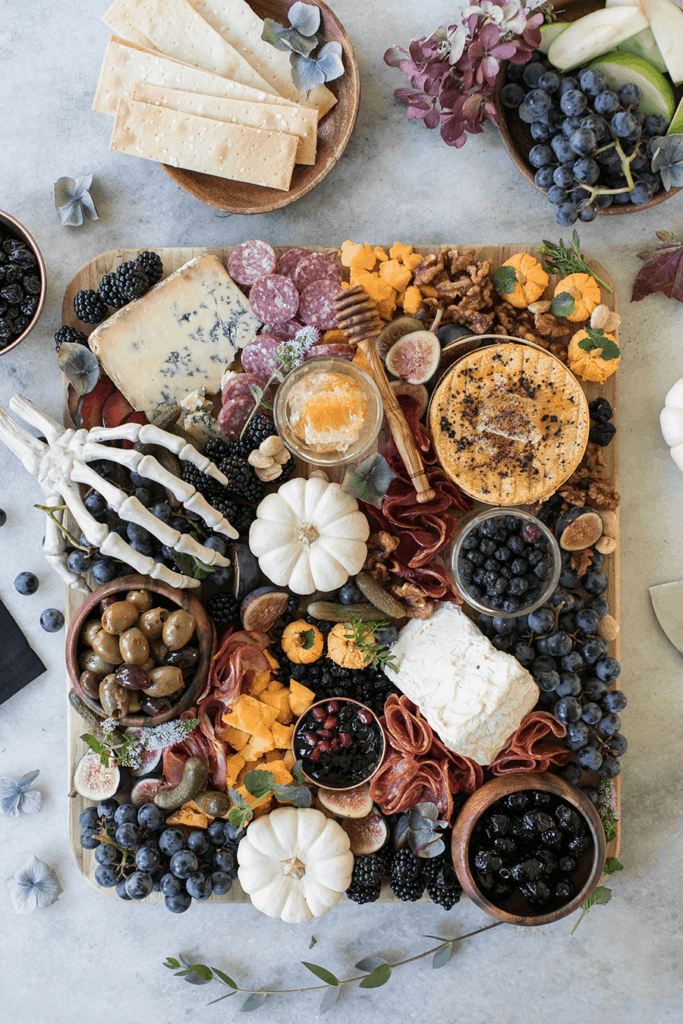
More Halloween DIY Projects
29 Spooktacular Halloween Centerpieces by diys.com
Quick & Easy Halloween Crafts For Kids by Happiness is Homemade
If you have tried this Craft Pumpkin project or any other project on Sugar and Charm, then please rate it and let me know how it turned out in the comments below!
You can also FOLLOW ME on FACEBOOK, INSTAGRAM, and PINTEREST to see more delicious recipes, cocktails, desserts and party ideas!

Photo Decoupage Pumpkin
Ingredients
- A faux pumpkin
- black and white photos
- Water based glue like – Mod Podge
- a paintbrush.
Instructions
- Print about 50 of your favorite photos in black and white on regular paper. All different sizes and cut them out.
- Paint a thin layer of Mod Pog on the back of a photo then place on the top of the pumpkin. I started from top to bottom, no order, just went with an organic pattern.
- Continue adding pictures on, layering from top to bottom until the entire pumpkin is covered. Embrace the crinkles… It’s decoupage so it’s supposed to have them and it gives it a cool rustic look!
- Let it dry for an hour then paint a layer of Mod Pog over the entire pumpkin. Let that dry for 2 hours and paint another layer. Continue to paint layers until you get the texture you like on the outside. I did 4 layers of Mod Pog. Enjoy!


Thanks for finally writing about >Decoupage Photo Pumpkin – Sugar and Charm – sweet recipes – entertaining
tips – lifestyle inspiration <Loved it!
What a beautiful way to add a personal touch to fall decor while keeping it chic! This is such a cute idea! It would be fun to do pictures of the whole family too, including pets! I’ve linked your project on my blog as part of a craft pumpkin decorating idea roundup here: http://www.ashleypicanco.com/5-fall-decor-projects-using-craft-pumpkins/ with a link back to your site of course!
Thanks for sharing!
I loved this idea when I saw it on Pinterest. My daughter has her first birthday in mid-November and we have a pumpkin theme going for the party. I thought this idea would be perfect to commemorate her first year and will go so well with the party theme. It turned out absolutely adorable! I hope to make a new one for her every year with all of my favorite pictures. We’ll have a collection of them in just a few short years. Thanks for a wonderful, creative idea!
love this ….would like to do it for christmas for my children….too late for this halloween but i might just go ahead and do it for thanksgiving. but on christmas…what should i do it on? any ideas/
Just wanted to share that I included your fun idea in my latest article for Parade Magazine!
http://www.parade.com/218216/kimbyers/10-unique-and-creative-no-carve-pumpkins-all-the-fun-and-none-of-the-mess/
This is absolutely adorable! I covered a faux pumpkin last year with fabric & modge podge, then after Halloween, bought another faux pumpkin on clearance (those suckers are pricy!) so I have one all ready to go this year to do this project with! Except I think I will print out all my photos in sepia to make it more of a fall color & my living room colors are more browns. 🙂 Thanks for the inspiration!! Jill @ Mama Ging
Oh how I love this! And love that I’m not the only one obsessed with picutures of the bambino! 🙂 Adorable!
This is such a great idea and fun way to display photos during the holidays!
What a great idea!! I want to have the same pumpkin in my house all year-round!
Haha!! You could leave it up! Or store it away and then the following year it will bring you so many memories 🙂
Super adorable idea, Eden! Very unique and we’ll have to try that before Halloween 😉
Thank you so much!! Yes, do it and you’ll have a memorable, decorated pumpkin forever! 🙂