
This post may contain affiliate links. Please see our disclosure policy.
You’re going to love these DIY coconut bowls! If there’s one thing we get satisfaction from, it’s being resourceful and using an item in its entirety!
Pin this now to find it later
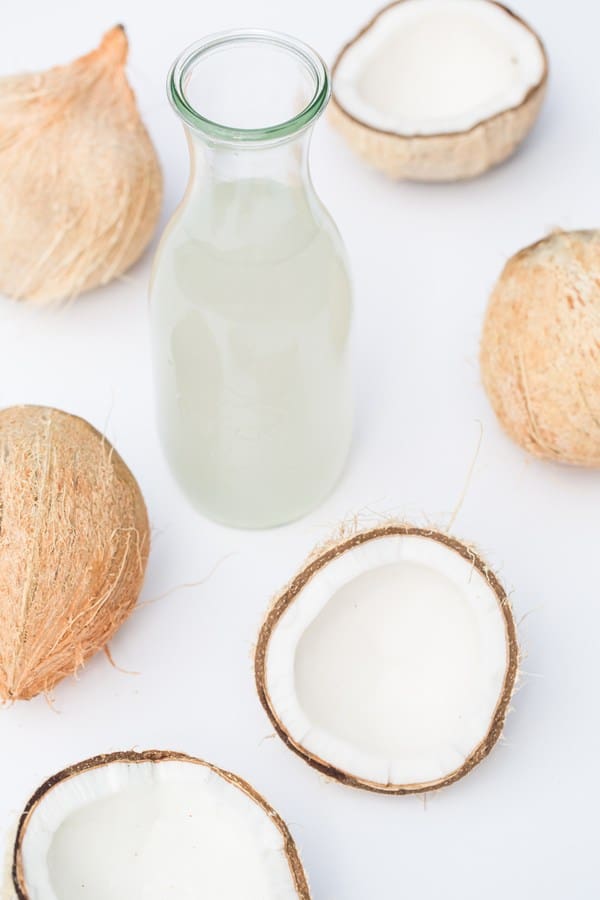
Pin ItWe purchased these coconuts for $1.50 each and got three uses from them… fresh coconut water (which we drank while finishing the bowls!), coconut meat and the coolest coconut bowls!!
How To Make Coconut Bowls – Step By Step
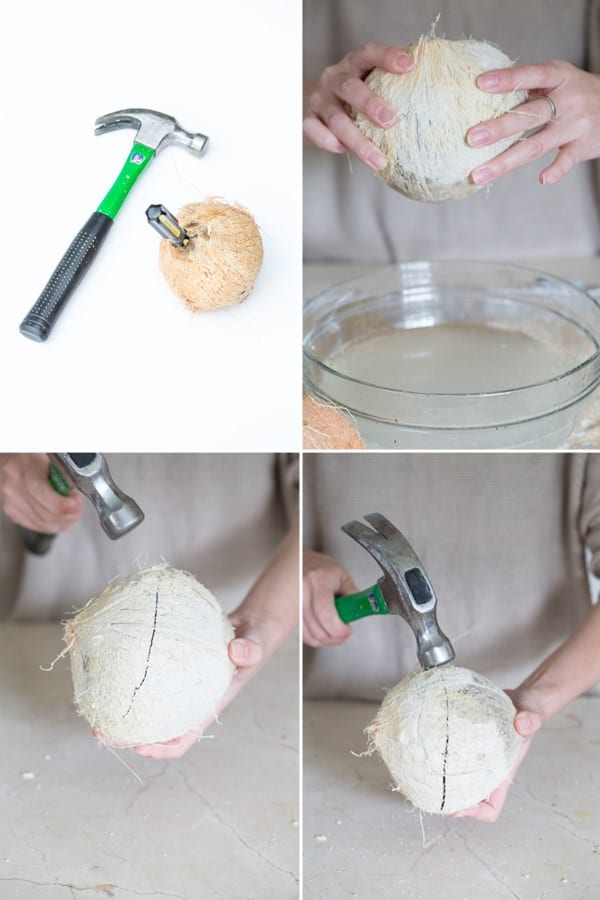
1. Use a screw driver and a hammer on the bottom of the coconut. Hit the screw driver several times with the hammer until you feel and hear a hollow sound. We made 3 holes in each.
2. Shake the coconut over a bowl to get all of the water out. Strain the water so you can drink it! Yum.
3. Using a hammer, pound in the center of the coconut, all the way around. This will create a line and eventually the coconut will break! You will have to go around a few times for the coconut to break.
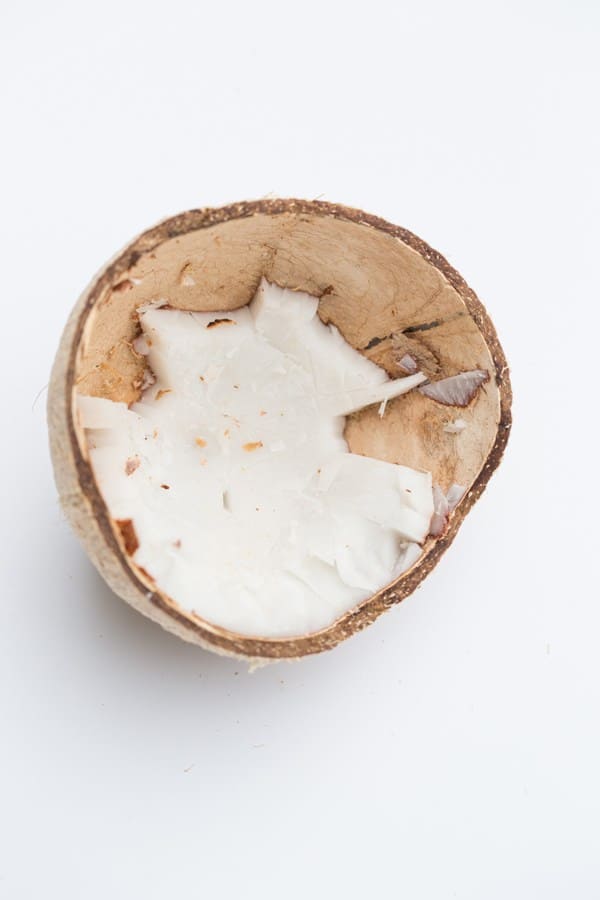
4. When the coconut breaks in half, you can scrape some of the meat out. After we got some of the meat out, we microwaved the coconuts to soften the rest of the meat. Then using a spoon and knife we lifted it out in larger chunks. It does take some time, but it’s worth it!
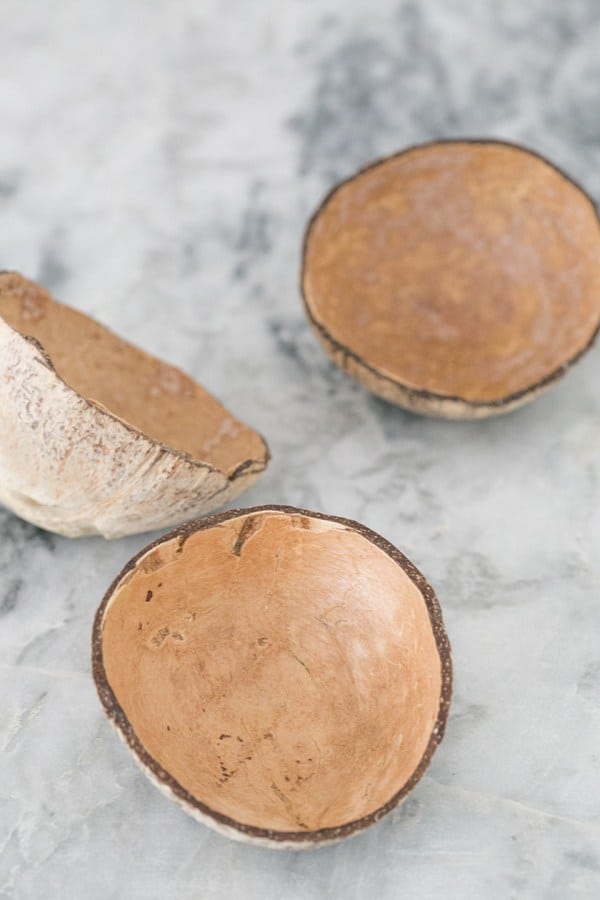
5. Using very course sandpaper, sand the inside and all of the outside until completely smooth!
6. Seal the coconuts with decoupage; or food safe sealer if you’re going to use them to serve food.
One coconut makes one bowl
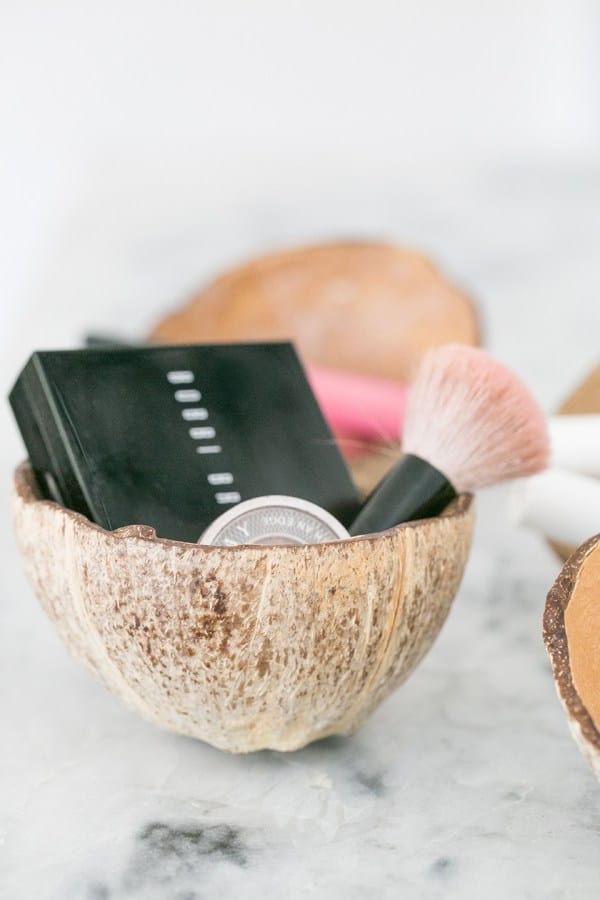
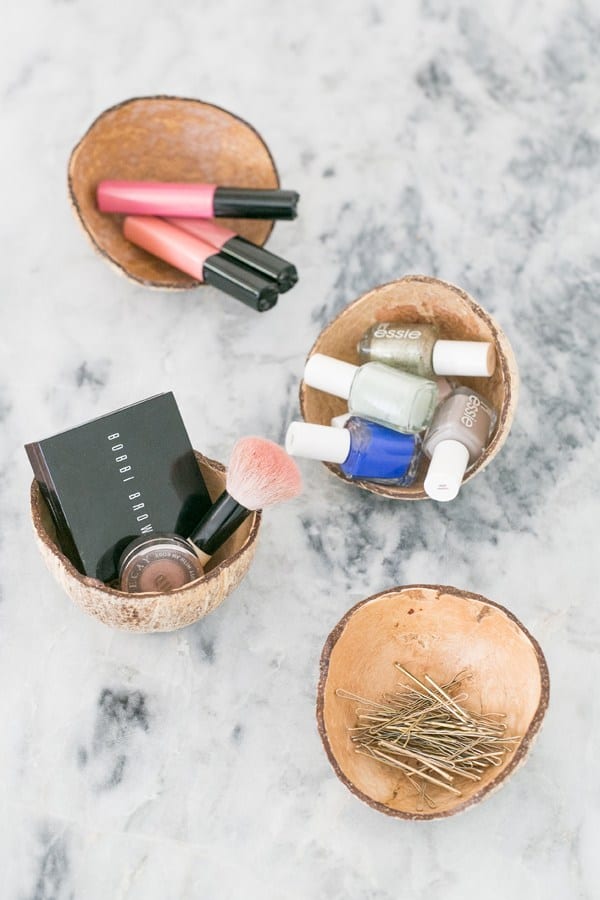
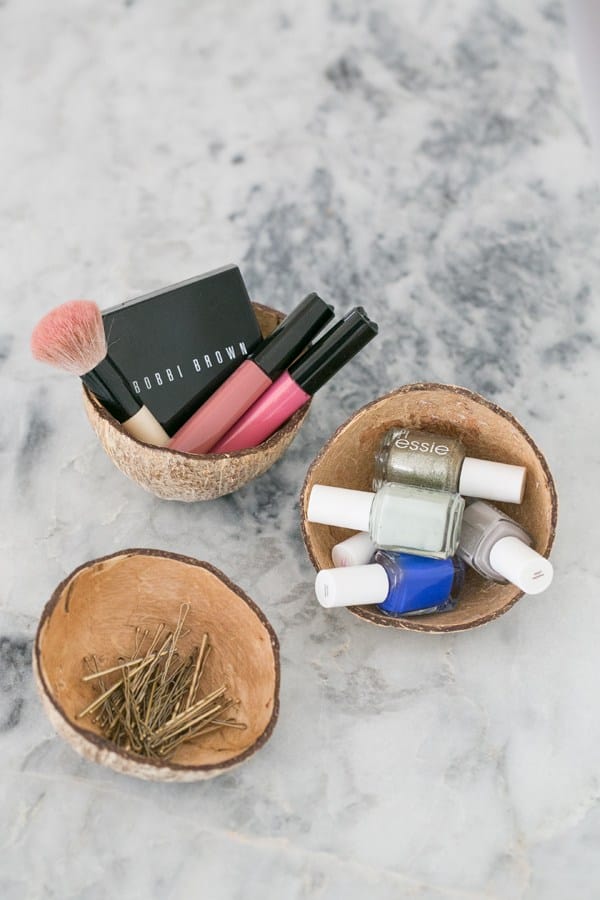
Coconut Bowls Are Super Versatile
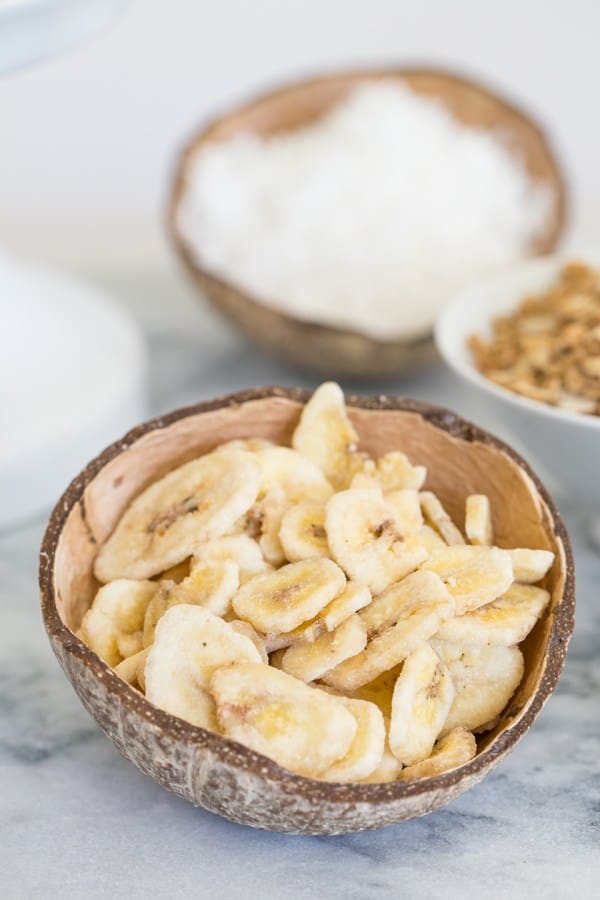
These DIY bowls can be used for so much and looks great sitting out. If you use a food-safe sealer, you can use them as serving bowls and if you have regular decoupage glue, use the bowls for cosmetics, jewelry, etc. You can even decoupage paper them, or spray paint the outside of them too. Get creative and go coconuts over this fun DIY!
Make Your Meals Instaworthy
Coconut bowls are great for storing cosmetics and all sorts of other items. But they’re also easy DIY food bowls, that make food pics pop! Try them with:
- smoothie bowls
- Ice cream,
- soups
- salads
- curries
- oatmeal
- wraps
- dips
- veggies
- fruit
- chips
Durable Containers
They are not only great to look at, but also really sturdy containers and bump resistant. Coco is a tough material, these DIY coconut bowls can handle drops and knocks better than many glass or ceramic containers.
Top Tips For DIY Coconut Bowls
- Hand wash the bowls with lukewarm soapy water. Do not use in the dishwasher, wash in very hot water or soak for a few hours.
- The bowls are suitable for both cool and warm foods.
- Make sure you have a bowl ready under your coconut when it cracks.
Check Out These Other DIY Containers
DIY Geometric Bowls by The Craft Patch
Clay Leaf Bowls by 2 Bees In A Pod
If you have tried this DIY coconut bowl project, or any other projects on my blog, then please rate it and let me know how it turned out in the comments below! You can also FOLLOW ME on FACEBOOK, INSTAGRAM and PINTEREST to see more delicious, healthy, family friendly food!

Ingredients
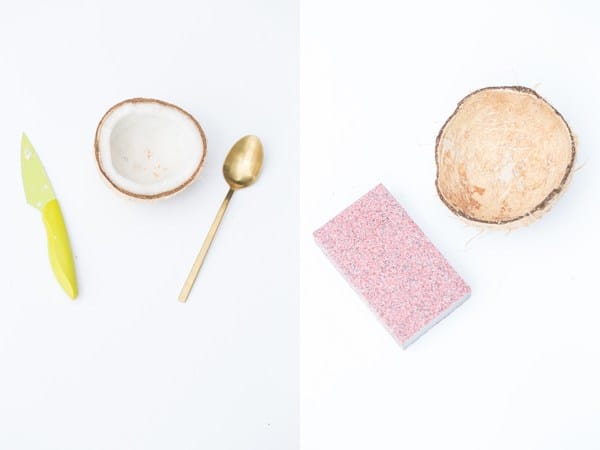
Supplies:
- Coconuts
- hammer
- sandpaper
- screwdriver
- knife
- spoon
- sealer or decoupage glue.
Instructions
- Use a screwdriver and a hammer on the bottom of the coconut. Hit the screwdriver several times with the hammer until you feel and hear a hollow sound. We made 3 holes in each.
- Shake the coconut over a bowl to get all of the water out. Strain the water so you can drink it! Yum.
- Using a hammer, pound in the center of the coconut, all the way around. This will create a line and eventually the coconut will break! You will have to go around a few times for the coconut to break.
- When the coconut breaks in half, you can scrape some of the meat out. After we got some of the meat out, we microwaved the coconuts to soften the rest of the meat. Then using a spoon and knife we lifted it out in larger chunks. It does take some time, but it’s worth it!
- Using very coarse sandpaper, sand the inside and all of the outside until completely smooth!
- Seal the coconuts with decoupage, or food safe sealer if you’re going to use them to serve food.


These bowls are awesome! I would love to use them for outdoor events, do you have a recommendation for a food safe sealer?
Wow. This is such a lovely idea!
Thank you Monique!! They were fun to make and I recently used them for a smoothie bar! I love the way they look 🙂
Well that’s cool. I love how rustic & easy this coconut bowl is to achieve. :]
// ▲ itsCarmen.com ▲
Thanks Carmen!! Getting the meat out of the coconut can be time consuming, but it was actually easier to make these than I thought!!