
This post may contain affiliate links. Please see our disclosure policy.
These DIY cement planters are inexpensive, easy to make and look great! These would be perfect for a wedding, your garden or a gift idea!
Pin this now to find it later
Pin ItI’ve been wanting to make some really cool diy cement planters for the house and I finally did it this week! There’s a natural type of rock called Tufa and it’s known for growing plants because of its porous texture.
Lucky for us, you can create a manufactured version of tufa called hypertufa with just three materials – peat moss, portland cement, and perlite. You can find all of them at a hardware store like Lowes or Home Depot.
I realized as I was making these, how cost efficient they are and if I saw them in a store, I would be the sucker who pays too much for one! This is why I love making things!
How To Make These DIY Cement Planters – Step By Step
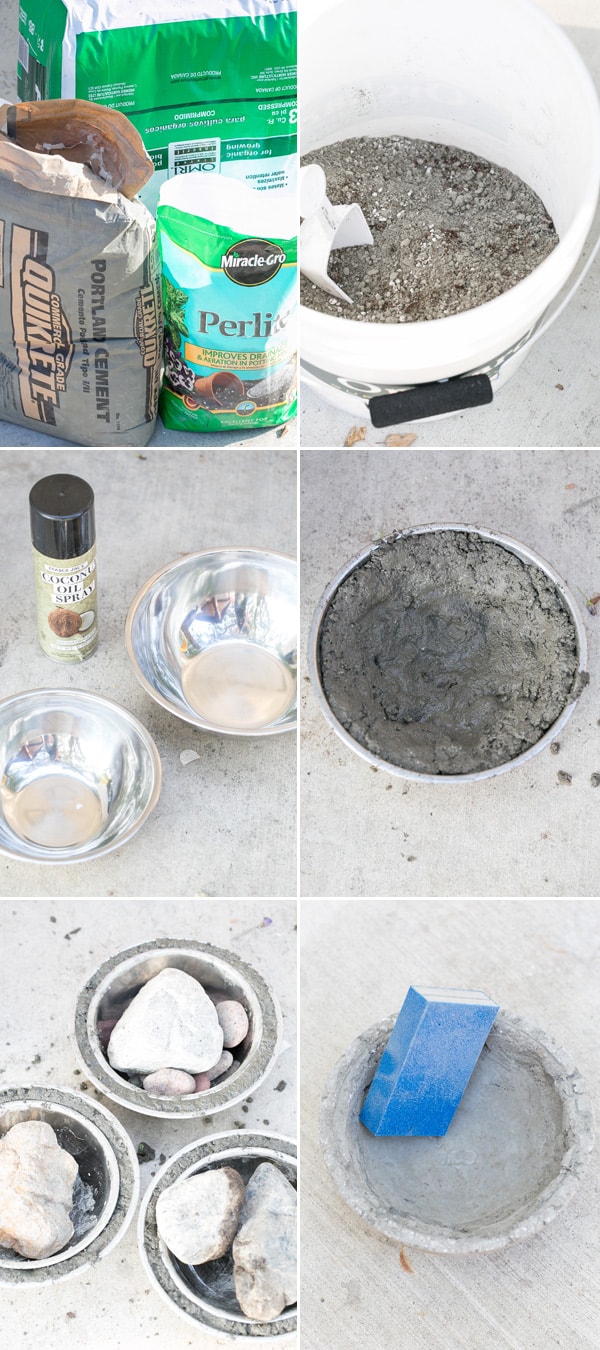
- Mix equal parts cement, peat moss and perlite. I scooped 8 cups of each into a large bucket. This will make 4 medium sized bowls.
- Mix the ingredients together and add water until you get a texture like wet sand. I did about 8 cups water, easy right?!
- Spray your molds, in this case the larger bowl with nonstick cooking spray and the bottom of the smaller bowl.
- Put yellow gloves on (they don’t need to be yellow, that’s just the color I think of when I think of gloveand scoop the mixture into the bowl with your hands. Press down and around the sides.
- Place the smaller bowl on top of the cement mixture. Place rocks inside to weigh it down.
- Let it dry like that for 24 hours, then remove the top bowl using a flathead screwdriver or something to lift it off. I left the bottom part to harden one more day and then removed it.
- Once the bottom is removed and the bowl is out of the mold, sand the edges.
- Drill holes in the bottom of the bowl for drainage.
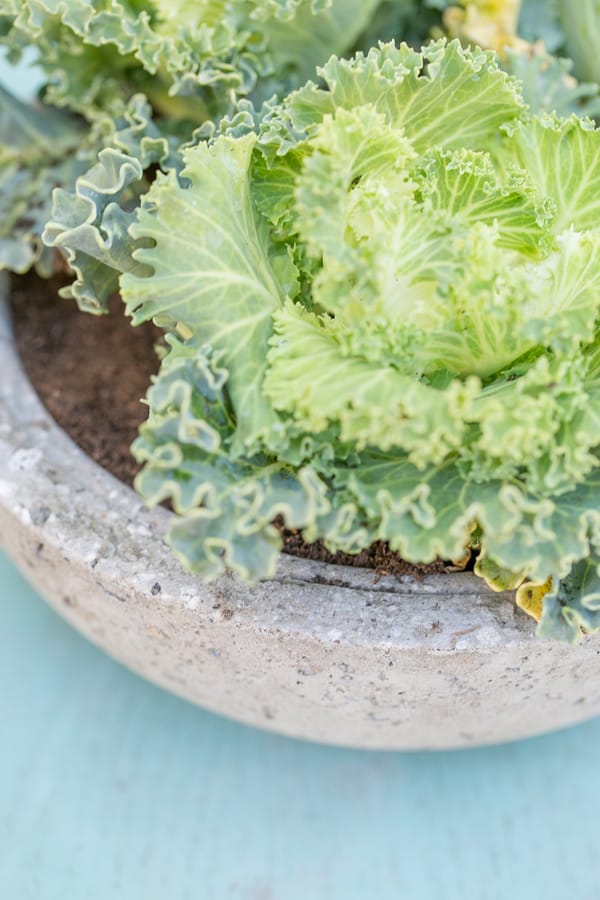
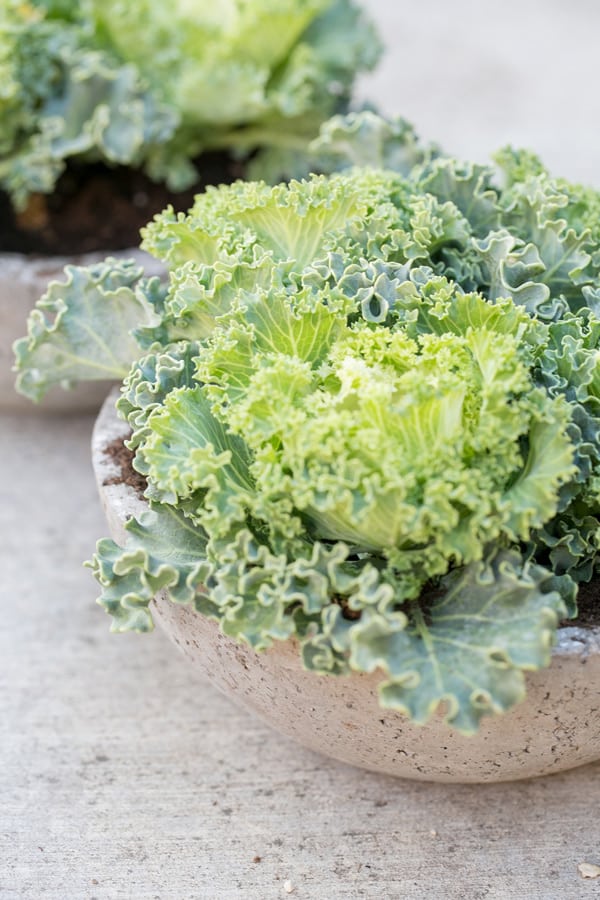
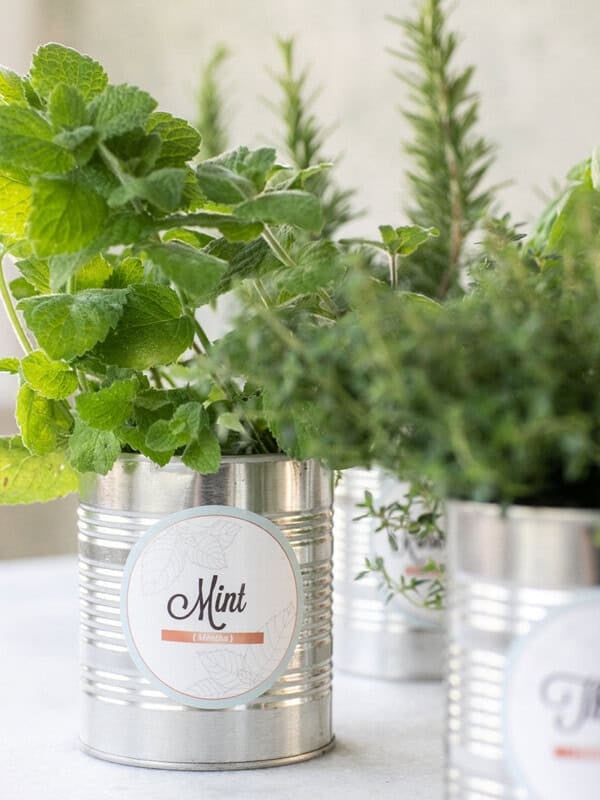
- Plant, plant, plant away! Geez I love these things!
Benefits of Hypertufa
Hypertufa is a great material! Here are some of it’s benefits for planters:
- Hypertufa has a unique look of ancient stone.
- Lightweight. Being so lightweight, despite having the look of a stone or cement planter, is a major benefit of a hypertufa planter.
- Sky is the Limit for Your Creativity.
- It’s cost effective.
- Withstands Extreme Weather Elements.
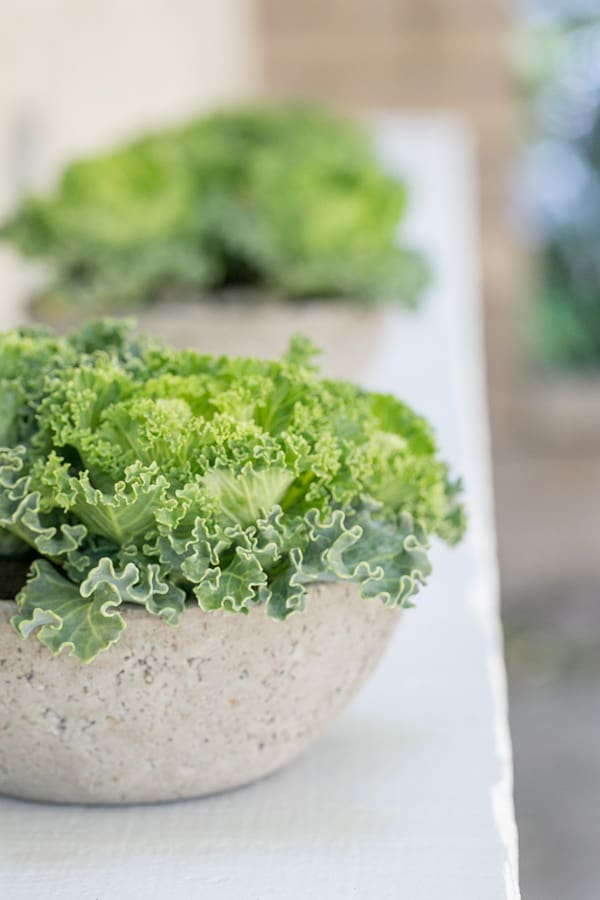
Cheap & Beautiful DIY Cement Planters!
The materials won’t weigh on your bank account, but they will weigh a lot when you try to take one off the shelf! A small bag of cement weighs 45 lbs. My back found that out quickly.
Anyway, I bought all three for only $24! And these aren’t little bags, you can easily make 30 medium sized pots, if not more. I bought the metal bowls at the 99 Cent Store, obviously for only $1 each.
DIY Cement Planters – Great For Events or Gifts
These DIY cement planters are easy to make and you can make a bunch!
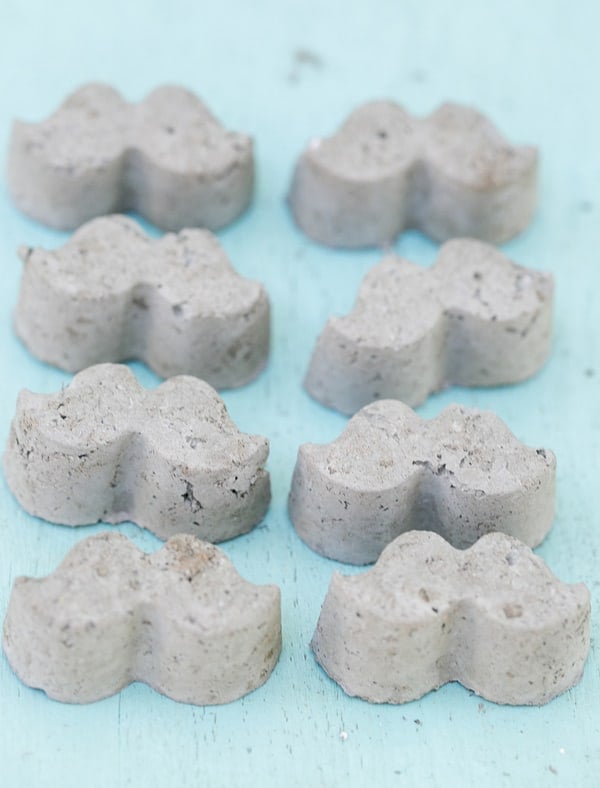
They would be perfect for a rustic (or even modern) wedding, to give as gifts or just for your pure enjoyment. Don’t ask why, but I also made some hypertufa mustaches… I’m thinking about putting one in each planter for good luck growth, hahaha!
Top Tips for DIY Cement Planters
- Spray your molds with nonstick cooking spray.
- Let the planters dry for at least 24 hours.
- Drill holes in the bottom of each planter, for drainage.
- Sand the edges of the bowl for a smoother finish, looks great!
Check Out these Other Great DIY Garden Projects
How To Make A Floral Garden
Outdoor Bench DIY Ideas by Idea Stand
10 DIY Garden Trellises That Cost Less Than $20 by The Spruce
If you have tried these DIY Cement Planters or any other project on Sugar and Charm, then please rate it and let me know how it turned out in the comments below!
You can also FOLLOW ME on FACEBOOK, INSTAGRAM, and PINTEREST to see more delicious recipes, cocktails, desserts and party ideas!

DIY Cement Planters
Ingredients
- Peat Moss
- 1 45 lb bag Portland Cement
- 1 small bag Perlite
- 4 large metal bowls and 4 smaller metal bowls to create a mold
- A bucket for mixing the cement
- Gloves
- Scoopers
- Sanding block
- Rocks
- Drill
- Flathead screwdriver
Instructions
- Mix equal parts cement, peat moss and perlite. I scooped 8 cups of each into a large bucket. This will make 4 medium sized bowls.
- Mix the ingredients together and add water until you get a texture like wet sand. I did about 8 cups water, easy right?!
- Spray your molds, in this case the larger bowl with nonstick cooking spray and the bottom of the smaller bowl.
- Put yellow gloves on (they don’t need to be yellow, that’s just the color I think of when I think of gloveand scoop the mixture into the bowl with your hands. Press down and around the sides.
- Place the smaller bowl on top of the cement mixture. Place rocks inside to weigh it down.
- Let it dry like that for 24 hours, then remove the top bowl using a flathead screwdriver or something to lift it off. I left the bottom part to harden one more day and then removed it.
- Once the bottom is removed and the bowl is out of the mold, sand the edges.
- Drill holes in the bottom of the bowl for drainage.
- Plant, plant, plant away! Geez I love these things!


I love your site but I followed your directions for making pots and they fell apart when I removed them from the molds. I let them dry 48 hrs before I even touched them. Maybe you could tell me why. I used equal parts perlite, pete moss and fast setting cement patcher,and water. . Where did I go wrong?
Thank you, Laryma
You made my day, please share some more creative stuff like this, I started gardening and for that I started gathering all creative ideas from internet for it. like Planters and Pots decorating, Soiling and about Seeds, ETC.
Have you ever cured your pots, or experienced any “lime” problems with the plants in them?
This is awesome! Love the texture.
OK this is brilliant!! I can’t wait to make some. 😉 And funny, I always imagine gloves to be blue. Not even joking. xox