
This post may contain affiliate links. Please see our disclosure policy.
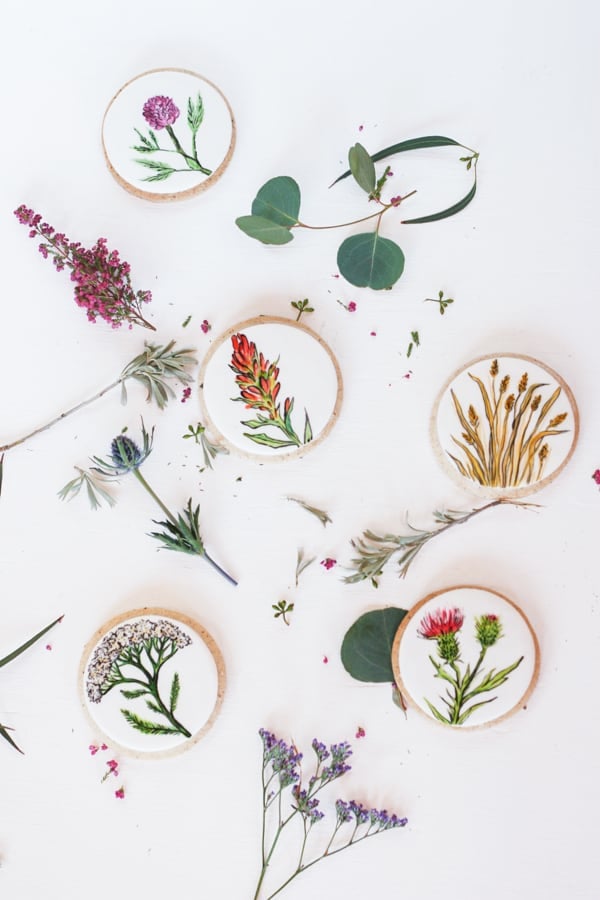
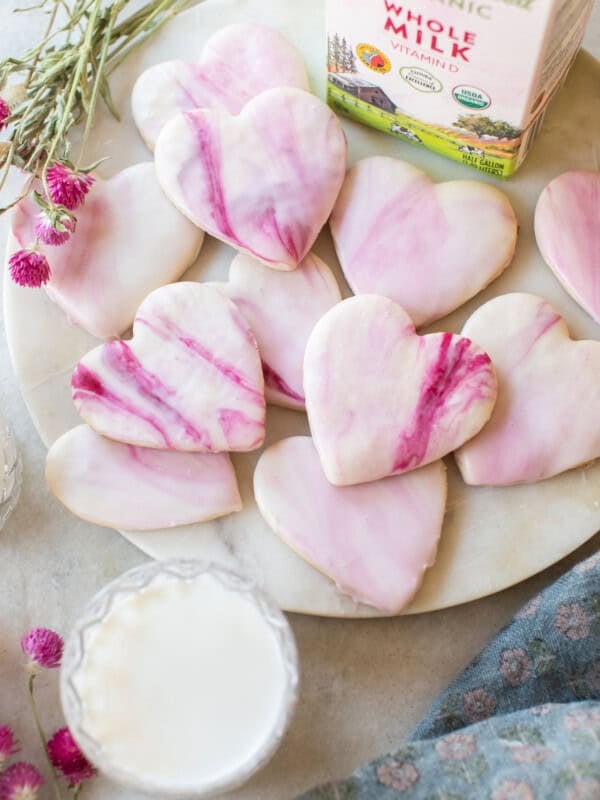
Have you ever wondered how you can create beautifully painted cookies? We’re giving you a fun tutorial on how to paint cookies and a delicious homemade fondant recipe!

Pin this now to find it later
Pin ItMariah from Everythin Golden and her crazy talented friend, Jasmine of Whipped is sharing this tutorial with us! Jasmine has married her love of food with her skills in illustration, sculpture, and metalsmithing.
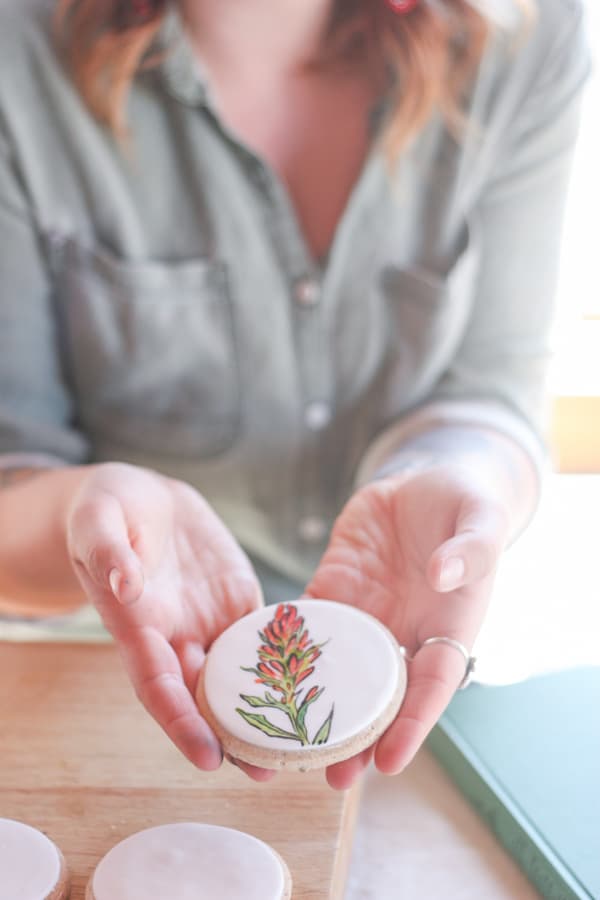
Mariah says, “her work is like nothing else I’ve seen and when you meet her you’ll see why she’s one-of-a-kind! We wanted to get together and share our love for Montana, wildflowers, and art. So, we’re here to share this tutorial on painting with food!”
Marshmallow Fondant Ingredients
16 oz mini marshmallows
Powdered sugar
Water
Corn syrup
Vanilla, optional
How to Make
- Sprinkle water over the mini marshmallows in a large microwave-safe bowl and microwave on high for 2 minutes or until marshmallows are puffed up and soft looking.
- Smear vegetable shortening on a wooden spoon before stirring the melted marshmallows (this is a sticky stage and you’ll save yourself some frustrating clean up later on).
- Add your extract (feel free to add in a different flavor: lemon and almond are lovely as weland corn syrup to the bowl. If you would like to color the entire batch, you can add some food coloring. For our purposes leave it white for good painting canvas.
- Slowly sift your powdered sugar over the melted marshmallows and stir between sifting. Stop when it becomes difficult to stir with a spoon.
- If you have any powdered sugar left sift it over your work surface, and begin to knead the rest of the powdered sugar into the fondant. The fondant may still be quite hot so start slowly and be careful!
- You are finished once all of the powdered sugar is incorporated, there are no lumps, and the texture is smooth. If you tear it and it seems very dry, you may feel it necessary to add a little bit more shortening.
For Best Fondant Results
Wrap your fondant in plastic wrap and/or a Ziplock bag and place it in the fridge overnight BEFORE using. Allowing it to rest means less tearing, bubbles, and lumps.
Rolling Out Fondant
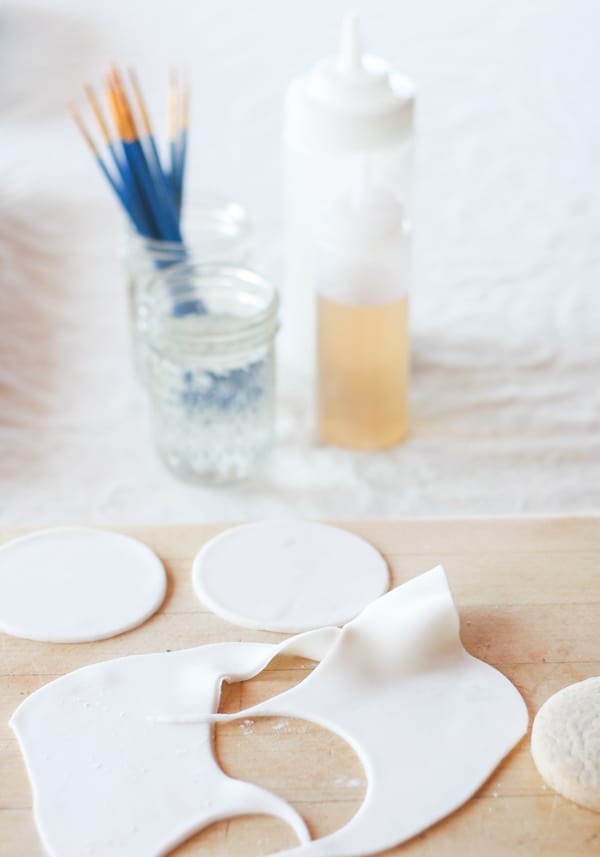
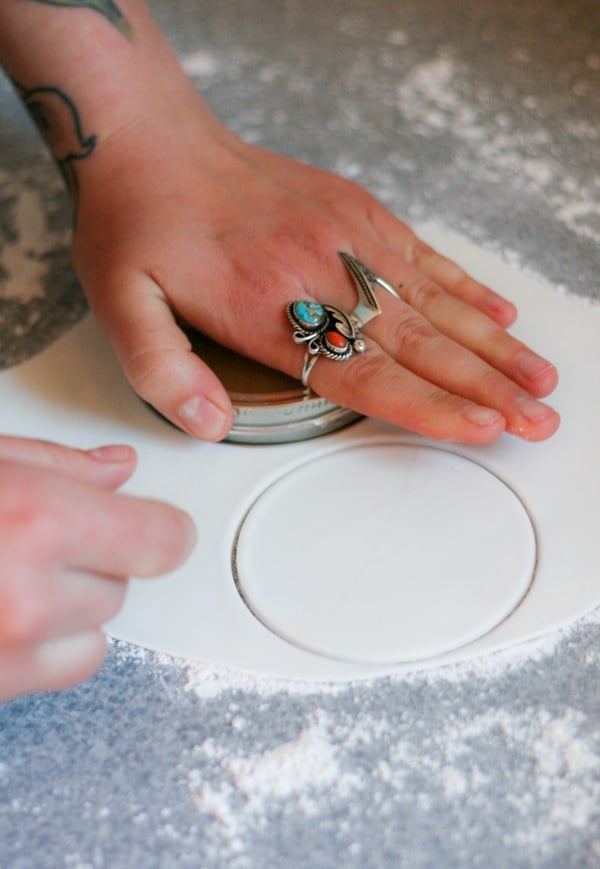
Cut off a quarter of your fondant and knead to soften (especially if it has just come out of your fridge). Sift powdered sugar over your work surface and place a round of fondant down. Sprinkle a bit more powdered sugar on top and roll as you would a pie crust.
Roll your fondant to the desired thickness (for cookies I like to roll mine quite thin). With the cookie cutter, you used to cut your cookies, cut out the fondant (your fondant shape should be just barely smaller than your cookie thanks to the cookie spreading a bit while it baked).
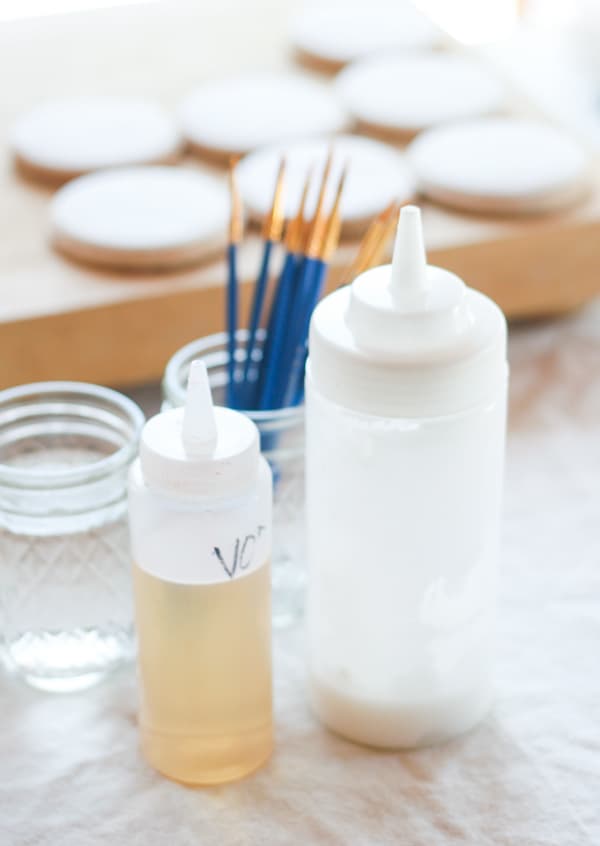
To adhere the fondant to your cookies, make a simple icing with powdered sugar and enough water to create a sugary glue.
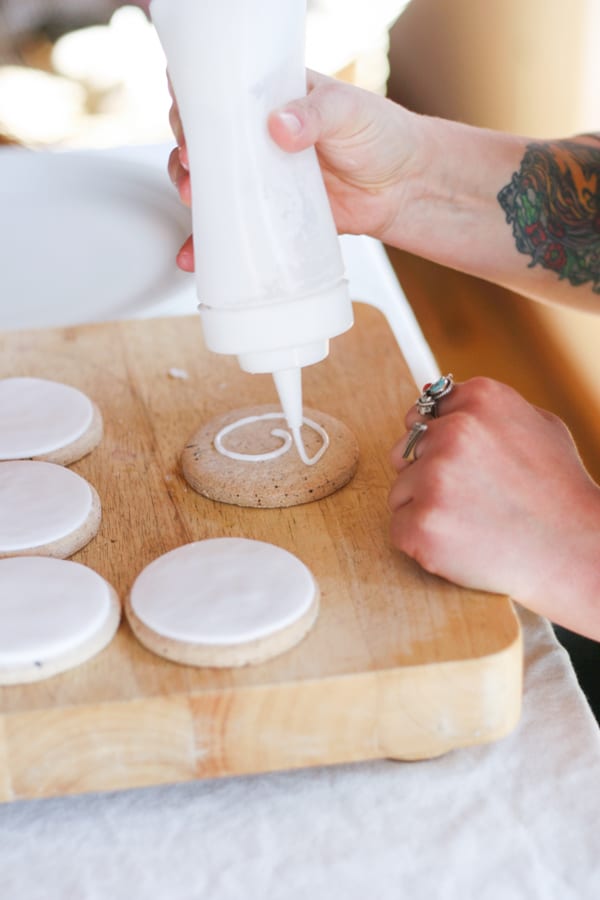
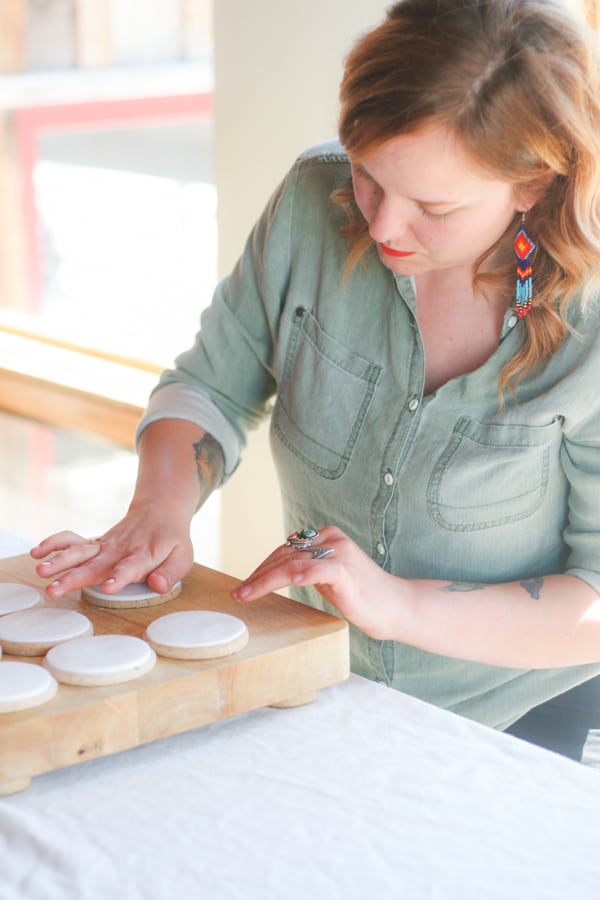
Brush it onto your cookies and place the fondant on top. Use the fatty palm of your hand (where your thumb reaches your wristo smooth the fondant over the cookie and especially around the edges.
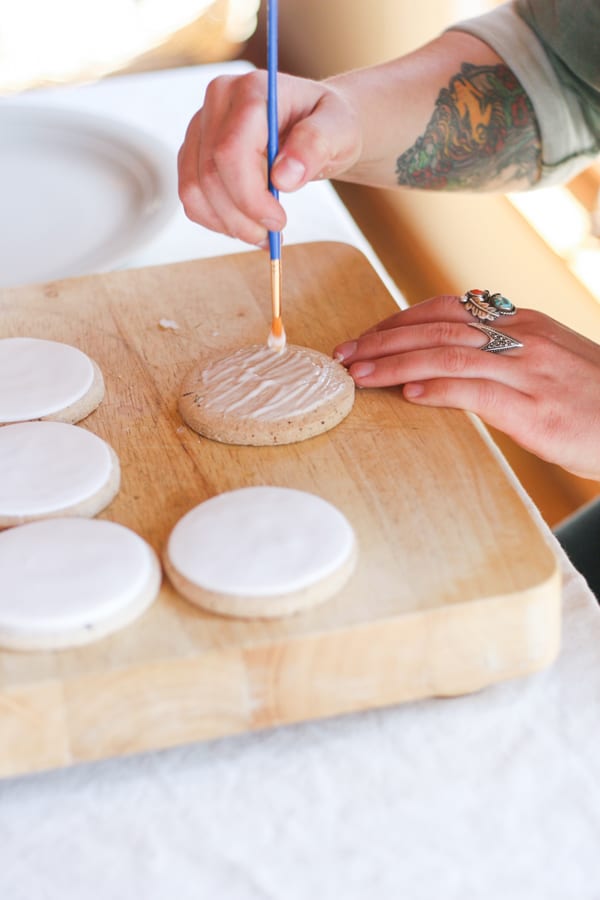
Letting the fondant set for at least one hour on your cookie will yield a smooth dry surface to paint on. Placing it in the fridge will speed up this process.
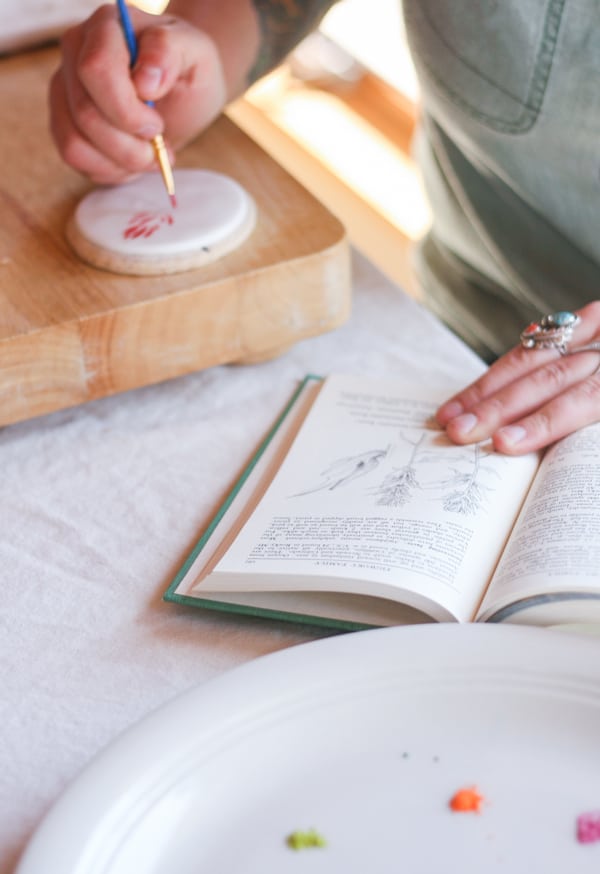
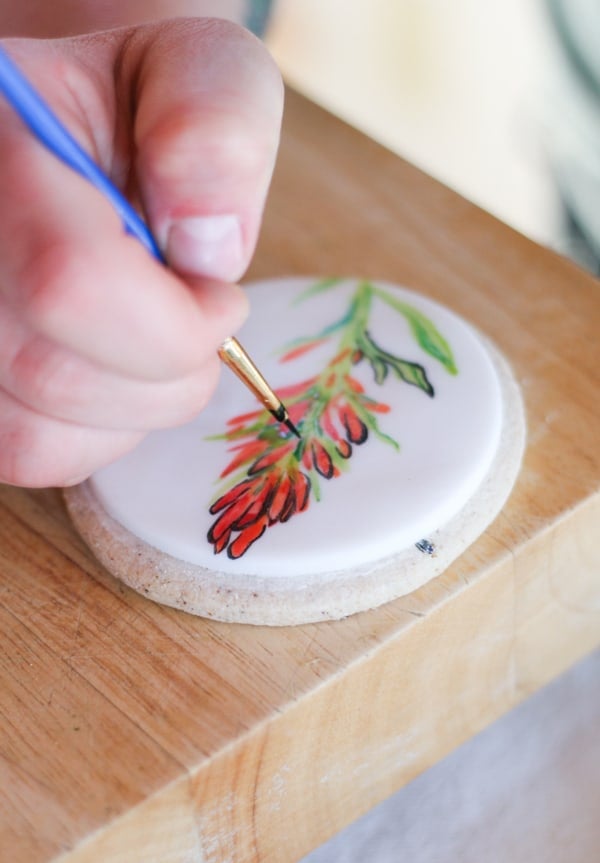
I like to use powdered food coloring, which you can often find at Michaels craft store, or else a gel food coloring will work in a pinch.
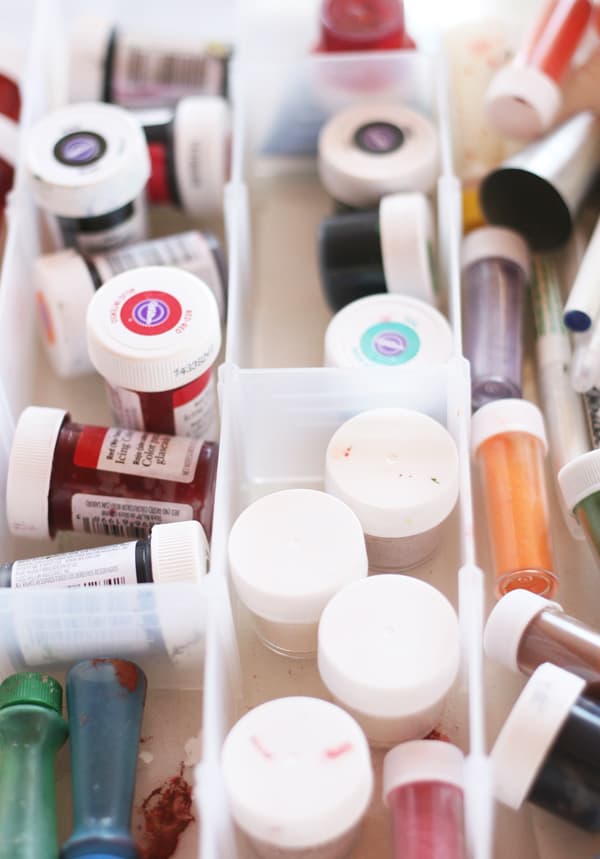
How to Thin Food Coloring Gel
To thin your food coloring you may use a high proof alcohol such as vodka or Everclear, or an extract (vanilla, almond, and lemon are most common).
Don’t worry about alcohol content in your cookies: the reason we use alcohol is that it evaporates quickly allowing the food coloring to dry.
Add a drop of gel onto a plate and using a small paintbrush (one you use for food only) paint on the fondant like you would a canvas!
We recommend using a few small tip brushes to really get fine details.
Tips for Making Painted Cookies
Wear plastic gloves or massage some vegetable oil into your hands before kneading to avoid a sticky mess.
There are special plastic rolling pins that are reasonably priced and make for an incredibly smooth surface.
If you do not have one of these handy tools, place wax or parchment paper over the top of your fondant and roll over the paper to preserve the surface.
You do not want to get a wood grain finish on your rolled fondant!
More DIY Projects You’ll Love!
How to Make a Charming Ice Bucket
How to Create a Marble Drip Cake – One of our most popular posts!
How to Make Marble Candied Apples
Let us know if you make these beautifully painted cookies!! Leave a comment and review!
You can also FOLLOW US on FACEBOOK, INSTAGRAM, and PINTEREST to see more delicious recipes, cocktails, desserts, and parties!
Photos by Mariah of Everything Golden
My new Entertaining book is here! Order Now!

Painted Wildflower Fondant Cookies
Ingredients
For the fondant
- 16 oz mini marshmallows
- 2 lb powdered sugar
- 1 tbs water
- 1 tbs corn syrup
- 1 tsp vanilla, optional
Instructions
- Sprinkle water over the mini marshmallows in a large microwave-safe bowl and microwave on high for 2 minutes or until marshmallows are puffed up and soft looking.
- Smear vegetable shortening on a wooden spoon before stirring the melted marshmallows (this is a sticky stage and you’ll save yourself some frustrating clean up later on).
- Add your extract (feel free to add in a different flavor: lemon and almond are lovely as weland corn syrup to the bowl. If you would like to color the entire batch, you can add some food coloring. For our purposes leave it white for good painting canvas.
- Slowly sift your powdered sugar over the melted marshmallows and stir between sifting. Stop when it becomes difficult to stir with a spoon. If you have any powdered sugar left sift it over your work surface, and begin to knead the rest of the powdered sugar into the fondant. The fondant may still be quite hot so start slowly and be careful!
- You are finished once all of the powdered sugar is incorporated, there are no lumps, and the texture is smooth. If you tear it and it seems very dry, you may feel it necessary to add a little bit more shortening.
- For best results wrap your fondant in plastic wrap and/or a Ziplock bag and place it in the fridge overnight BEFORE using. Allowing it to rest means less tearing, bubbles, and lumps.
- To roll it out: cut off a quarter of your fondant and knead to soften (especially if it has just come out of your fridge). Sift powdered sugar over your work surface and place a round of fondant down. Sprinkle a bit more powdered sugar on top and roll as you would a pie crust.
- Roll your fondant to the desired thickness (for cookies I like to roll mine quite thin). With the cookie cutter, you used to cut your cookies, cut out the fondant (your fondant shape should be just barely smaller than your cookie thanks to the cookie spreading a bit while it baked).
- To adhere the fondant to your cookies, make a simple icing with powdered sugar and enough water to create a sugary glue. Brush it onto your cookies and place the fondant on top. Use the fatty palm of your hand (where your thumb reaches your wristo smooth the fondant over the cookie and especially around the edges.
- Letting the fondant set for at least one hour on your cookie will yield a smooth dry surface to paint on. Placing it in the fridge will speed up this process.
- I like to use powdered food coloring, which you can often find at Michaels craft store, or else a gel food coloring will work in a pinch.
Notes
Nutrition
Nutrition information is automatically calculated, so should only be used as an approximation.


Looks amazing and can’t wait to try this.
these look amazing!
Hope you can give me some advice!
Ive been trying out watercoloring onto fondant, but after painting my fondant it doesn’t seem to fully dry, and has a bit of a tacky/sticky feel to it.
how do i avoid this?! im planning to full watercolour a cake in a couple of weeks for a birthday and im worried about it not drying.
Im just using ready made fondant icing from one of the supermarkets.
thanks!
Hi Helen – If you really want the fondant to dry you might need to make homemade. If not, try kneading the fondant with powdered sugar. That will help with the stickiness. You can also brush some over the top and dust it off and that will help remove a sticky texture too. I hope this helps!
Will the painting work on dried royal icing if done with a light touch? I am not sure what the fondant tastes like and not sure how it would impact the taste of the cookies.
You can definitely try it. I’m sure you would have to do a very light brush stroke on royal icing.
Can I order these? They are beautiful!
Love this!
I’m not very talented in the decorated cookie department, but I feel like I might actually be able to pull this one off!
Let’s Mingle Blog
I think you could Ashley!! It seems more manageable than decorating with a piping bag and frosting, right?!
these are absolutely gorgeous! beautiful work!
These cookies are stunning. If you gave me one I probably couldn’t eat it because it’s too pretty. I’ve never made fondant before. :]
// ▲ itsCarmen.com ▲
It’s really quite easy to make, Carmen! and it’s cheaper than store bought and so much tastier… give it a try!