• Home
  • Recipes
  • Eats & Drinks
    ▼
    • Easy Everyday
    • Desserts
    • Cocktails
    • Drinks
  • Parties
    ▼
    • Party Food
    • Celebrations
    • Everyday Parties
    • Party DIY
    • Party Planning
    • Flowers
  • Home
    ▼
    • Decorating
    • Cleaning
    • Organizing
    • Gardening
  • Holidays
    ▼
    • 4th of July
    • Birthdays
    • Valentine’s Day
    • Saint Patrick’s Day
    • Easter
    • Mother’s Day
    • Father’s Day
    • Halloween
    • Thanksgiving
    • Christmas
    • New Year’s Eve
  • Videos
  • Shop
  • About
  • Press
  • Contact
  • Home
  • About
  • Press
  • Recipe Index
  • Videos
  • Contact
  • Nav Social Menu

    • Email
    • Facebook
    • Instagram
    • Pinterest
    • RSS
    • Tumblr
  • Skip to main content
  • Skip to primary sidebar
  • Skip to footer

Sugar and Charm

  • Eats & Drinks
    • Easy Everyday
    • Desserts
    • Cocktails
    • Drinks
  • Parties
    • Party Food
    • Celebrations
    • Everyday Parties
    • Party DIY
    • Party Planning
    • Flowers
  • Home
    • Decorating
    • Cleaning
    • Organizing
    • Gardening
  • Holidays
    • 4th of July
    • Birthdays
    • Valentine’s Day
    • Saint Patrick’s Day
    • Easter
    • Mother’s Day
    • Father’s Day
    • Halloween
    • Thanksgiving
    • Christmas
    • New Year’s Eve
  • Shop
Home » Home » DIY Reusable Oilcloth Bowl Covers

DIY Reusable Oilcloth Bowl Covers

Published on November 2, 2015 Updated on May 20, 2021 by Eden

  • Share
  • Tweet
  • Email
This post may contain Affiliate Links. Please read our privacy policy here.

Instead of using saran wrap to cover and store food and ingredients, we made DIY Reusable Oilcloth Bowl Covers that are waterproof and fit different sizes of bowls.
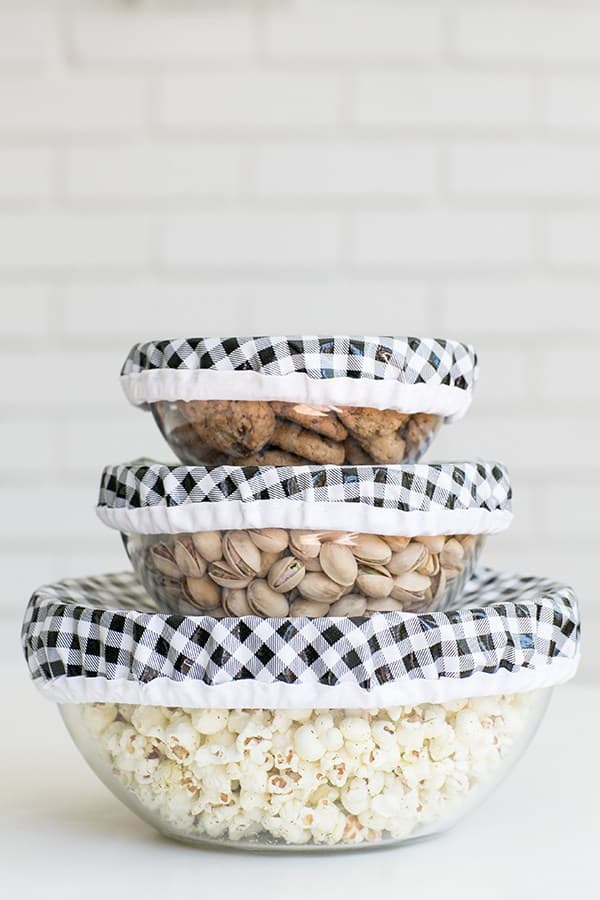
stack of bowels with oil cloth covers

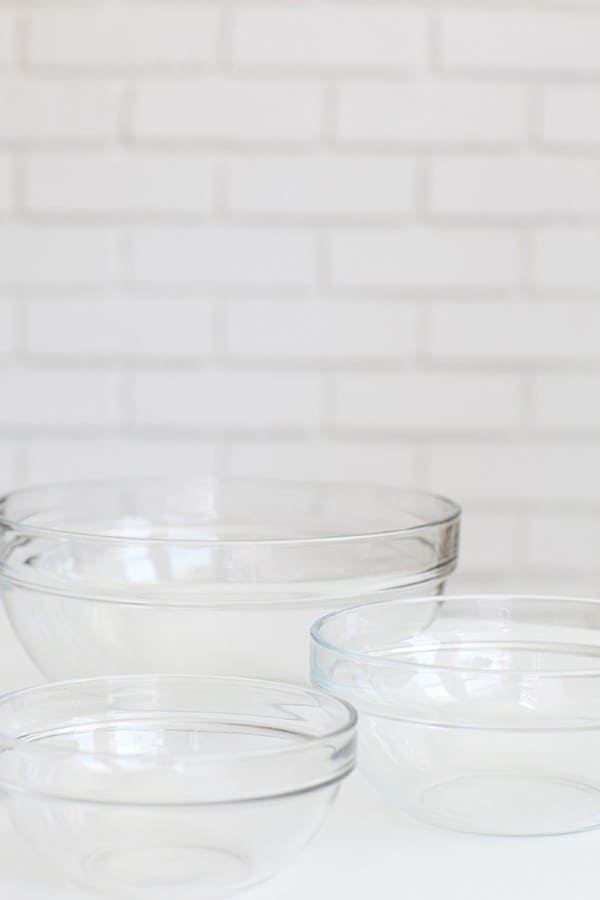
We’re going old school with these DIY reusable oilcloth bowl covers! They’re actually so useful and a DIY that I use often! I have this handy 10-piece glass bowl set that I use for mixing, storing, etc.
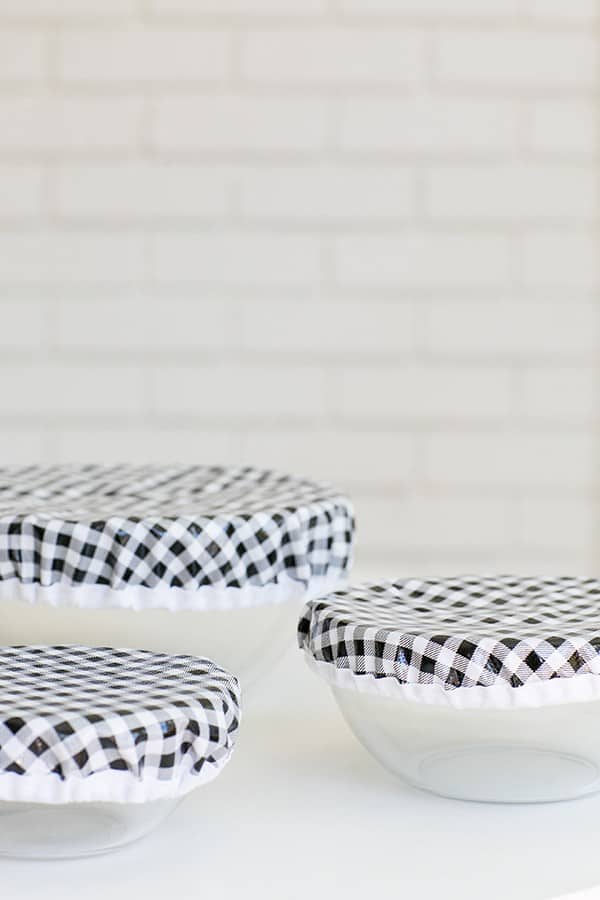
Three clear bowls with black and white oil cloth covers.

I keep them in the same drawer as the saran wrap so I never forget about them. Such a charming and easy way to cover food, especially around the holidays!! Also, a set of these bowls with homemade covers would be a pretty awesome gift for any host and cook!

Three Clear Bowls

DIY Oilcloth bowl Covers

Table of Contents

  • DIY Oilcloth bowl Covers
    • Materials
    • Directions
  • More Simple and Fun DIY Projects
  • Frequently Asked Question
    • What is Oilcloth and is it the Same as Vinyl?
    • Can You Put Oilcloth in the Washing Machine?
    • How Do You Get Stains Out of Oilcloth?
    • Can You Use Oilcloth Outdoors?
    • What Was Oilcloth Originally Used For?
    • What Did They Use to Waterproof Oilcloth In the 18th Century?

Materials

Bowls
Oilcloth or laminate fabric. This site has a great selection!
1/4 inch elastic
Double fold bias tape
Small safety pin
Scissors
Needle and thread
Ruler
Measuring tape

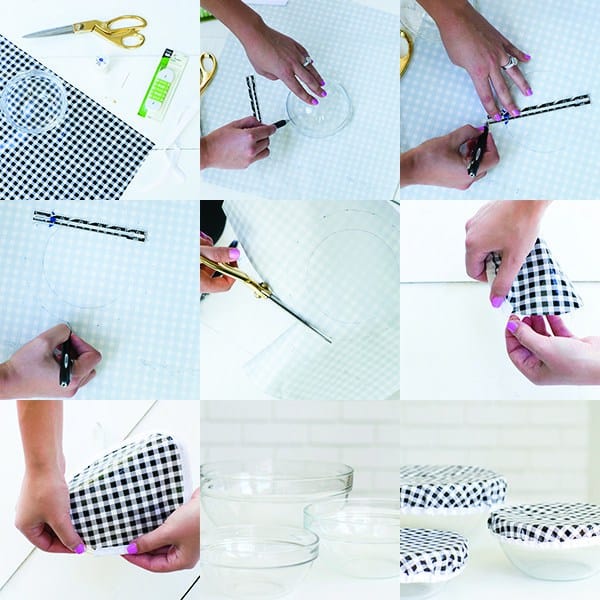
Grid of photos for directions for oil cloth bowl covers.

Directions

1. Place your bowl on the unfinished side of the oilcloth and trace around it lightly with a pen.

2. Using a ruler, measure 1 inch larger than the bowl. We did this by making small marks every couple inches and then connecting the dots.

3. Cut around this line. Take the bias tape and position it so the oilcloth is in the middle and there’s about 1/4’’ along the edge. That’s where the elastic will eventually go.

4. Sew the bias tape onto the oilcloth, making sure to leave an opening of about 2 inches on one side.

5. Measure around the top of the glass bowl where the cover will sit. Subtract 2 inches from that number and cut the elastic to that size.

6. Pin the safety pin to one end of the elastic and work the pin and elastic inside the bias tape, all around the cover.

7. When you get to the opening on the other side, sew the two sides of the elastic together.

8. Sew the remaining section of the bias tape and put the cover on your bowl!
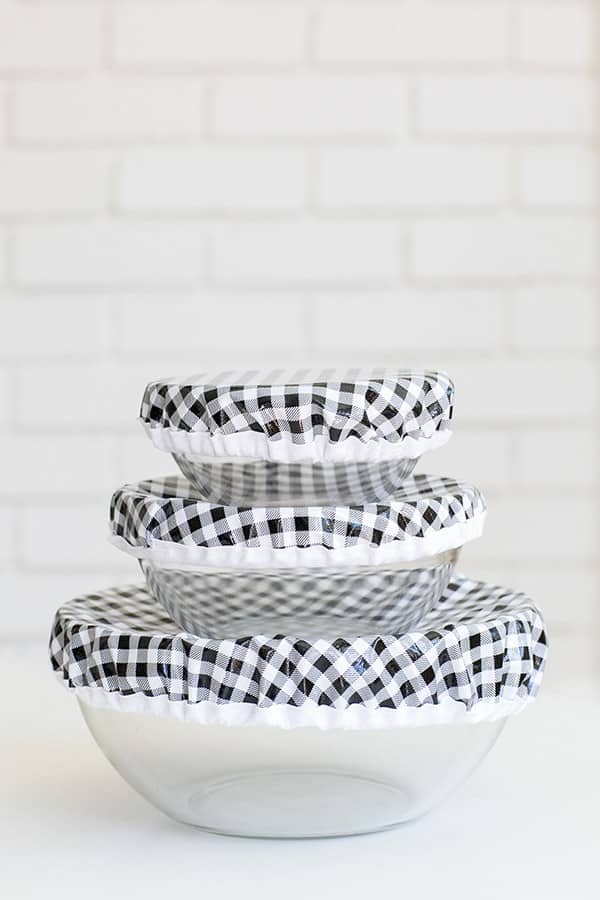
Stack of clear bowls with DIY oil cloth bowl covers.

We hope you all enjoy these DIY Reusable Oilcloth Bowl Covers! It’s been 3 years and I still use mine and have the same mixing bowl set! See more easy projects below.

More Simple and Fun DIY Projects

  • Fabric Marbling
  • Pom Pom Placemats
  • Essential Oil Candles
  • DIY Mini Cake Stands

Frequently Asked Question

What is Oilcloth and is it the Same as Vinyl?

It’s a sheet of natural fabric with a tight weave, like cotton or linen, that gets treated on one side to make it waterproof. The treatment that coats the cloth is usually made of PVC or Teflon.

There are also waterproof fabrics made from PVC alone. The technical name for PVC is polyvinyl chloride.

In the 1950’s it became common for manufacturers to make clothes coated with PVC. It didn’t take long for the coating to gain the nickname, “vinyl.”

Because of this connection people sometimes refer to oilcloth as vinyl as well. It’s two words for the same thing.

Can You Put Oilcloth in the Washing Machine?

You can wash some Teflon coated cloths in a machine with a low enough heat setting, but it’s usually a bad idea. Your best bet is to read and follow the washing instructions for your specific product.

How Do You Get Stains Out of Oilcloth?

Most stains that end up on your oilcloth will wipe right off with warm soapy water or a quick spritz from your favorite kitchen cleaner. Stains from things like curries, tomato sauces, and red wines, however, will still leave their mark.

The best thing you can do if your sangria granita snow cone drips onto your oilcloth is to wipe it up as soon as possible. If you can’t get to it in time there’s no guaranteed method for getting the spot out, but there are a few things you can try.

Baking Soda: Use water to make a paste and coat the stain, rubbing it gently. Let it sit for two to three minutes and then wash it off.

White Toothpaste: Cover the stain with the toothpaste and let it sit for a bit so that it starts to harden. Wipe off the paste and repeat until the stain fades. This sometimes takes two or three times to work.

Nail Polish Remover: Rub the remover over the stain with cotton wool. Don’t forget to be gentle. Let it sit for a few minutes and then wash it off.

Knowing the type of stain you have is the best way of determining how to remove it. This stain removal guide may prove useful if these methods don’t work.

No matter how you go about it, be sure to test your stain remover on a small, difficult to see spot before you dive in.

When you’re done, try one of these gin and tonic recipes. You’ve earned it. 

Can You Use Oilcloth Outdoors?

An Oilcloth’s waterproof and stain-resistant properties make it ideal for outdoor use. That said, it’s best not to leave it out. Oilcloth fades overtime if left in the elements. 

What Was Oilcloth Originally Used For?

There was a time when flexible, waterproof materials were rare and leather was both expensive and hard to maintain. For this reason, oilcloth became a popular alternative. It was used to waterproof luggage, carriages and even clothing.

What Did They Use to Waterproof Oilcloth In the 18th Century?

Before PVC and Teflon were a thing, people used to make their own oilcloth by boiling linseed oil, lead dross, metal, and salts. If you’re thinking that doesn’t sound healthy, you’re right. The stuff was toxic. 

Additionally, the linseed oil mixture took a long time to both boil and cure, so the process took a while. The cloth also liked to stick to itself when folded so people had to scrub it with pumice beforehand to keep this from happening. 

Modern oilcloth is much healthier and easier to take care of. 

Let us know what you think by leaving a comment and review below!


12 Comments

Related Posts

  • Backyard Renovation Plans by Yardzen

    Backyard Renovation Plans by Yardzen

  • How to Arrange Cut Tulips in a Vase

    How to Arrange Cut Tulips in a Vase

  • How to Style a Spring Bar

    How to Style a Spring Bar

Stay up to Date

Join our Newsletter to Keep up on Latest

Related Posts

  • How You Can Hygge Your Home and Life!
  • DIY Essential Oil Candles
  • 5 Natural DIY Cleaning Recipes that Work!
  • Three ways to use tea garden herbs
Previous Post: « Printable and Edible Halloween Cake Designs!
Next Post: Apple Pie Smoothie »

Reader Interactions

Comments

  1. Elizabeth Detschermitsch says

    February 20, 2022 at 3:49 pm

    How do you clean the back side of the bowl covers if they touch the food.

    Reply
  2. Earth Bunny says

    July 17, 2020 at 7:44 am

    Great idea …Nice Tutorial .thank you so much for sharing!!!

    Reply
  3. Peggy Cross says

    June 11, 2020 at 6:59 pm

    Great tutorial! Thank you for the instructions! An idea I had is to use a compass splayed to 1” to mark the cutting line. This would eliminate the need to mark the cutting line after the fact.

    Reply
    • Eden says

      June 11, 2020 at 10:26 pm

      Great idea! Thank you Peggy!

      Reply
  4. Kelly says

    September 16, 2019 at 9:14 am

    Absolutely love these bowl covers! I have added them to our article, 5 DIY Plastic Wrap Alternatives. You can check it out here if you like https://www.diythought.com/5-diy-plastic-wrap-alternatives/ Thanks!

    Reply
    • Eden says

      September 16, 2019 at 4:46 pm

      Yay!! Thank you SO much Kelly for including us! Thrilled to be part of your roundup!

      Reply
  5. Sabrina says

    July 5, 2019 at 7:24 am

    Are they microwaveable?

    Reply
    • Eden says

      July 8, 2019 at 2:26 am

      They are not, you have to remove it first.

      Reply
  6. Rebecca says

    June 27, 2016 at 3:42 pm

    Love these! Can they be washed in a washing machine?

    Reply
    • Eden says

      June 27, 2016 at 10:27 pm

      Thank you! You can!!

      Reply
  7. sharon says

    November 2, 2015 at 1:32 pm

    what a fantastic idea!!! i’m totally going to make these, thank you so much for the good directions too!!

    Reply

Leave a Reply Cancel reply

Your email address will not be published. Required fields are marked *

Recipe Rating


Primary Sidebar

Eden of Sugar and Charm

Adding a little charm to the everyday life with entertaining and lifestyle inspiration, sweet recipes and classic style… your daily dose of sugar and charm!

Meet
Eden

Eden’s Corner

Eden's Corner

Sign Up for our Newsletter

Signup for the Newsletter
View our Most Charming Posts

Seasonal Recipes

The Best Banana Bread Recipe Ever

The Best Banana Bread Recipe Ever

Complete Guide to Making Homemade Popsicles + Recipes

Complete Guide to Making Homemade Popsicles + Recipes

How to Make Delicious and Easy Monkey Bread!

How to Make Delicious and Easy Monkey Bread!

How to Create the Perfect Cheese Platter

How to Create the Perfect Cheese Platter

A Colorful Backyard Carnival Party Theme

A Colorful Backyard Carnival Party Theme

Easy Homemade Caramel Sauce

Easy Homemade Caramel Sauce

Popular Posts

The Best Cookie Recipes

The Best Cookie Recipes

Cranberry Orange Cornbread Recipe

Cranberry Orange Cornbread Recipe

Super Moist Easy Pumpkin Bread Recipe

Super Moist Easy Pumpkin Bread Recipe

Frozen Gin and Tonic Recipe

Frozen Gin and Tonic Recipe

Valentine’s Day Charcuterie and Dessert Platter!

Valentine’s Day Charcuterie and Dessert Platter!

Guide to Hosting a Tropical Summer Party!

Guide to Hosting a Tropical Summer Party!

Footer

You Might Also Like

honey simple syrup with lavender

How to Make Honey Syrup

mint julep recipe

Easy Mint Julep Recipe

baked blueberry donuts

Best Baked Blueberry Donuts Recipe

The best buttermilk cake recipe with chocolate frosting and edible flowers on the top

The Best Buttermilk Cake Recipe 

How to Make Limoncello

Featured In:

Featured In Logos

Copyright © 2022 · Sugar and Charm · Privacy Policy · Accessibility Statement