
This post may contain affiliate links. Please see our disclosure policy.
This is the exact Lemon Gooey Butter Cake recipe I make every year to use up the harvest from my backyard lemon tree. While other recipes can be overly sweet, mine uses a heavy hand of fresh zest and juice to create a tart, vibrant contrast to the rich, buttery base.
It has the same melt-in-your-mouth texture as my Peanut Butter Gooey Butter Cake, Pumpkin Gooey Butter Cake, and my gooey chocolate chip cookie pie, but with a bright citrus flavor like all of my lemon recipes.

Pin this now to find it later
Pin ItWhat is a Lemon Gooey Butter Cake?
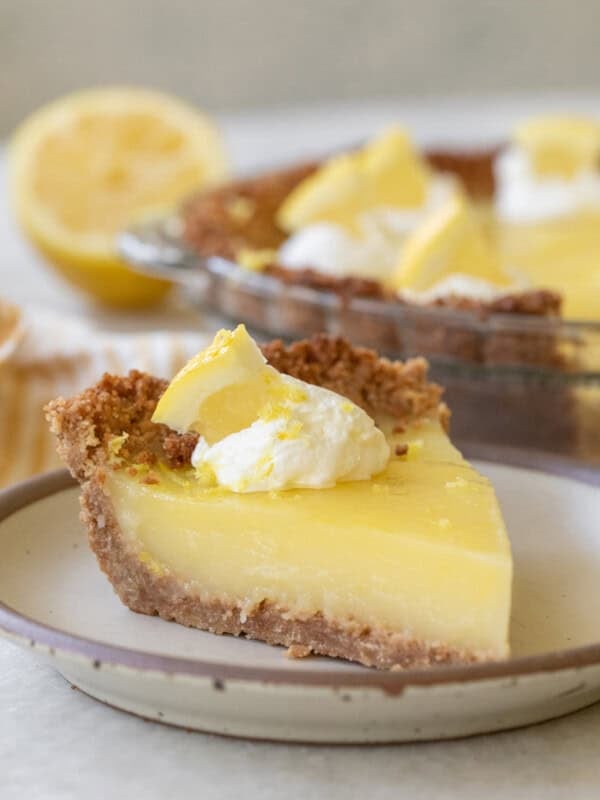
If you haven’t had a classic St. Louis Gooey Butter Cake, you are in for a treat. It’s a unique, two-layer dessert that sits somewhere between a dense lemon bar and a rich cheesecake.
The bottom is a firm, buttery crust (similar to a blondie), and the top is a luscious, cream-cheese-based custard that stays soft and “gooey” even after cooling. My lemon version adds a bright, citrusy punch to that classic sweetness, making it a perfect springtime dessert.
Why This Lemon Gooey Butter Cake Works
Make-ahead friendly: The texture actually improves as it sits—the gooey layer firms up slightly while staying soft and creamy, making it even better the next day.
Perfect gooey texture: The cream cheese, eggs, and butter bake into a custard-like layer that stays soft in the center rather than fully setting—similar to the rich, tender texture of my gooey chocolate chip cookie pie.
Bright lemon flavor: Fresh lemon juice and zest add acidity, balancing the sweetness and keeping the cake from feeling too heavy.
Easy shortcut base: The cake mix creates a stable, buttery crust that holds up under the gooey layer without becoming soggy.
Lemon Gooey Butter Cake Ingredients
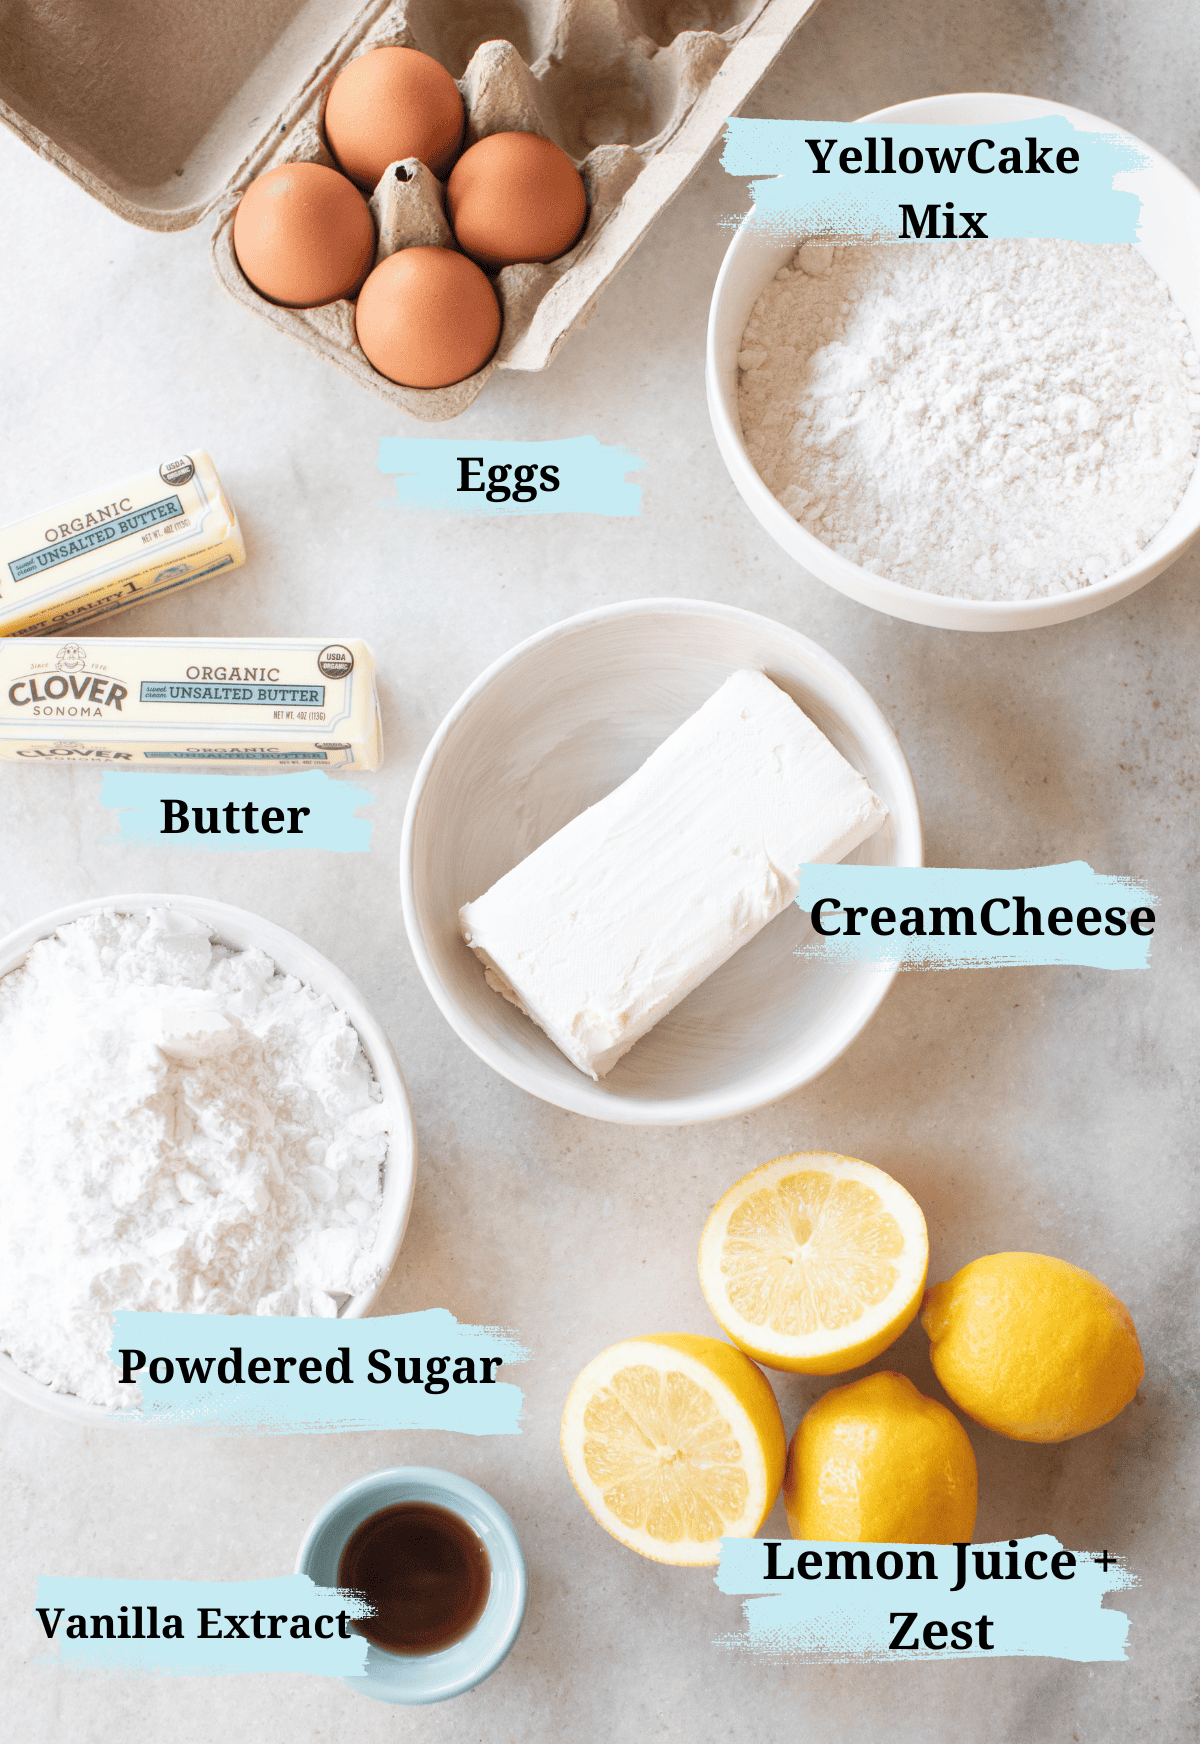
For the Bottom Layer:
- Unsalted Butter: Adds richness and a buttery base to the cake layer.
- Egg: Binds the ingredients together and provides structure.
- Yellow Cake Mix: The foundation of the cake, offering a buttery and slightly sweet flavor.
- Fresh Lemon Zest: Infuses the cake layer with bright, citrusy notes.
- Lemon Juice: Enhances the lemon flavor with a touch of tang.
For the Gooey Lemon Layer:
- Cream Cheese: This creates a creamy, tangy base for the gooey layer.
- Eggs: Help create a smooth and set texture while adding richness.
- Powdered Sugar: Sweetens the filling and adds a smooth texture.
- Unsalted Butter: Adds a rich, velvety consistency to the topping.
- Vanilla Extract: Balances the tangy lemon flavor with a warm sweetness.
- Lemon Zest: Intensifies the citrus flavor and provides a natural fragrance.
How to Make Lemon Gooey Butter Cake


- Prepare the Pan: Preheat your oven to 350°F (175°C). Line a 9×13-inch baking pan with parchment paper, leaving a slight overhang on the sides for easy removal and perfectly clean slices.
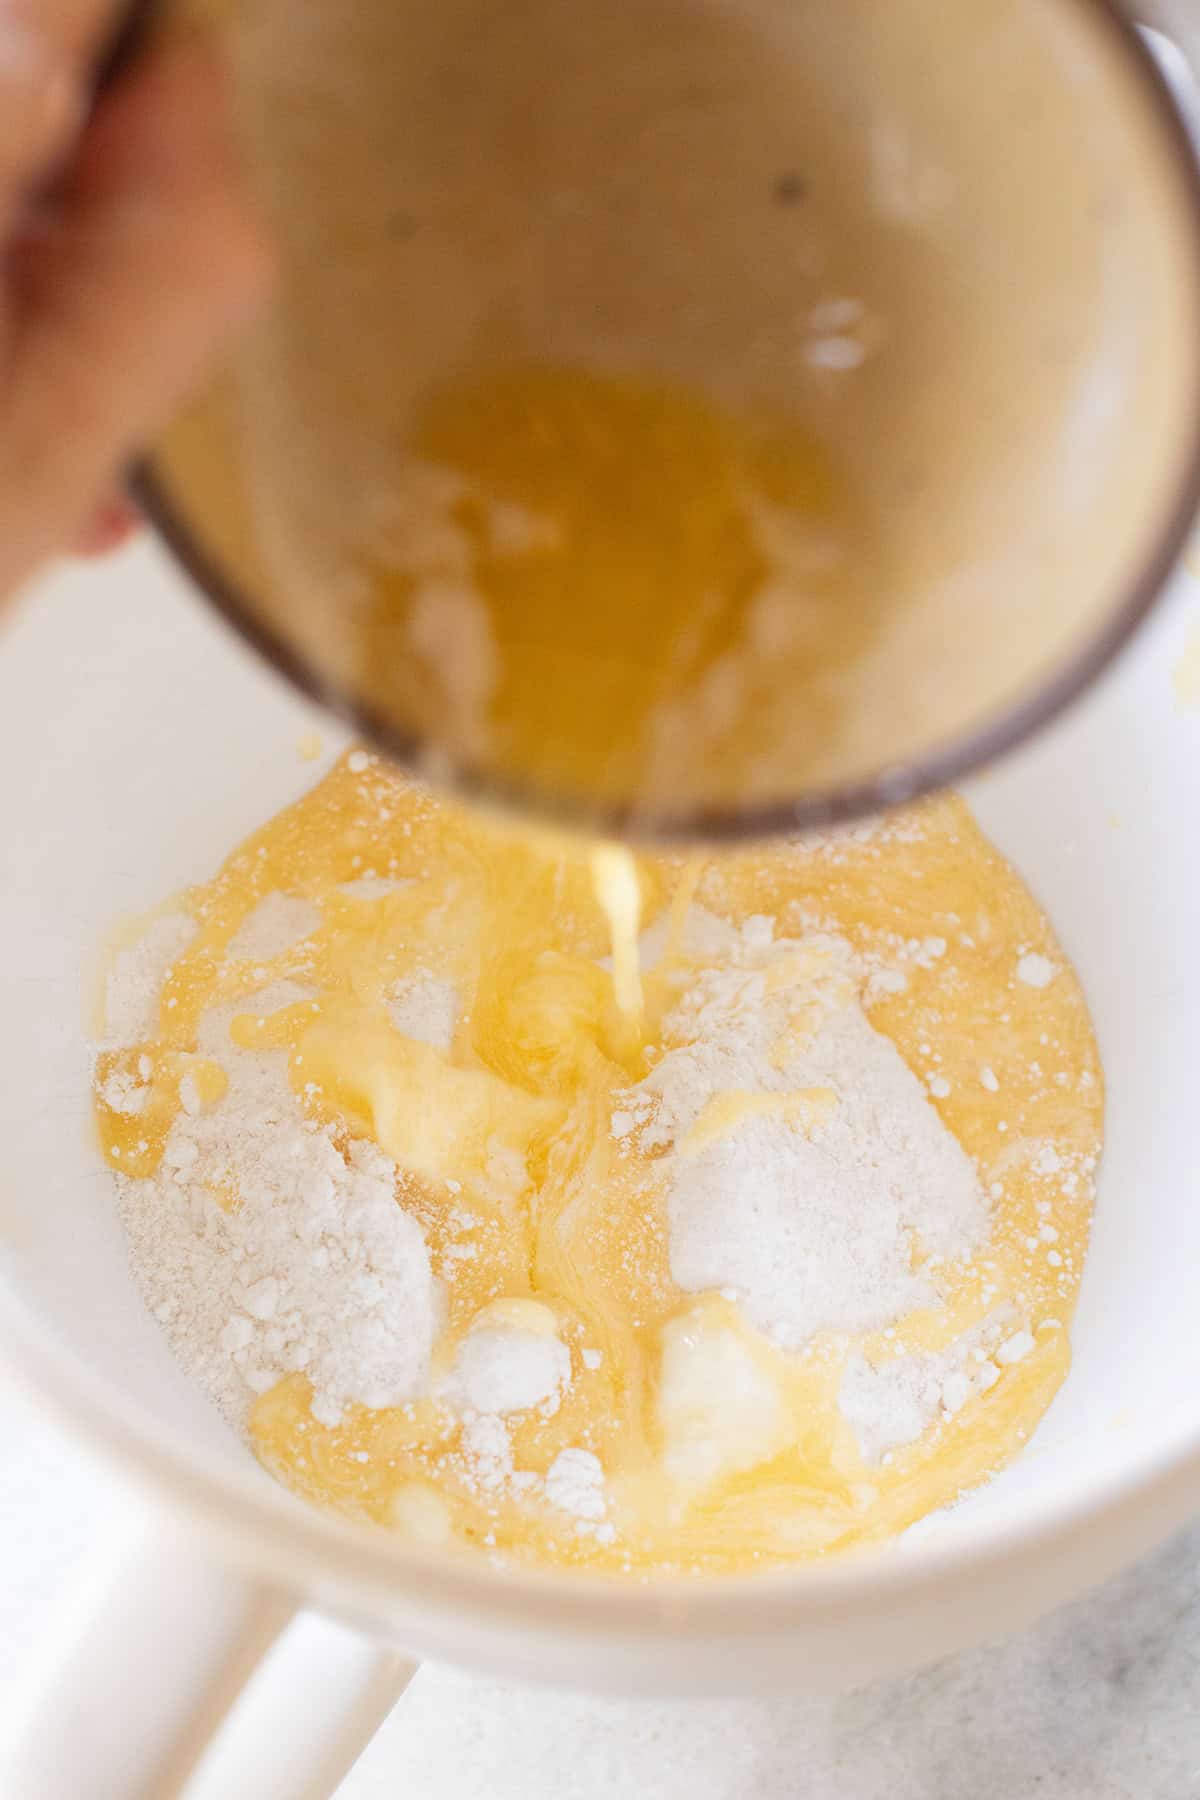
- Mix the Base Layer: In a stand mixer, combine the melted butter, egg, yellow cake mix, fresh lemon zest, and lemon juice. Mix on low speed until a thick, smooth dough forms with no dry streaks. Press this evenly into the bottom of your prepared pan.
- Whip the Gooey Layer: Using the same mixer (just a quick wipe-down is fine!), blend the softened cream cheese, eggs, powdered sugar, melted butter, vanilla extract, and additional lemon zest. Mix until the filling is creamy and luscious, then pour it over the base layer, spreading it to the edges.
- Bake to a Golden Jiggle: Bake for 35-40 minutes. You’re looking for edges that are lightly golden and set, while the center should still have a slight “jiggle” when you gently shake the pan. Don’t over-bake—that wobble is the secret to the gooey texture!
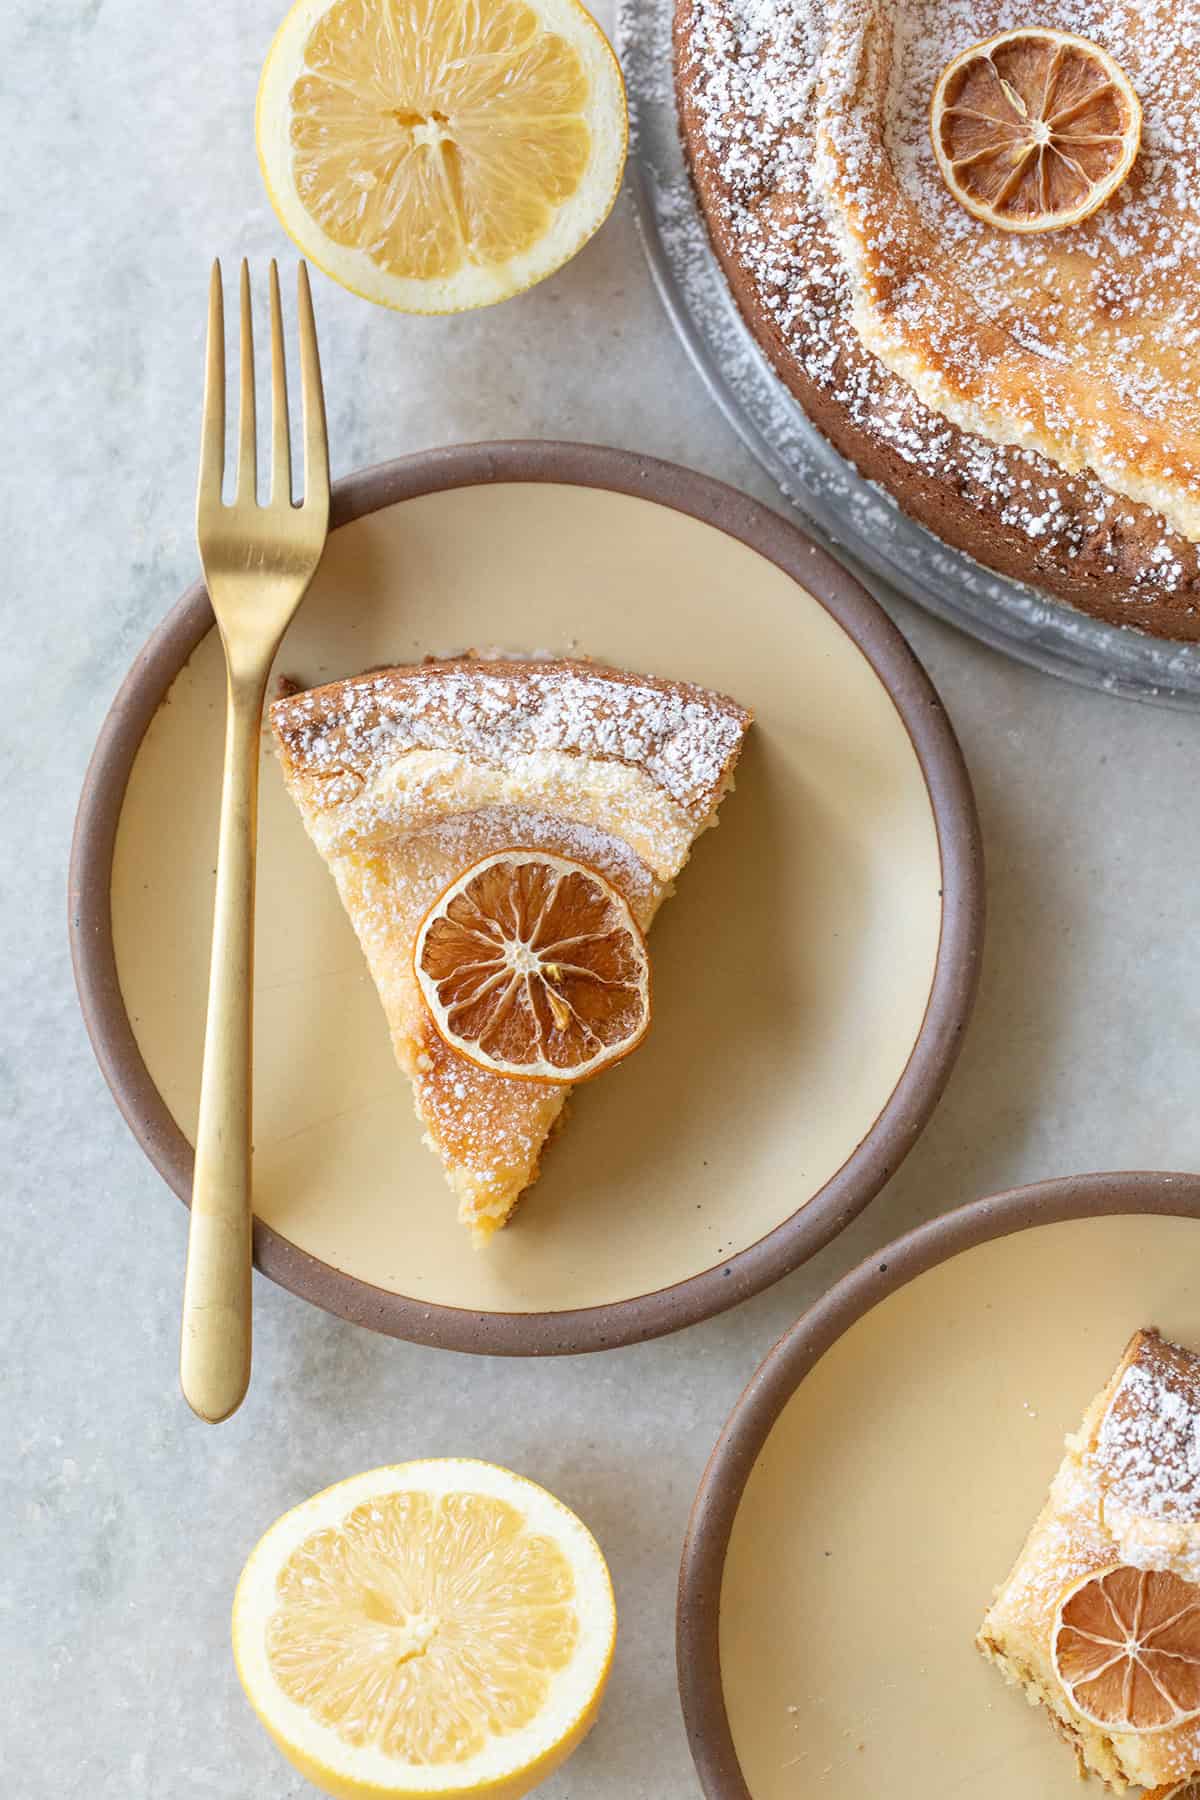
- Cool and Dust: Allow the cake to cool completely in the pan on a wire rack. Once cooled, use the parchment overhang to lift the bars out, dust generously with powdered sugar, and slice into squares.
Tips for the Perfect Lemon Gooey Butter Cake
To get that signature Sugar & Charm finish and a melt-in-your-mouth texture, keep these four essentials in mind:
Mastering the Zest: Always zest your lemons before you juice them. Use a microplane for fine, fragrant zest, and be careful not to grate the bitter white pith underneath. The oils in the zest are what give this cake its vibrant, sunny fragrance.
The “Slow & Low” Mix: This is my biggest secret! Keep your mixer on low speed when blending the gooey layer. Adding too much air will cause the cake to puff up like a soufflé and then collapse. We want it dense, creamy, and perfectly gooey.
The Jiggle Test: Don’t overbake! Pull the cake from the oven when the edges are set and golden, but the center still “wobbles” slightly like Jell-O. It will firm up into a fudgy consistency as it cools on a wire rack.
Room Temperature Ingredients: For a silky, lump-free layer, ensure your cream cheese is super soft. If you’re in a rush, microwave it for 10 seconds—cold cream cheese is the #1 cause of a grainy texture.
How to Store and Freeze
- Room Temperature: You can store this cake in an airtight container at room temperature for up to 2 days. Keep it in a cool, dry place away from direct sunlight.
- Refrigeration: For longer storage, cover the cake tightly or store it in an airtight container in the refrigerator for up to 5 days. For the best melt-in-your-mouth texture, let it sit on the counter for about 20 minutes to come to room temperature before serving.
- Freezing: This cake freezes beautifully. Slice it into portions and wrap each slice tightly in plastic wrap. Place the slices in a freezer-safe bag or container and freeze for up to 3 months. Simply thaw in the refrigerator overnight before serving.

FAQs
Don’t worry—a slight sink is actually a hallmark of a true St. Louis-style gooey cake! It means the center is moist and fudgy. However, to prevent a major collapse, make sure you mix the gooey layer on low speed. Whipping too much air into the cream cheese causes it to rise like a soufflé and then fall aggressively.
While you can, I highly recommend fresh. Since we are using lemons from the backyard tree (or the produce aisle!), the fresh zest and juice provide a vibrant, “sunny” flavor that bottled juice simply can’t match. The oils in the zest are the secret to that professional citrus aroma.
Use the “Jiggle Test.” The edges should be set and a light golden brown, but the center should still wobble slightly like Jell-O when you move the pan. If the center is firm, it’s overbaked and won’t have that signature melt-in-your-mouth texture.
Yes! This is one of the easiest recipes to adapt. Simply swap the yellow cake mix for a high-quality gluten-free version. The gooey topping is naturally gluten-free, so you won’t lose any of that decadent texture.
Because of the cream cheese and butter content, I recommend storing leftovers in an airtight container in the refrigerator for up to 5 days. I actually think the lemon flavor intensifies and the texture becomes even better on day two!
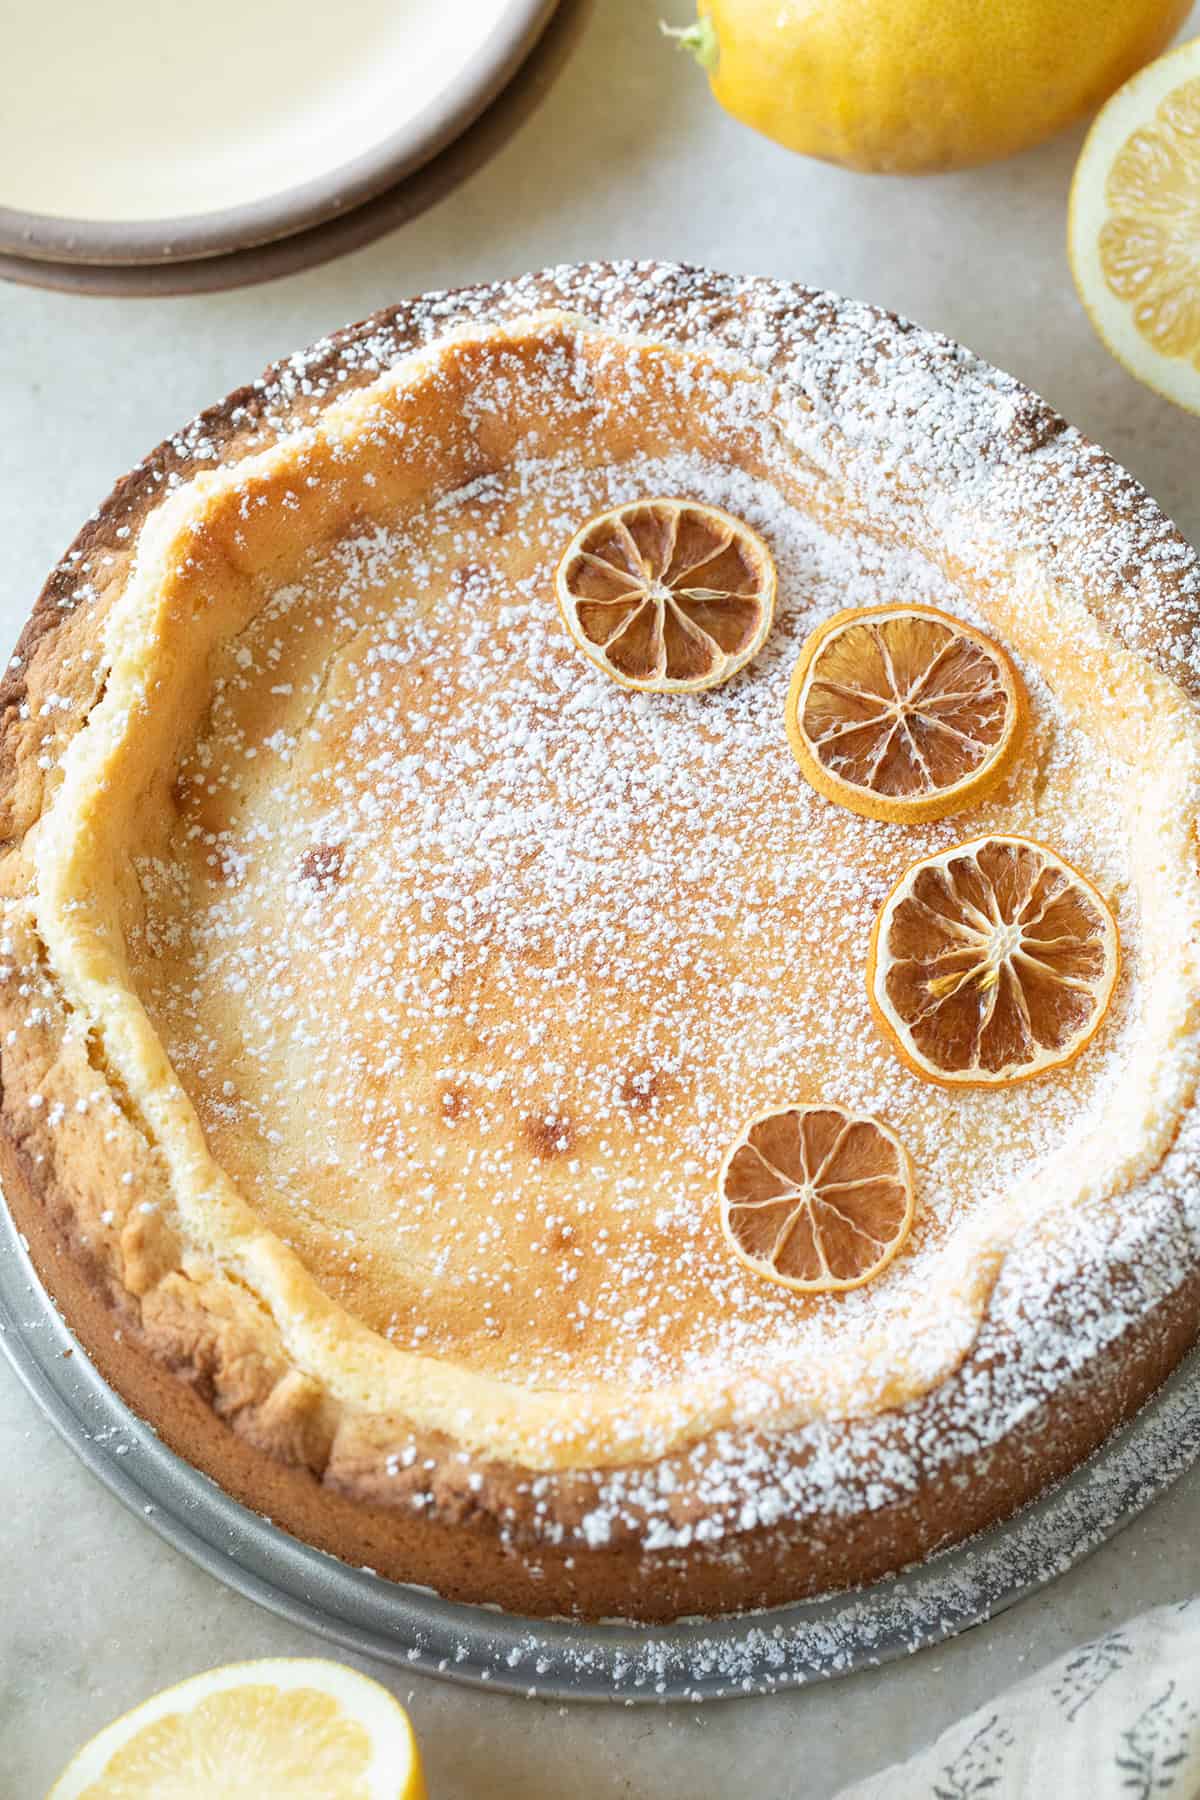
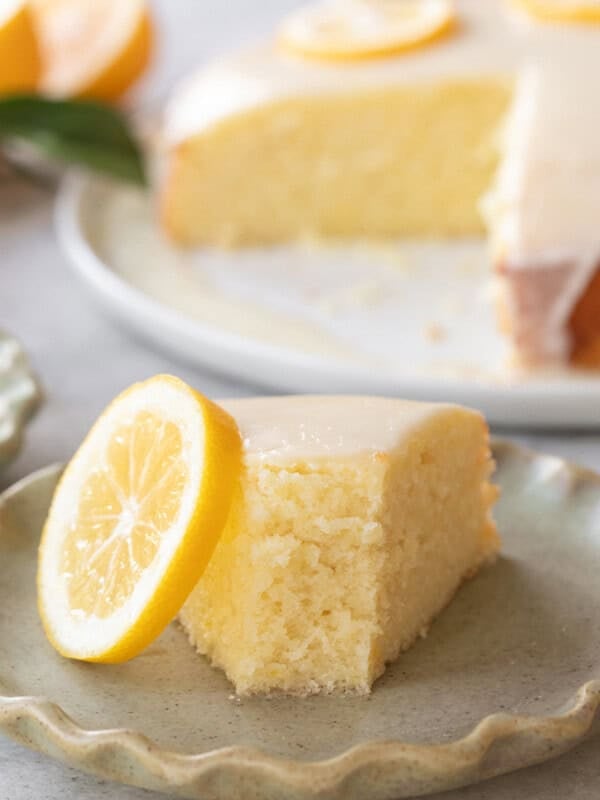
Yes! While I prefer the polished look of a 9-inch round springform pan (it makes such beautiful triangle wedges!), you can also bake this in a traditional 9×13-inch rectangular baking pan.
If you choose the 9×13 pan, the layers will be thinner, so you’ll want to reduce the bake time to 35–40 minutes. It’s a great option if you’re looking to serve these as classic, square dessert bars for a larger crowd!
More Lemon Desserts


If you make this lemon gooey butter cake, I’d love to hear what you think! Leave a comment below or tag @sugarandcharm so I can see your beautiful creations!

My new Entertaining book is here! Order Now!

Lemon Gooey Butter Cake
Ingredients
First Layer
- 1/2 cup unsalted butter, melted
- 1 large egg
- 1 box yellow cake mix , 13.25 oz
- 2 tbsp lemon zest
- 1 tbsp lemon juice, freshly-squeezed
Gooey Lemon Layer
- 8 ounces cream cheese, super soft
- 2 large eggs
- 2 cups powdered sugar
- 1/2 cup unsalted butter, melted
- 1 tsp vanilla extract
- 2 tbsp lemon zest
- 1 tbsp lemon juice , freshly-squeezed
Instructions
- Prepare the Pan: Preheat your oven to 350°F (175°C). Grease a 9-inch round springform pan with butter or nonstick spray, then line the bottom with parchment paper to ensure easy removal and a polished look on your cake stand.
- Make the Buttery Base: In a stand mixer fitted with the paddle attachment, combine 1/2 cup melted unsalted butter, 1 large egg, one 13.25 oz box of yellow cake mix, 2 tablespoons fresh lemon zest, and 1 tablespoon fresh-squeezed lemon juice. Mix on low speed until a thick, dough-like consistency forms.
- Press into the Pan: Scrape the mixture into your prepared springform pan. Use a spatula or your fingers to press it evenly into the bottom and slightly up the sides. Set aside.
- Whip the Gooey Lemon Layer: In the same mixing bowl (no need to clean it!), add 8 ounces of super soft cream cheese, 2 large eggs, 2 cups powdered sugar, 1/2 cup melted unsalted butter, 1 teaspoon vanilla extract, 2 tablespoons lemon zest, and 1 tablespoon lemon juice. Beat on low speed to combine, then increase to medium just until smooth and creamy (about 2-3 minutes). Scrape down the sides of the bowl.
- Assemble and Level: Pour the gooey lemon mixture over the base layer. Use a silicone spatula to spread it evenly to the edges, then tap the pan gently on the counter to release any trapped air bubbles for a smooth, crack-free top.
- Bake to Perfection: Place the pan on the center rack and bake for 40-50 minutes. The edges should be lightly golden, and the center should still have a slight jiggle, similar to a classic cheesecake. Avoid over-baking; the gooey layer will continue to firm up as it cools!
- Cool, Release, and Serve: Remove the cake from the oven and let it cool completely on a wire rack. Once cool, run a knife around the edges, release the springform, and dust with a generous layer of powdered sugar. Slice into wedges and enjoy
Notes
- Eden’s Pro Tip for the Perfect Texture: The biggest secret to a perfectly gooey center is to mix the topping on low speed. If you whip too much air into the cream cheese, the cake will puff up like a soufflé and then collapse aggressively. Slow and steady ensures that dense, fudgy consistency we want!
- Use Room Temperature Ingredients: Ensure your cream cheese, butter, and eggs are at room temperature for smooth blending and an even, velvety texture.
- Cream Cheese Must Be Very Soft: If it’s too firm, you’ll have tiny white chunks in your filling. Let it soften naturally on the counter or microwave in 10-second bursts until it is very pliable.
- Avoid Over-Baking: The cake’s center should still jiggle slightly like a cheesecake when you pull it. Over-baking will dry out the “gooey” layer. It is completely normal for the center to sink slightly as it cools—that’s the signature sign of a true gooey butter cake!
- Release Air Bubbles: Gently tap the pan on the counter a few times before sliding it into the oven to ensure a smooth, even surface.
Nutrition
Nutrition information is automatically calculated, so should only be used as an approximation.


Made this today, and OMG it tastes heavenly!! Thank you for sharing this recipe.
So happy to hear that!!
I just made this. It smells devine. I can’t wait until it cools so I can eat it.