DIY Photo Birthday Party Hats
Feb 21, 2012, Updated Mar 11, 2025
This post may contain affiliate links. Please see our disclosure policy.
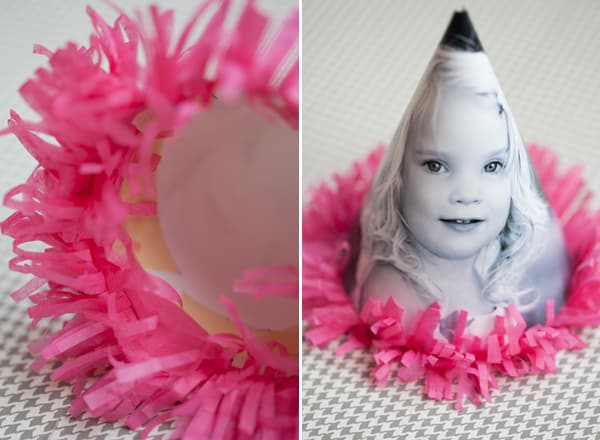
These DIY photo birthday party hats are an easy and inexpensive way to add a little personalization to your party and entertain your guests with photos!
Pin this now to find it later
Pin ItI adore these picture-perfect photo birthday party hats!! I absolutely love personalizing birthdays and making them special with small details. I had a request this weekend (from a sweet 5-year-old! haha) to make her a birthday hat just like the one I made for her brother.
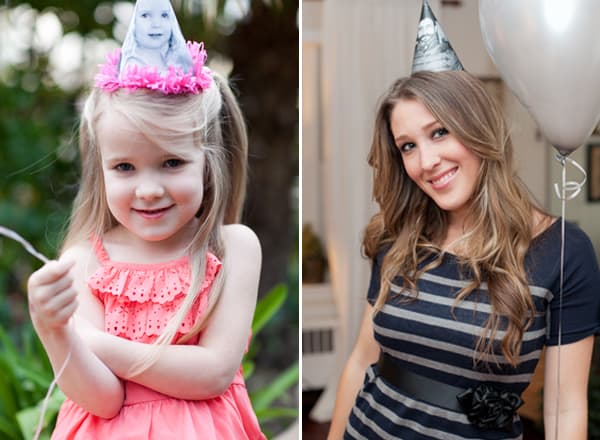
I’m telling you, people love these photo party hats! I made them for my father-in-law’s 60th birthday as well and they’re always a hit at the party and look adorable on children!
I saw the idea in Martha Stewart last year and I still use the same template from her site… I made a few adjustments read below for the how-to
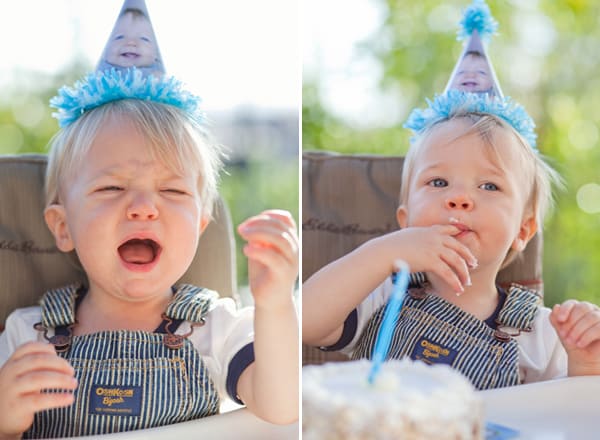
How funny are these pictures Zan captured of our best friend’s little boy?! It was his first birthday and I know these pictures will be memorable to him one day.
Below is a pic of the beautiful birthday girl, who wore her hat ALL evening! And that’s the hat I made for my father-in-law’s 60th birthday!
How To Make These DIY Party Hats – Step by Step
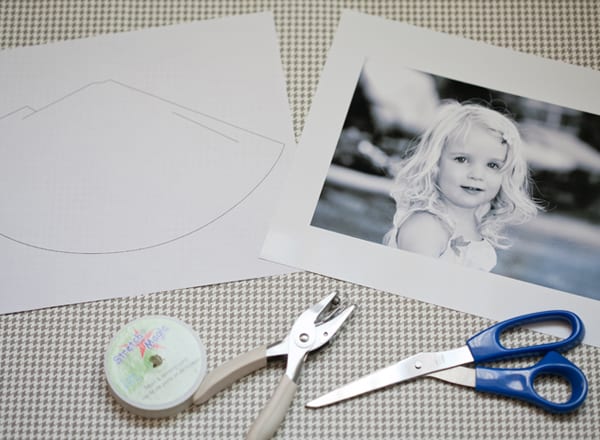
- Cut the template out and tape it to the photo. Hold it up to the light to see the picture shine through, so you know exactly where you’re placing the template and what will bee seen on your hat.
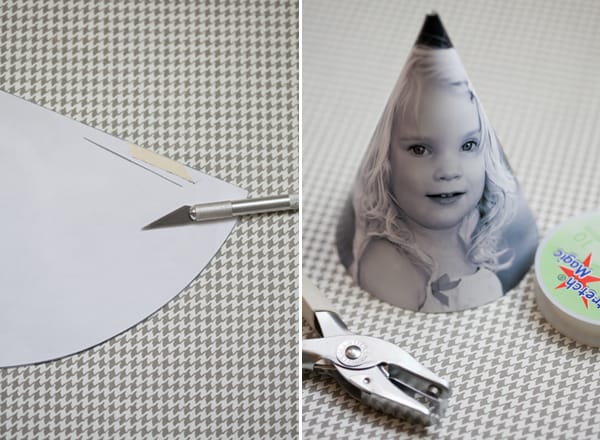
- Then, cut around the template. Using an X-acto knife cut the straight line.
- This is where you will fold the hat together and insert the flaps on the other side, so it stays put.
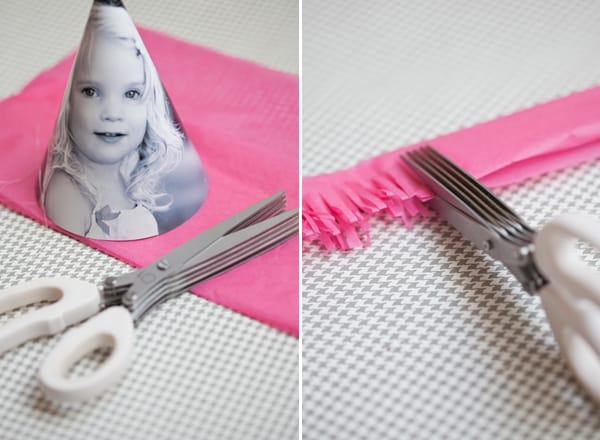
- If you want to add fringe, fold a long piece of tissue paper and using Martha Stewart fringe scissors cut along the bottom of one edge.
- Tape the fringe to the inside of the hat and voila your party hat is done!
Using the Template for these DIY Party Hats
Download the template from here, I scale it to fit one size of regular paper rather than legal size. I like the size of them better this way and it’s easier! Print out your favorite picture of the person you’re celebrating. It’s best if you have the picture printed 8×11 so you have room to move the template around.
A Great Way to Personalize a Party!
These party hats add a really personal touch to a party, any party really! From kids parties to retirement parties, these work across all age ranges!
You can opt for a funny pic or something more flattering, up to you and the tone you want to set. Whatever the case, they make for great photo ops!
An Easy Craft Project!
These party hats are a cinch to make, especially with the downloadable template. It just takes a few minutes per hat and you can customize them quickly with a fringe too.
In fact, you can get creative with your hat decorations, why not add some glitter or even mini pom-poms, the sky’s the limit!
Top Tips for These DIY Party Hats
- Use the template provided.
- Hold the photo and template up to the light so you can see where to place the photo.
- Customize the hats with a fringe, glitter or whatever crafting materials you want!
Check Out These Other Charming Party Ideas
15 Super Amazing and Fun Halloween Party Ideas
How to Throw a Last Minute Birthday Party!
Guide to Hosting a Tropical Summer Party!
How to Host a Charming Oscar Party at Home
10 Great Birthday Party Favor Ideas for Kids by Mommy Poppins
DIY Party Decorations On A Budget by That Sweet Gift
If you have tried this DIY Photo Party Hat project, then please rate it and let me know how it turned out in the comments below!
You can also FOLLOW US on FACEBOOK, INSTAGRAM, and PINTEREST to see more delicious recipes, cocktails, desserts and party ideas!



Love these! Are you printing them on photo paper or standard printer paper?
Hi Taylor! I used photo paper so they were thick!
Hi
Such a cute idea – what did you use to hold the hats on?
TIA
Sheri
Hi Sheri! We used an elastic string that’s clear. You can find them in the beading and jewelry area of a craft store!