
This post may contain affiliate links. Please see our disclosure policy.
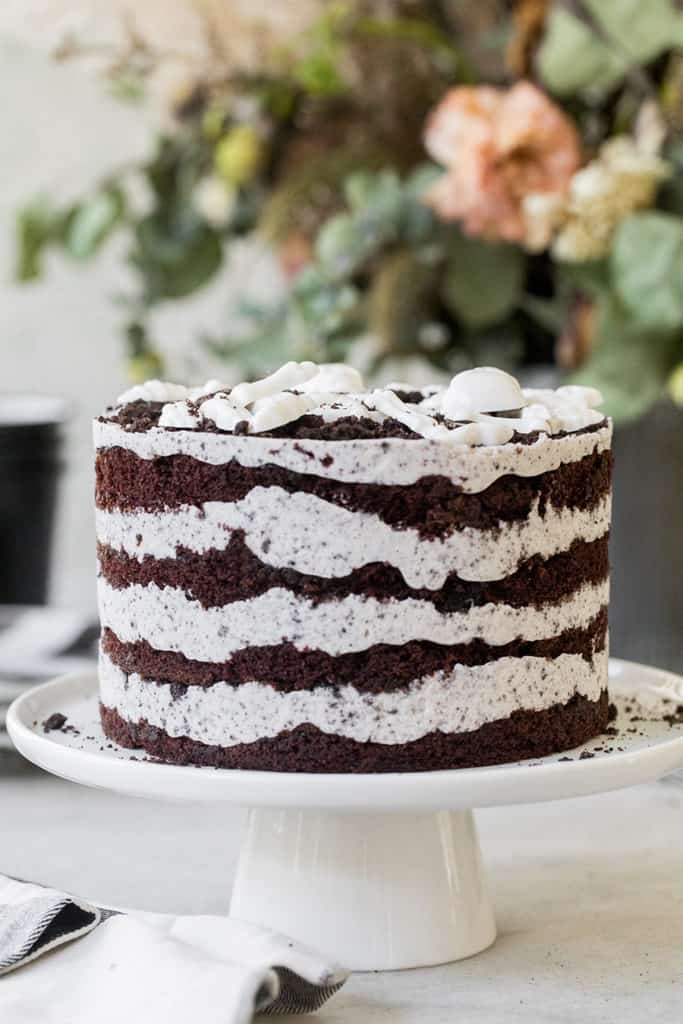
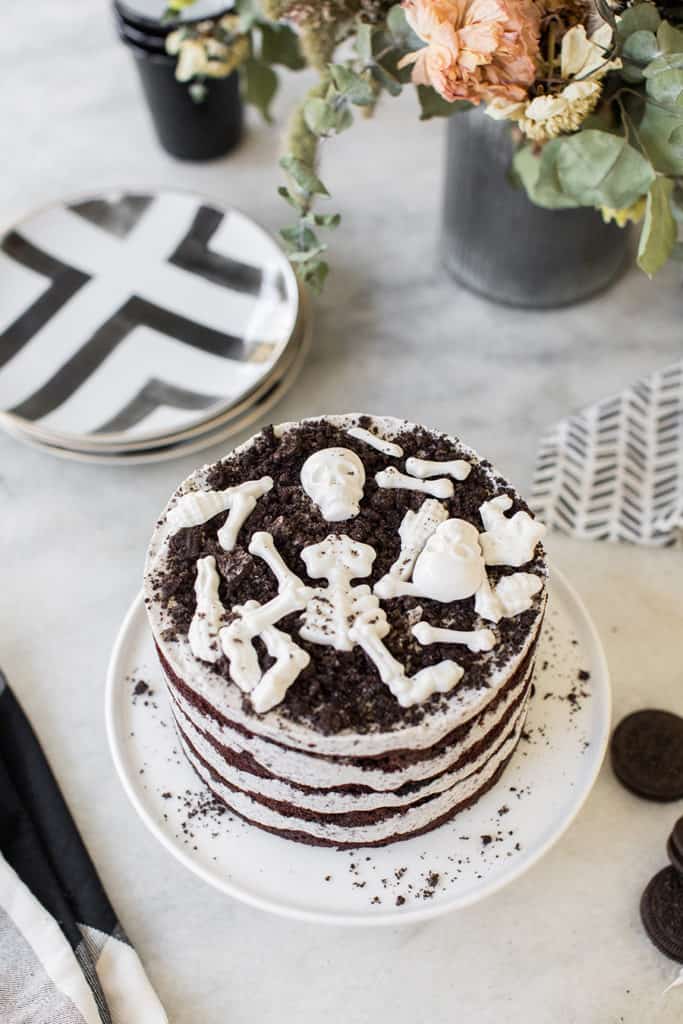
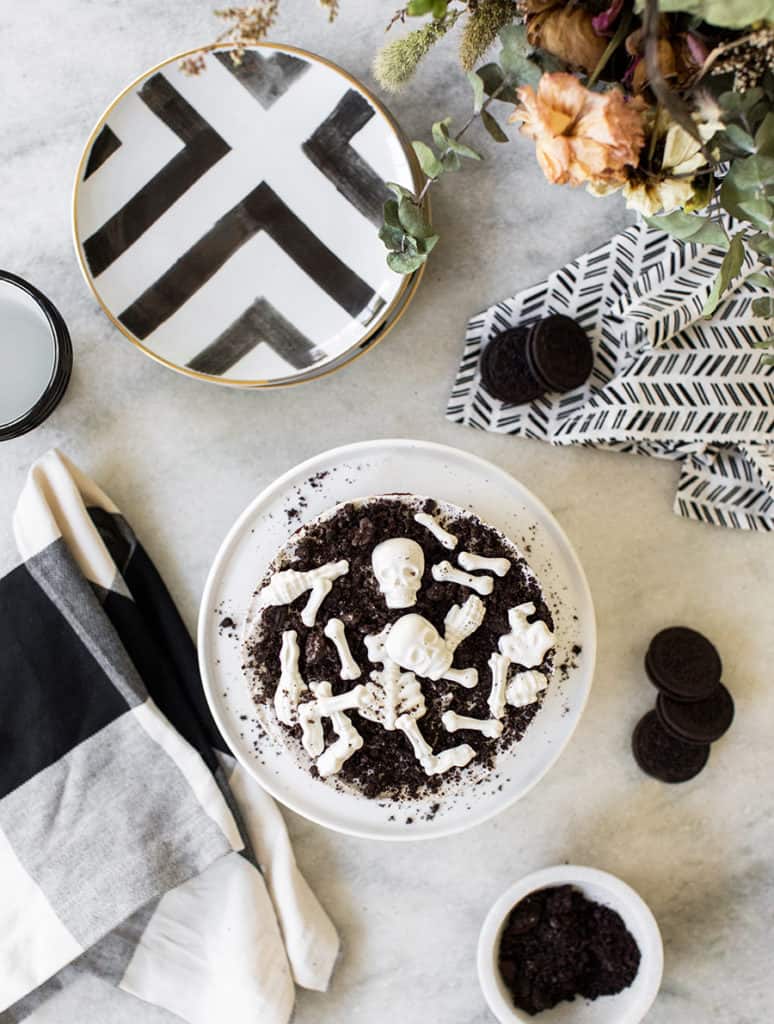
We used the same technique as this cake to make our most delicious Oreo Halloween cake! Frosted with an Oreo frosting and chocolate skeleton bones!
Pin this now to find it later
Pin ItA few month ago I used a new cake making technique that the amazing professionals use at Milk Bar Bakery use. Did you know you can take classes at a few of their locations?! I made this 4th of July cake and it was fantastic so I wanted to try it with my favorite chocolate cake batter and Oreo frosting to make the most delicious Oreo Halloween cake!
It’s honestly so so GOOD! And that Oreo frosting is HANDS DOWN AMAZING. I’m surprised there was any left for the cake after I tasted a spoonful!
How to Make this Oreo Cake for Halloween
We used the same technique as this cake to make our the most delicious Oreo Halloween cake! Frosted with an Oreo frosting and chocolate skeleton bones!
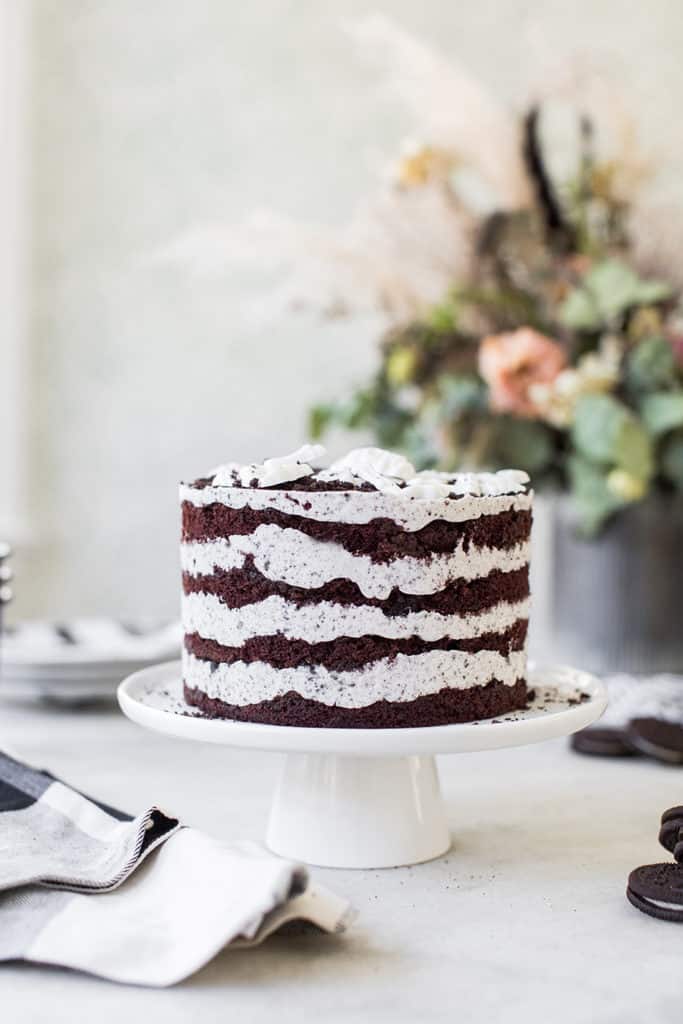
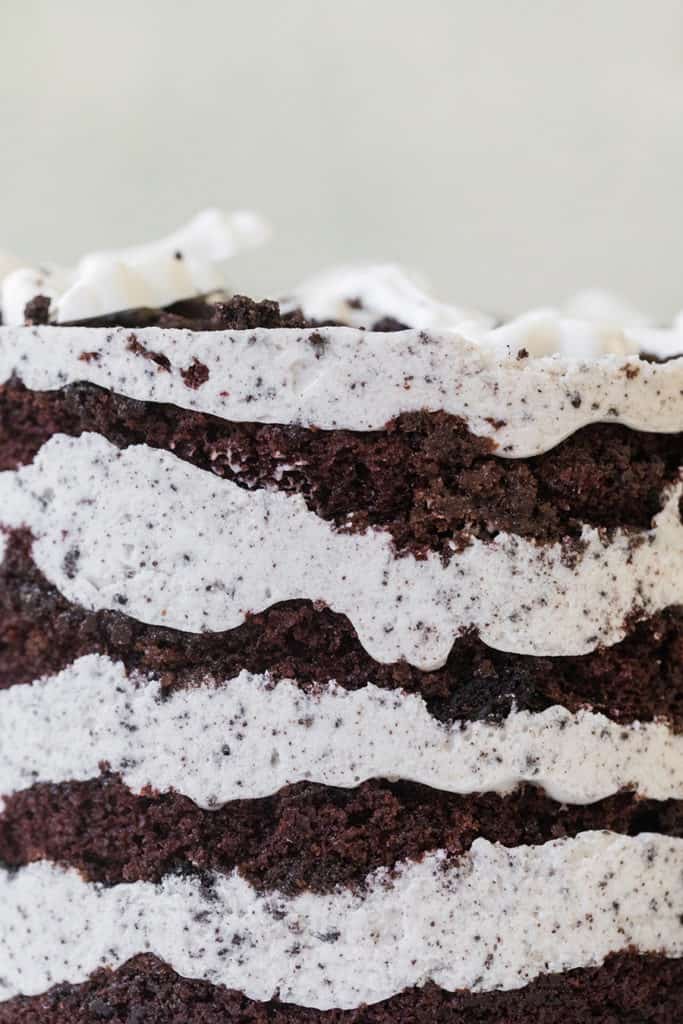
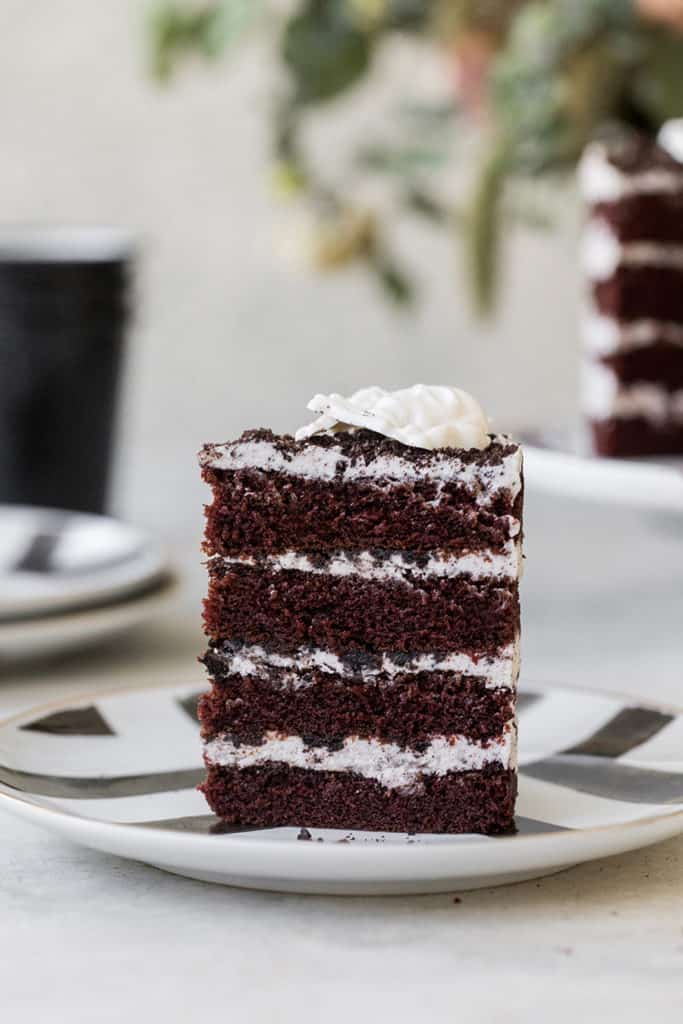
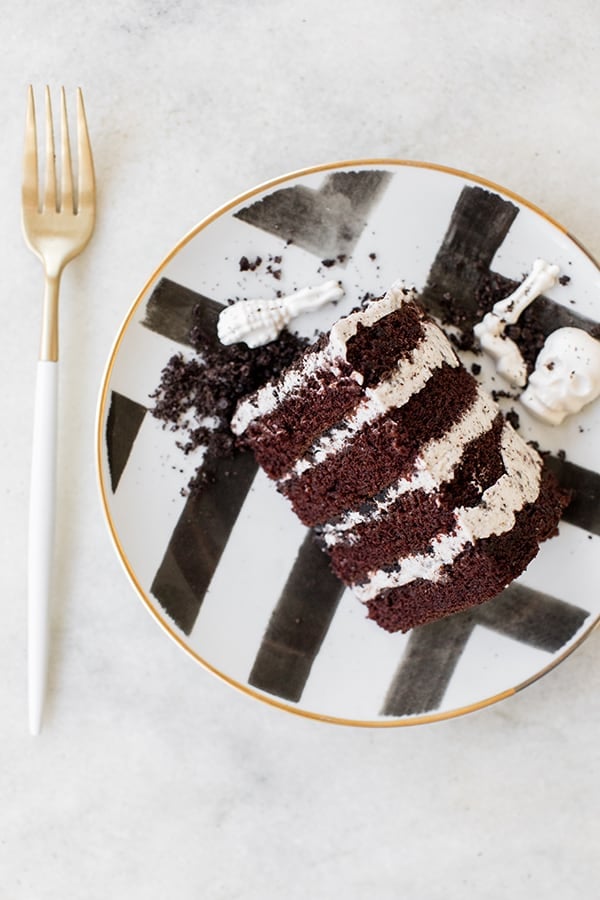
The chocolate layers of this cake are moist and pillow soft when scooped with a fork! It’s the perfect amount of chocolate taste and seems to be pretty foolproof every time I make it.
For this Oreo Halloween Cake, I used my favorite Devils Food Cake recipe and baked the batter in a sheet cake and used the 6″ round cutter to make circles. I explain more below.
I had already purchased a few ingredients and supplies for the previous cake, like the transparent cake edge, the clear vanilla extract and 6″ stainless steel cake cutter. You can get all of these on Amazon and I’m happy I have them now because I’ll be using this technique often!
For the assembly of this Oreo Halloween Cake:
- Bake the chocolate batter on a sheet pan, you’ll make the round cake part after the cake has baked. Follow these instructions for the chocolate cake, but bake on a sheet pan.
- Place a silicone baking mat or piece of parchment on a counter. Invert cake onto mat, then peel off parchment.
- Use cake ring to punch out two to three (or even 4 if you can) 6″ rounds from cake. These are your layers. You can also cut half circles to make one circle for the center of the cake since you won’t see it (the remaining cake scraps will form the bottom layer of the cake).
- Line a sheet pan with a clean piece of parchment. Clean cake ring and place it in center of the pan. Use 1 acetate strip to line inside of cake ring. Place cake scraps inside ring and use the back of your hand to press scraps together into a flat, even layer (you never see this layer, so it’s okay that it’s messy—but since it’s the base of the cake, it needs to be flat).
- Combine milk and remaining 1 tsp. vanilla in a small bowl. Dunk a pastry brush in milk mixture and use half of it to generously moisten the base layer.
- Use the back of a spoon to spread about 3 Tbsp. frosting evenly over cake. Sprinkle 1/8 cup crushed Oreo crumbs evenly over frosting. Use the back of your hand to press them in place. Use the back of a spoon to spread another 3 Tbsp. frosting as evenly as possible over crumbs.
- With your index finger, gently tuck second acetate strip between cake ring and the top ¼” of the first acetate strip, so that you have a clear ring of acetate 5–6″ tall—high enough to support the height of the finished cake. Top with a cake round (if 1 of your 2 cake rounds is less pretty than the other, use it for the middle layer and save the most perfect one for the top). Brush layer with remaining milk mixture. Repeat frosting-crumb layering process.
- Nestle remaining cake round into frosting. Cover top of cake with remaining frosting. Use an offset spatula to form decorative swirls, or do as they do at Milk Bar and shape it into a perfectly flat top. Top with remaining birthday crumbs.
- At least 3 hours before serving the cake, pull sheet pan out of freezer and, using your fingers and thumbs, pop cake out of cake ring. Gently peel off acetate and transfer cake to a platter or cake stand. Defrost in fridge at least 3 hours.
- Transfer cake to freezer and freeze at least 3 hours to set cake and filling.
This video showing the process of the Classic Milk Bar cake helps a lot when putting this cake together.
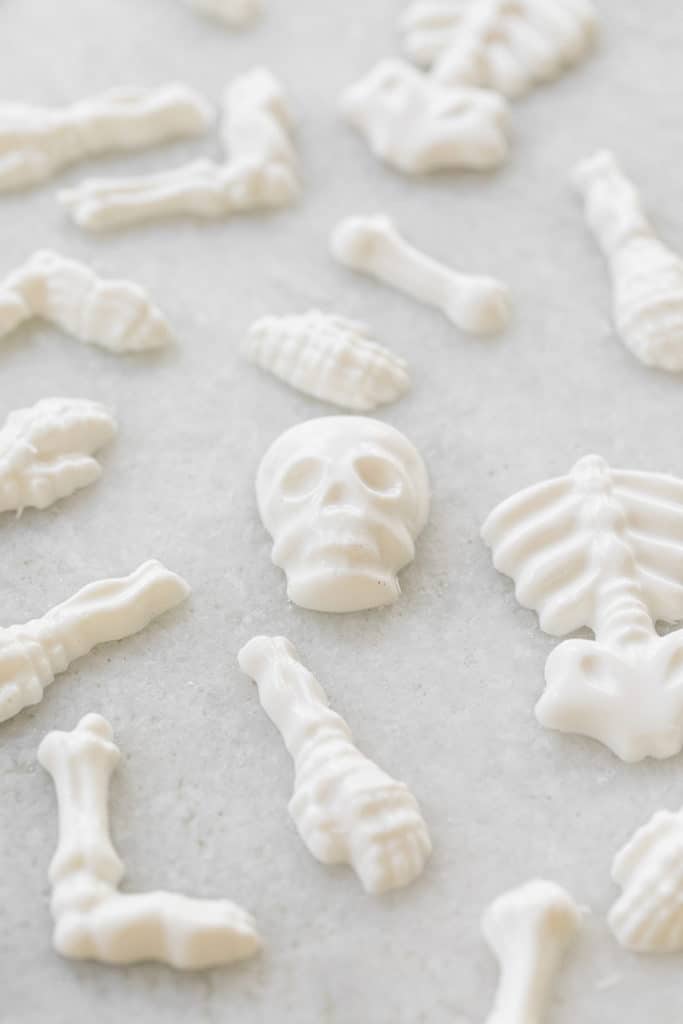
How to Make White Chocolate Skeleton Bones
To make the skeleton bones, we used this mold and white candy melts. Candy melts keep the color super white, white chocolate would give the bones a dash of a yellow hue.
If you make Oreo cake using this chocolate cake recipe and the Oreo frosting below, let us know what you think!
Also check out our Oreo Truffles and Oreo Lollipops!
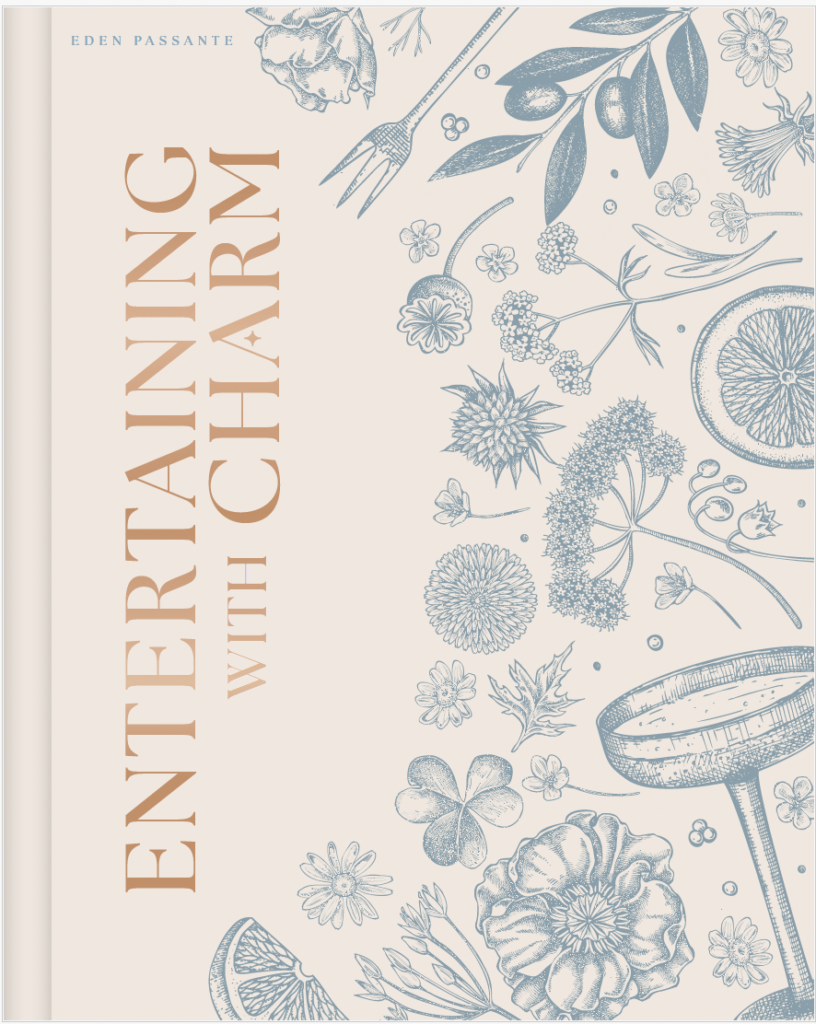
My new Entertaining book is here! Order Now!

Layered Oreo Halloween Cake
Ingredients
Creamy Oreo Frosting
- 1/2 cup unsalted butter, room temperature
- 1/4 cup vegetable shortening, room temperature
- 4 ounces cream cheese, room temperature
- 2 tbsp light corn syrup
- 1 tbsp clear imitation vanilla
- 1 1/4 cups powdered sugar
- 1/2 cup crushed Oreo cookies
- 1/2 tsp salt
- 1/4 tsp baking powder
- 1/2 tsp fresh lemon juice
Instructions
Oreo Frosting
- Add the butter, cream cheese and shortening in a mixing bowl fitted with a paddle attachment. Beat on high until light and fluffy. It’s very important all of the ingredients are room temperature so there are no clumps.
- Scrape down sides of the bowl and slowly stream in corn syrup and 1 tablespoon vanilla. Beat until mixture is silky smooth and glossy white, about 3 minutes.
- Scrape down sides of the bowl and, with mixer on low, add powdered sugar, salt, baking powder, and citric acid until just combined. Increase speed to medium-high and beat until you have a brilliant stark white, beautifully smooth frosting, about 4 minutes until super white and fluffy.
- Stir in the crushed Oreos last with just a few strokes.
- Store frosting in an airtight container in fridge up to 1 week.
Nutrition
Nutrition information is automatically calculated, so should only be used as an approximation.


What size sheet pan?