
This post may contain affiliate links. Please see our disclosure policy.
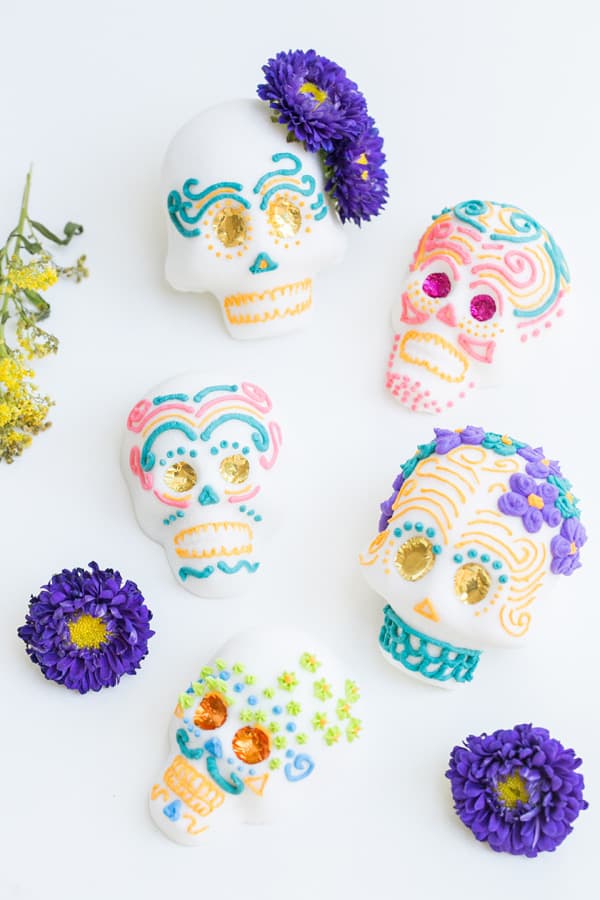
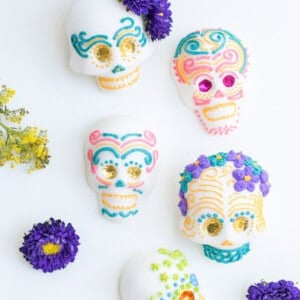
Mexican Sugar Skulls are one of the most joyful ways to celebrate Day of the Dead. Made from sugar, meringue powder, and water, then decorated with colorful royal icing and shiny foil, they’re vibrant little works of art that bring so much personality to the holiday!
If you love this idea check out my Sugar Skull Arrangement and Day of The Dead Make-up!
Pin this now to find it later
Pin ItWhy You’ll Love These Sugar Skulls
Festive décor – They’re perfect for Halloween parties, Day of the Dead altars, or even as gifts.
Full of tradition – Sugar skulls date back to 17th-century Mexico and are still part of Dia de los Muertos celebrations today.
Creative and colorful – Making sugar skulls feels a lot like carving pumpkins or decorating gingerbread houses, it’s creative, hands-on, and such a fun activity to do with family or friends.
A fun party activity – Invite a few girlfriends over, pour some cocktails, and turn decorating sugar skulls into a festive craft night. Everyone leaves with their own colorful creation!
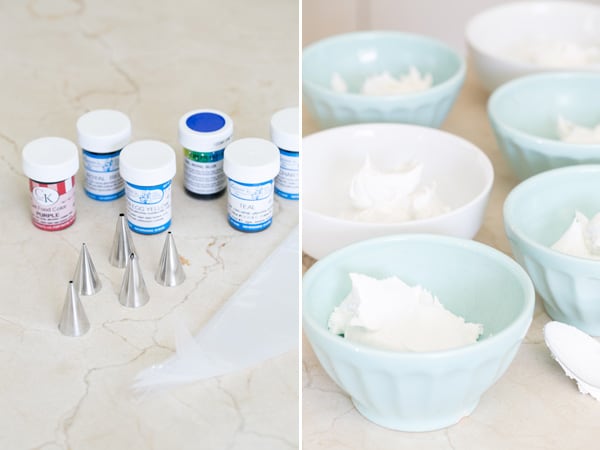
Supplies You’ll Need
You can find almost everything on Mexican Sugar Skull, which sells the authentic molds and materials. Here’s what I used:
- Oaxaca Large Sugar Skull Mold (2-sided so they can stand)
- Original Medium Sugar Skull Mold
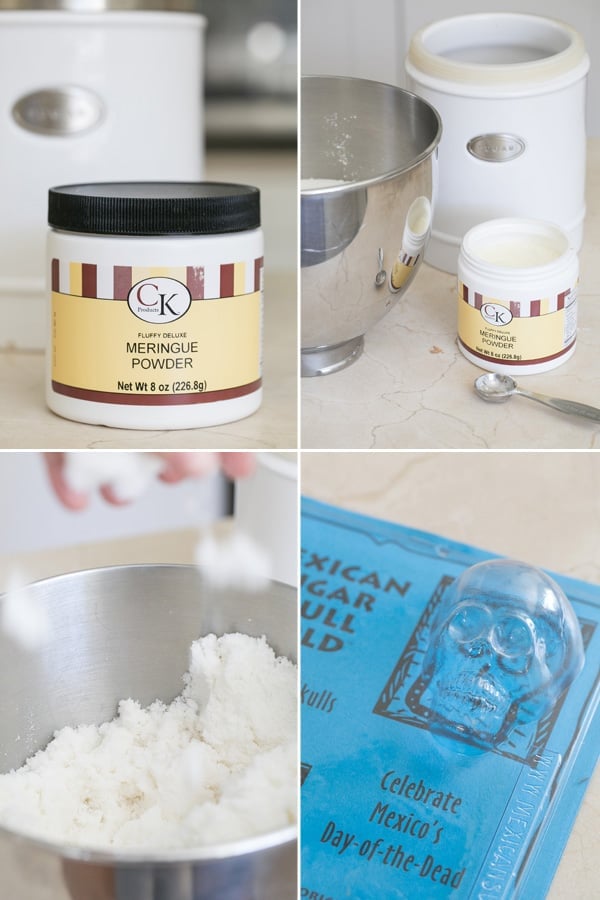
- Good quality meringue powder (8 oz jar – I used W3504)
- Food coloring paste (not liquid drops): Chartreuse, Royal Blue, Golden Egg Yellow, Purple, Teal, Royal Red
- Disposable icing bags + small round piping tips
- Assorted colored foil for eyes and crowns
- Cardboard squares for drying
Sugar Skull Ingredients
For the Sugar Skulls
- Granulated sugar – The base of the skulls. It packs tightly in the mold and dries into a solid form.
- Meringue powder – Helps the sugar harden and hold its shape. A good-quality brand is key here.
- Water – Just enough to moisten the sugar so it packs into the molds.
For the Royal Icing
- Powdered sugar – Creates the smooth, sweet base for the icing.
- Meringue powder – Acts as the stabilizer, giving the icing structure so it pipes cleanly and dries firm.
- Water – Adjust the amount to control consistency (thicker for outlining, thinner for flooding).
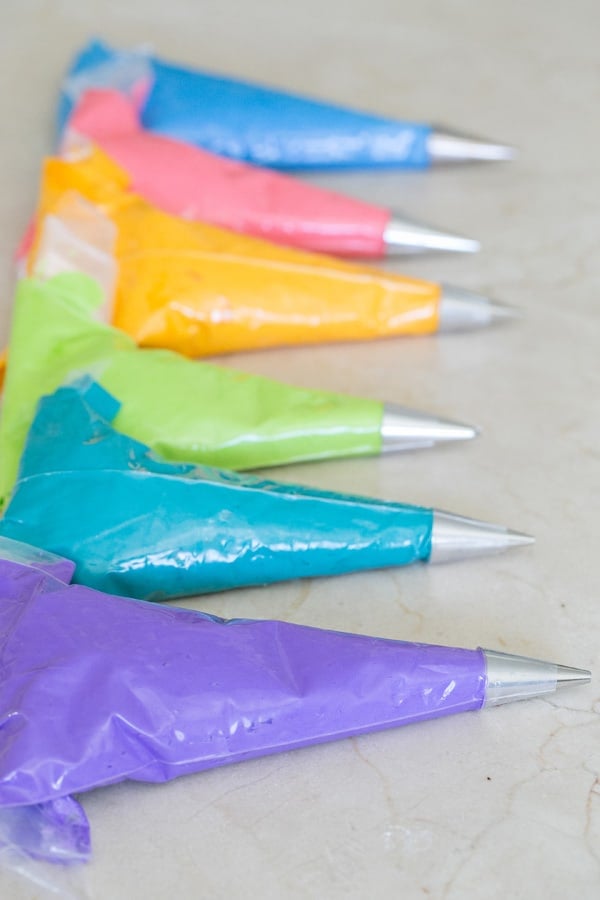
- Gel food coloring – Provides vibrant, opaque colors. Unlike liquid drops, gel coloring won’t thin out the icing.
How to Make Mexican Sugar Skulls
- Mix the base – In a large bowl, combine sugar, meringue powder, and water. Start with a spoon, then use your hands until the mixture clumps and holds its shape when squeezed. (It usually takes at least 5 minutes of mixing.)
- Mold the skulls – Pack the mixture tightly into your skull mold. Flip onto a cardboard square and gently lift the mold away.
- Dry overnight – Let skulls dry at least 12 hours. For 2-part skulls, after 4 hours, scrape out some sugar from the backs so they’re lighter when you glue them together.
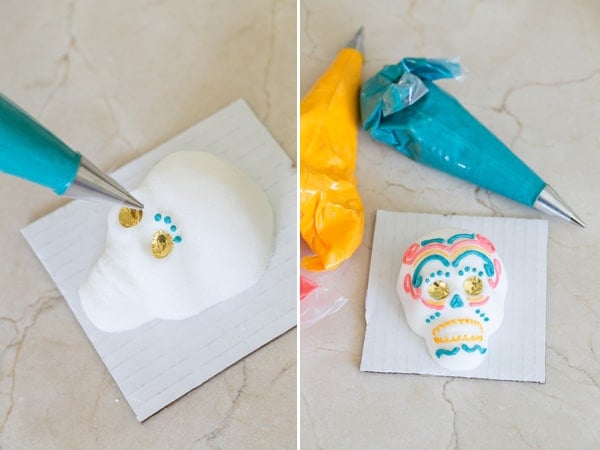
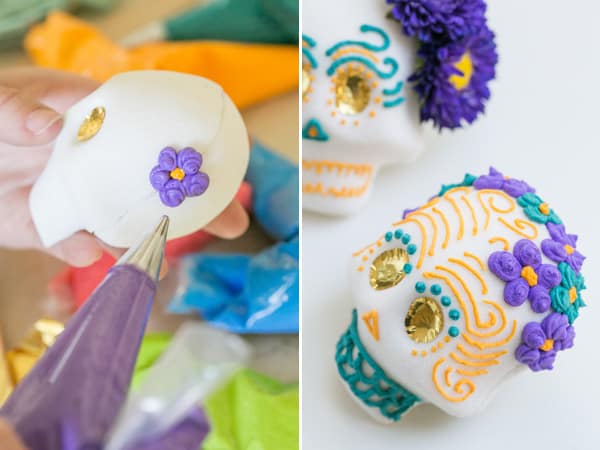
- Decorate! – Once dry, use royal icing, foil, sequins, beads, feathers, or whatever inspires you.
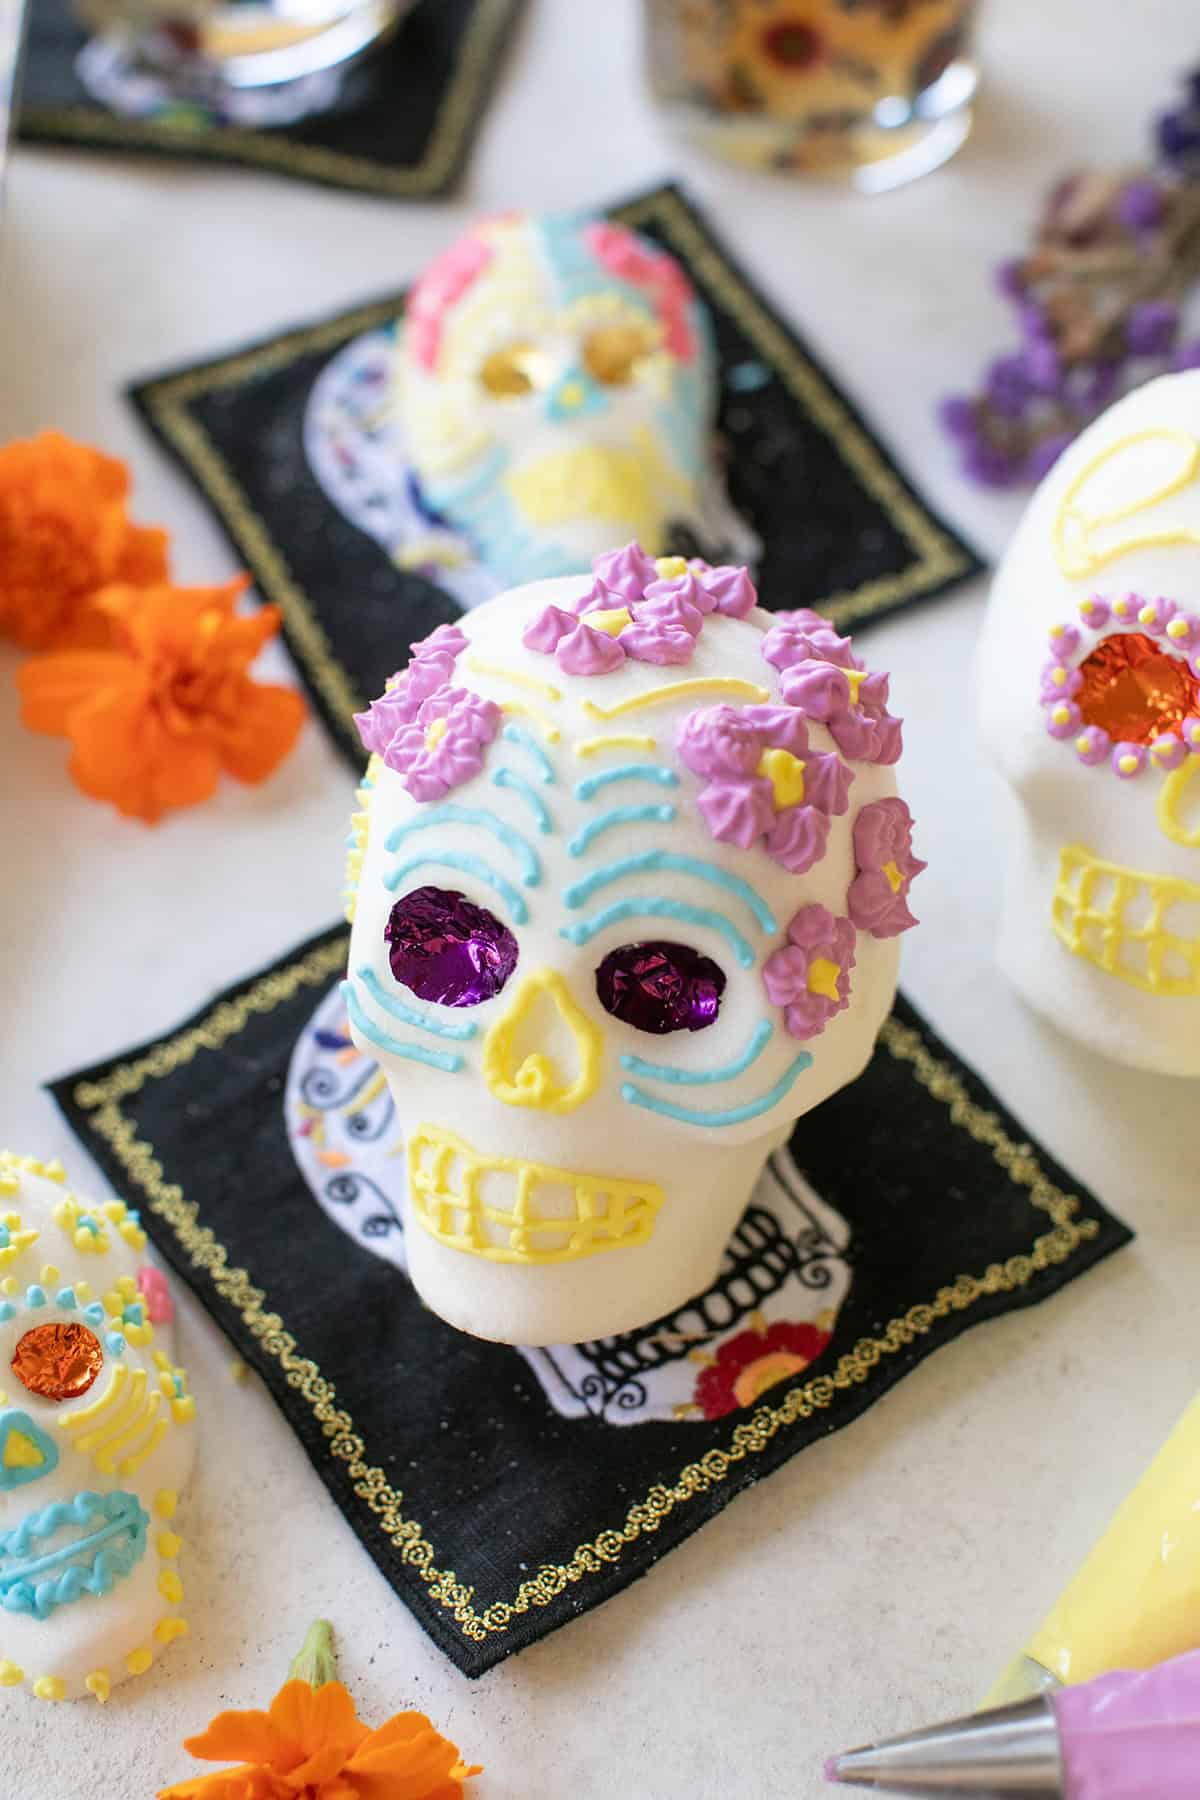
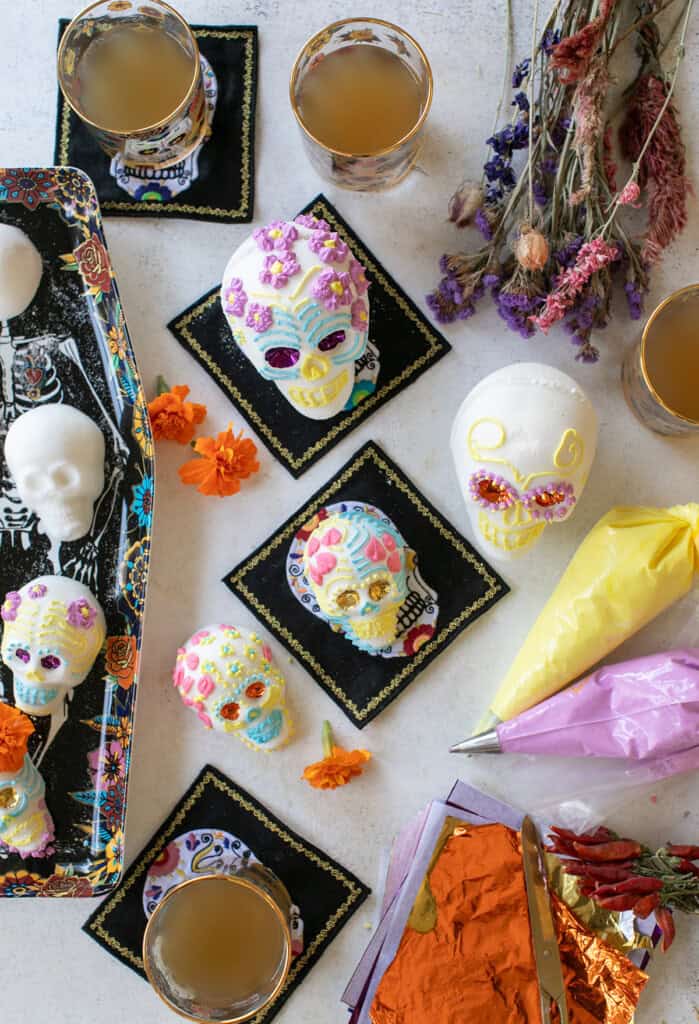
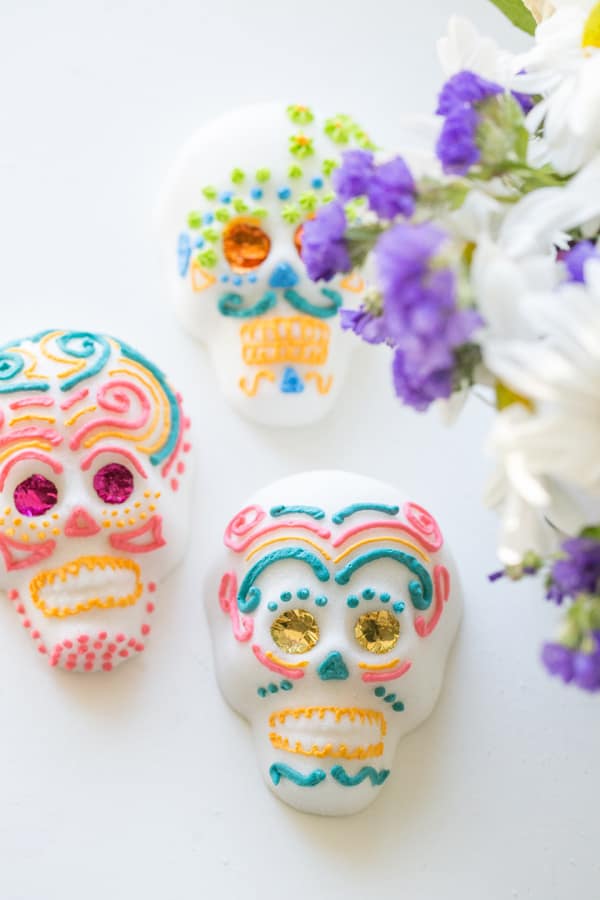
Decorating Sugar Skulls
Once your sugar skulls are dry, the fun begins! Use colorful royal icing, foil, sequins, or beads to bring them to life. Here are a few quick piping tips:
Let the icing “fall” onto the skull by holding the tip slightly above the surface.
Fill piping bags only ⅓ to ½ full so they’re easier to control.
Twist the top to remove air bubbles before piping.
Hold the bag between your thumb and first two fingers, using your other hand for support.
Practice designs on parchment paper before decorating.
Eden’s Tips
Practice piping on parchment first.
Keep unused icing covered so it doesn’t dry out.
If a piping tip clogs, use a needle to clear it.
For kids, let them finger-paint the icing if piping feels tricky.
Host a sugar skull decorating party—it’s the best way to get everyone involved!
Mexican Sugar Skull FAQs
Sugar skulls represent departed loved ones and are placed on altars with flowers, candles, and food during Día de los Muertos (Day of the Dead) to honor their memory.
Nope! Even though they’re made with sugar and meringue powder, they’re meant for decoration, not dessert. Think of them more like holiday ornaments than candy.
If you keep them dry and stored safely, decorated sugar skulls can last for years as colorful keepsakes.
The base recipe is simple—granulated sugar, meringue powder, and water—plus colorful royal icing and foil for decorating.
Yes, you can use regular liquid food coloring, but your designs won’t be as vibrant. For those bold, opaque colors you see on traditional sugar skulls, I recommend gel or paste food coloring.
The name comes from the traditional method: molding sugar into the shape of a skull and decorating it with bright designs to celebrate life and memory.
More Halloween Ideas


Holidays
Decoupage Photo Craft Pumpkins

Thanksgiving
DIY Pumpkin Concrete Decorations

Holidays
Witch Finger Pretzels
Making Mexican Sugar Skulls is such a fun and meaningful tradition. Each one turns out a little different, and that’s what makes them so special. I hope this guide inspires you to try them at home—don’t forget to leave a comment and rating below if you do!
My new Entertaining book is here! Order Now!
Mexican Sugar Skulls
Ingredients
Mexican Sugar Skull Recipe
- 8 cups sugar
- 8 tsp meringue powder
- 8 tsp water
Royal Icing Recipe
- 7 cups powdered sugar
- 1/2 cup meringue powder
- 2/3 cup water, more if needed
- food coloring
Instructions
Mexican Sugar Skulls
- In a large mixing bowl, combine granulated sugar, meringue powder, and water.
- Start mixing with a wooden spoon, then use your hands to work out all the clumps. Keep going until the mixture feels like damp sand and holds its shape when squeezed. (This usually takes about 5 minutes.)
- Tightly press the sugar mixture into your skull mold. Make sure it’s firmly packed—any gaps will cause cracks when the skull dries.Place a small piece of cardboard over the mold, flip it carefully, and gently lift the mold away to reveal the skull.
- Leave the skulls to dry for at least 12 hours. They need to be completely hardened before decorating.
- If you’re making two-part skulls, wait about 4 hours, then gently scrape out some sugar from the backs of each piece. This makes them lighter and easier to glue together with royal icing later.
Royal Icing Directions
- In the bowl of a stand mixer fitted with the paddle attachment (or use a large mixing bowl with a handheld mixer), combine powdered sugar and meringue powder. Whisk them together to remove any lumps.
- Divide it into bowls and tint each one with gel or paste food coloring.
- Transfer the icing into piping bags fitted with small round or decorative tips, depending on the designs you want to create.
- Pipe colorful swirls, lines, and flowers with royal icing.
- Add foil for eyes, sequins for sparkle, or even feathers and beads for personality.
- Add foil for eyes, sequins for sparkle, or even feathers and beads for personality.
Notes
- Consistency check: The sugar mixture should feel like damp sand and hold its shape when squeezed. If it’s too crumbly, add a few extra drops of water.
- Drying time: Let the sugar skulls dry at least 12 hours before decorating. For two-part skulls, scrape out a little sugar after 4 hours so they’re lighter when glued together.
- Royal icing fix: If the icing is too thick, beat in a tiny bit of water until smooth.
- Work quickly: Royal icing dries fast—keep bags twisted closed and cover bowls with plastic wrap pressed on top.
- Unclogging tips: If icing hardens in the piping tip, poke it out with a pin or toothpick.
- Decorating ideas: Add foil crowns, sequins eyes, marigold flowers, or even feathers to make each skull unique.
Nutrition
Nutrition information is automatically calculated, so should only be used as an approximation.


IT’S LOVELY!
thanks so much for sharing this! :))
Thanks for a beautiful rendition of this process! Nice work!
You did a beautiful job! Wow…..very detailed. I have seen these around and had no idea what they symbolized. Thanks!