This post may contain affiliate links. Please see our disclosure policy.
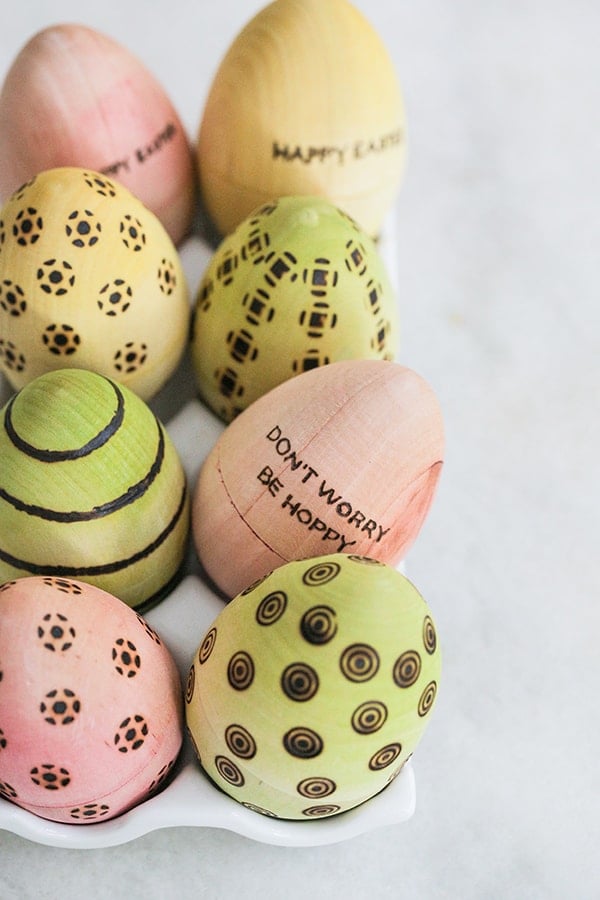
If you like the art of crafting as much as we do, then you’ll love making these wood-burning Easter eggs! Perfect for table settings and egg hunts! You can also reuse them every year! Read below to design your own wooden Easter eggs!
Pin this now to find it later
Pin ItWe can’t get enough of these wooden eggs! The best part is, they last forever, so you can enjoy your creations for years! Crafting has always made me feel relaxed. And wood-burning is no exception. Have you tried it?
You will need a wood-burning tool. I’ve had mine for years and I’m always thinking of unique ways to use it.

How to Engrave Wooden Easter Eggs
Supplies
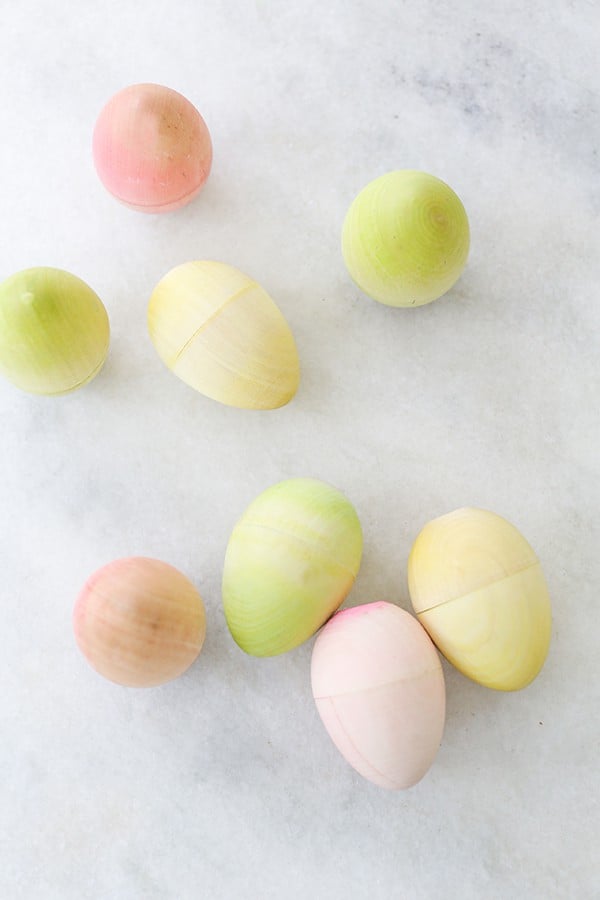
Egg dying kit – Standard one from the grocery store.
Made these eggs with dye and vinegar to create a very light pastel color on the wooden eggs.
I love how the Easter eggs turned out just with the dye too! So charming right?!
Directions
Dye the wooden eggs with an egg dying kit and use vinegar instead of water. Leave each egg in the bucket for a minute or two until the desired color.
Let the wooden eggs dry.
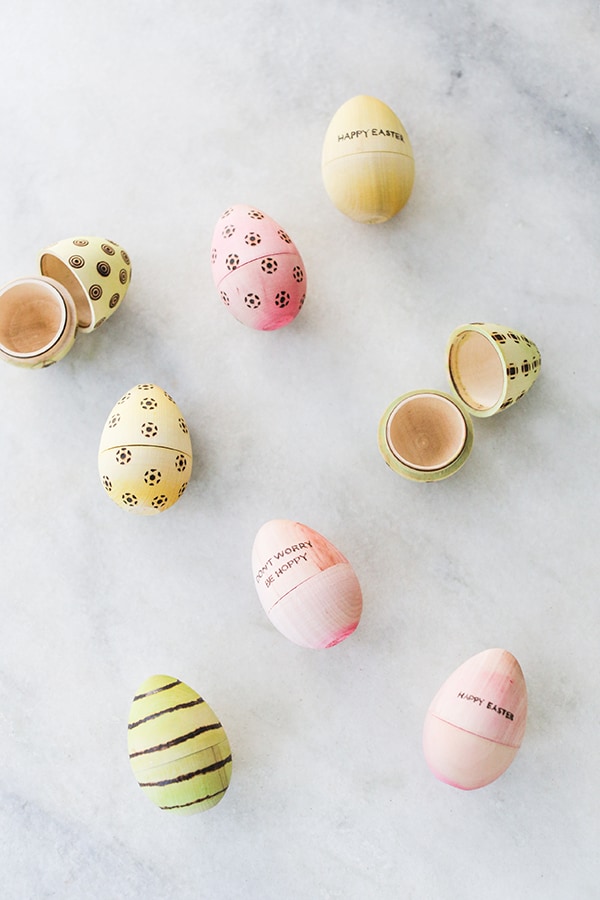
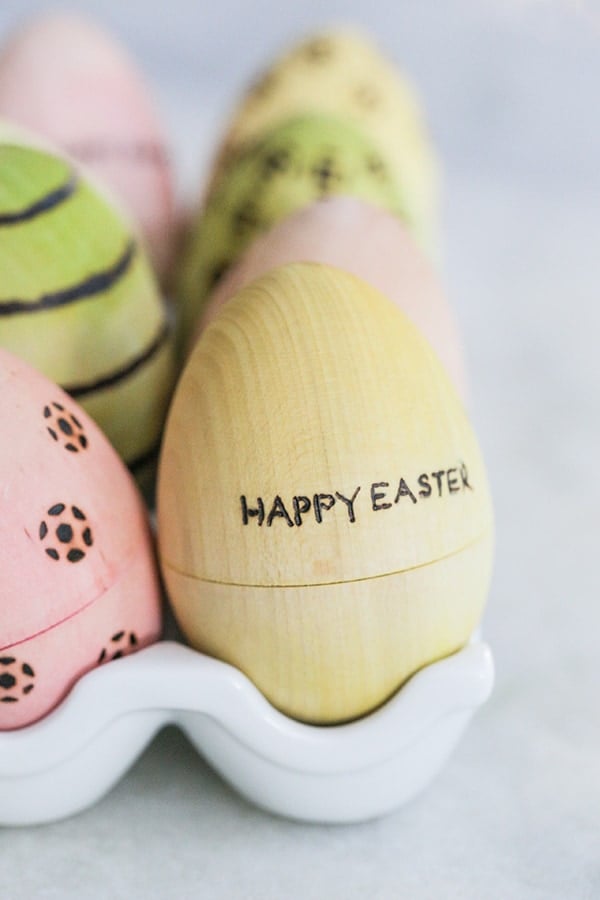
Once the wooden eggs have dried, you can choose your pattern or design. Most wood-burning kits come with different tips and designs. I used those tip patterns because they look good and they’re easy!
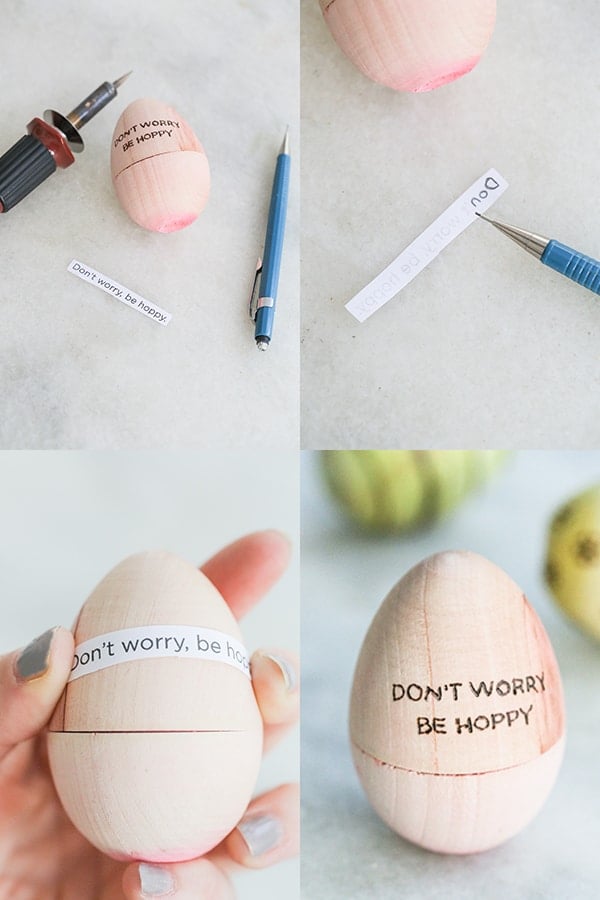
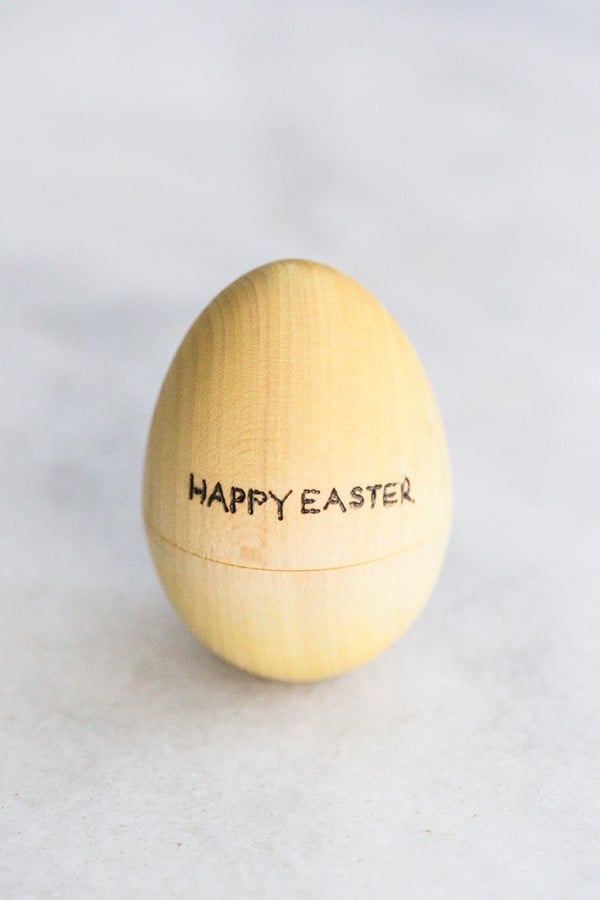
For the writing, print out what you want to burn into the egg, then just trace the back of the word, on the paper, with pencil and press it against the egg, scratching it in so it leaves an outline on the egg.
This makes it much easier to trace! I used the tiny point tip on the wood-burning tool to burn the letters in the egg.
How to use your Wooden Easter Egg
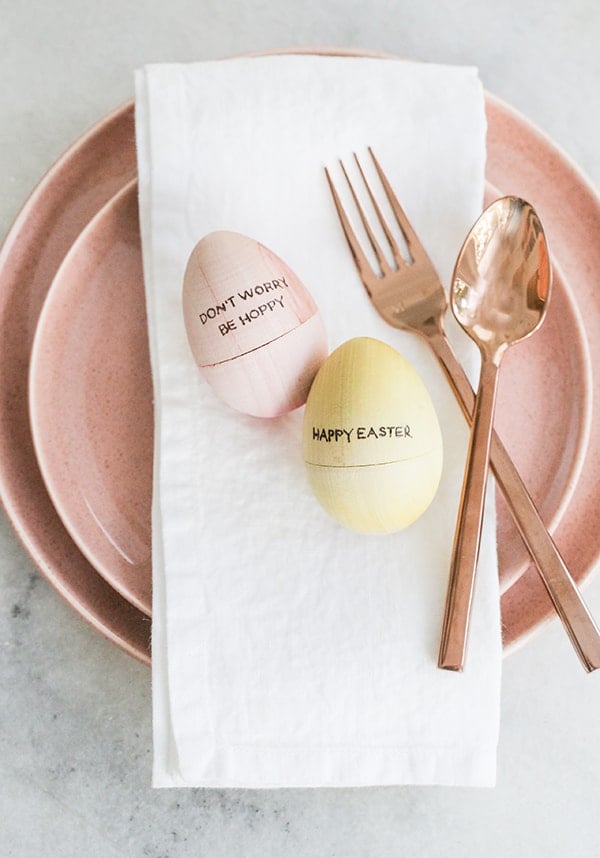
There are so many ways you can use these fun eggs! They’re adorable for an egg hunt, instead of letters you can engrave numbers on each egg! They’re also great for name cards for an Easter brunch too!
More Easter Egg Decorating Ideas

More Easter Ideas You’ll love!
Pin the Tail on the Bunny Printable
Let us know if you make these wooden Easter eggs by leaving a comment below! Also, tag your photos @sugarandcharm so we can see what you made and share!

Wood Burning Easter Eggs
Ingredients
- 6 wooden eggs
- 1 Easter egg dye kit
- 1 wood burning tool kit
Instructions
- Dye the wooden eggs with an egg dying kit and use vinegar instead of water. Leave each egg in the bucket for a minute or two until the desired color.
- Let the wooden eggs dry.
- Once the wooden eggs have dried, you can choose your pattern or design. Most wood-burning kits come with different tips and designs. I used those tip patterns because they look good and they’re easy!
- For the writing, print out what you want to burn into the egg, then just trace the back of the word, on the paper, with pencil and press it against the egg, scratching it in so it leaves an outline on the egg.
- This makes it much easier to trace! I used the tiny point tip on the wood-burning tool to burn the letters in the egg.