
This post may contain affiliate links. Please see our disclosure policy.
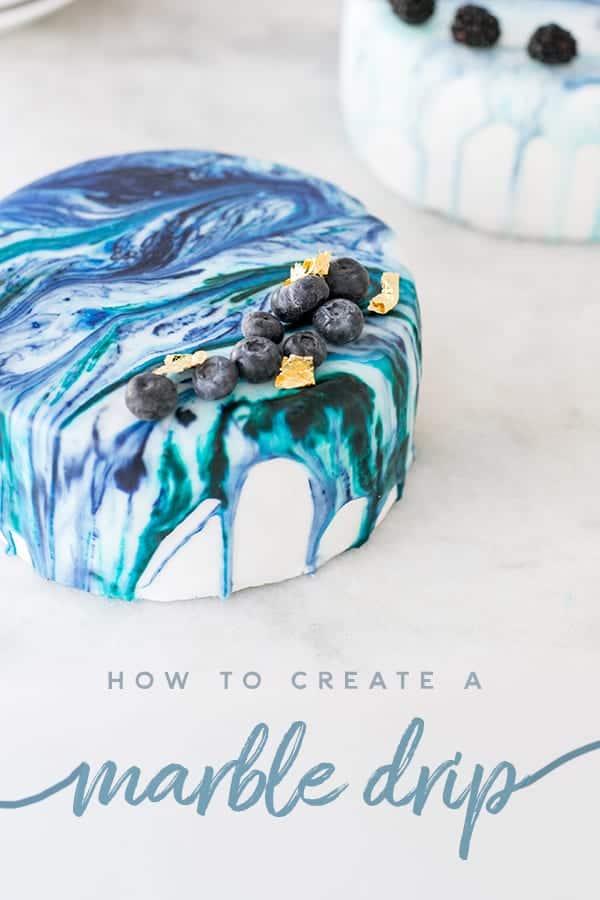
If you are looking for a fun and pretty way to decorate a cake for a party, this marble drip cake is for you! Follow this decorating tutorial for and easy drip cake with a marble effect, and you’ll have a stunning cake in a matter of minutes! Also check out my marble candy apples!
Pin this now to find it later
Pin ItWe’re sharing a deliciously easy way to create a marble drip cake! Drip cakes can be so intimidating to make, but to be honest, they’re actually a fairly simple way to frost a cake!
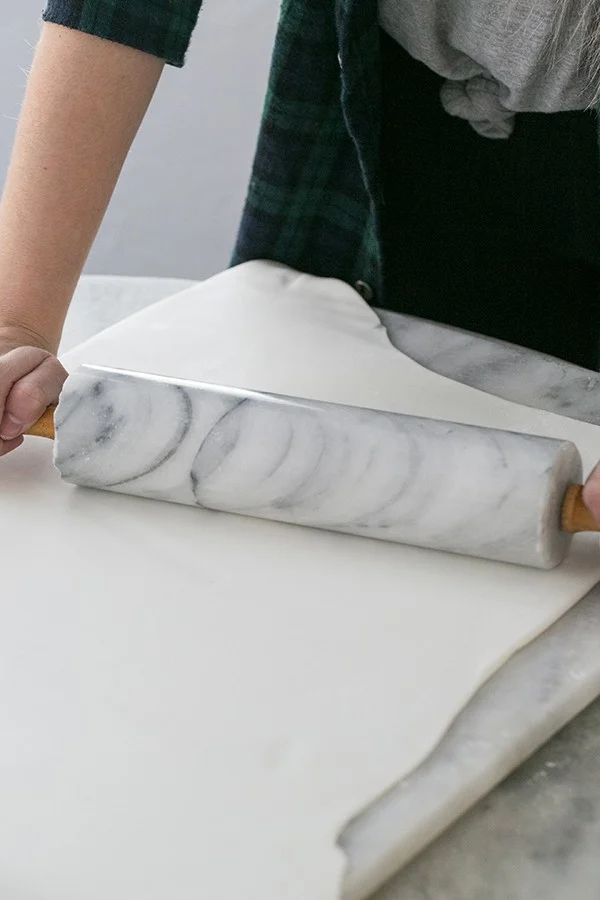
As long as you’re comfortable using fondant to cover the cake, the frosting part is easy peasy! Fondant isn’t difficult either, it just takes some strength and time to roll it out!
We used a simple icing recipe and added a little corn syrup to keep some of the shine.
Marble Drip Cake
Fondant – Homemade or store-bought. You can try our marshmallow fondant recipe too!
Rolling Pin – Used to roll out the fondant.
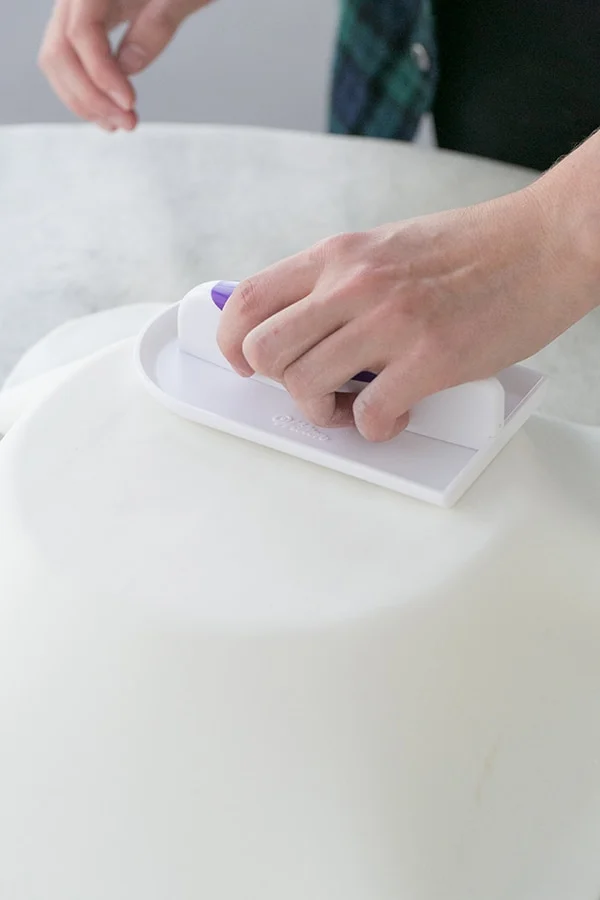
Fondant Smoother – To get a smooth texture.
Baking Sheet and Cookie Rack – Used to place the cake so the icing can drip down and not create a mess.
Measuring Cup with Spout – To pour the icing over the cake.

How to Make
Bake one of our easy homemade cake recipes. We love this easy vanilla cupcake recipe, and this is our favorite chocolate cake. We also love our funfetti cake too!
Bake the cake in a standard 8″ round cake pan. Lightly frost the cakes before adding the fondant.
Knead and roll out the fondant to about 1/4 inch thick. Then place it over a lightly frosted cake.
The reason you frost the cake is so the fondant will stick to it and hold. Frost all the way down the sides, top, etc.
Place the fondant on top and then smooth it out using the fondant smoother. This will remove any bumps, it doesn’t have to be perfect!
If you need, store these cakes in the refrigerator for one day.
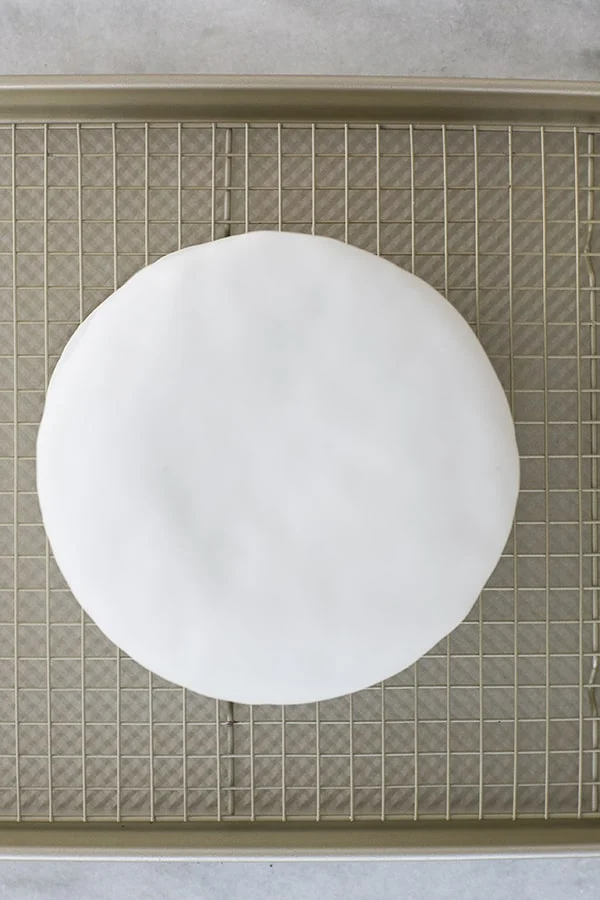
Place a rack on a rimmed cookie sheet and place the cake on top. This way the frosting will fall beneath.
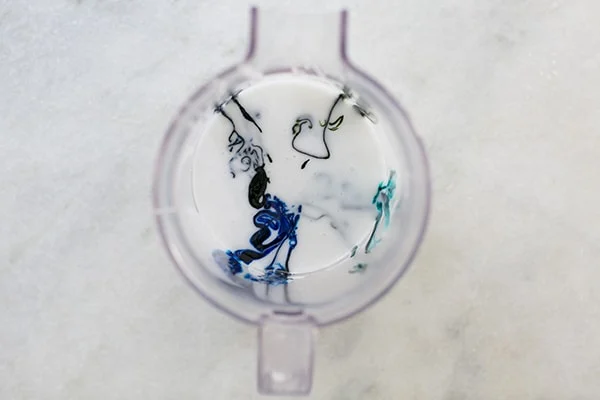

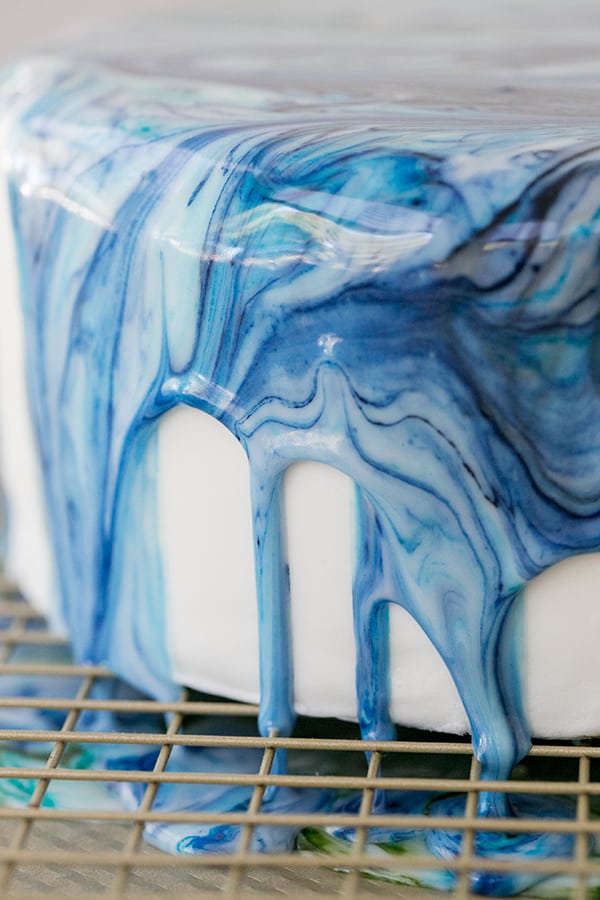
Make the frosting (recipe below) and add drops of desired food coloring. We used food coloring gel for this recipe.
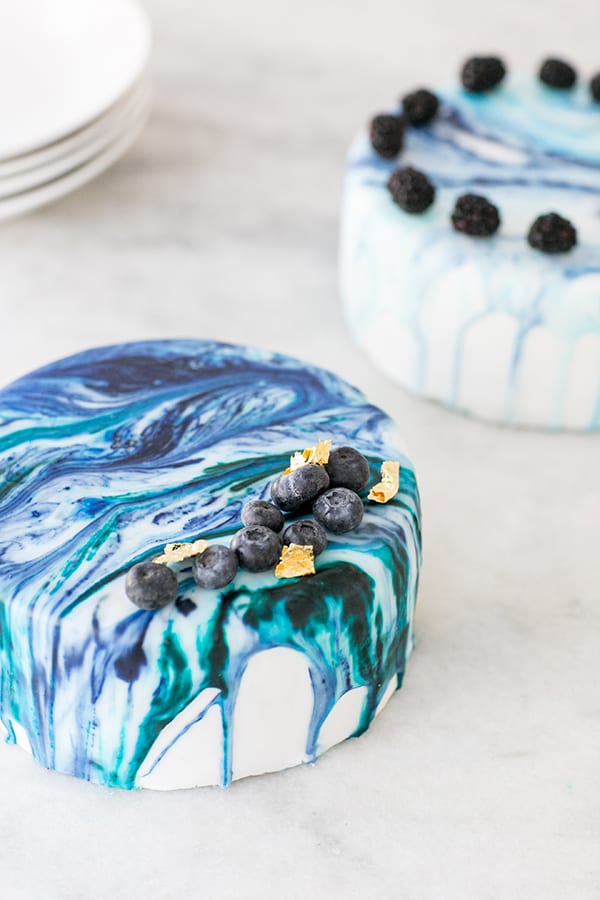
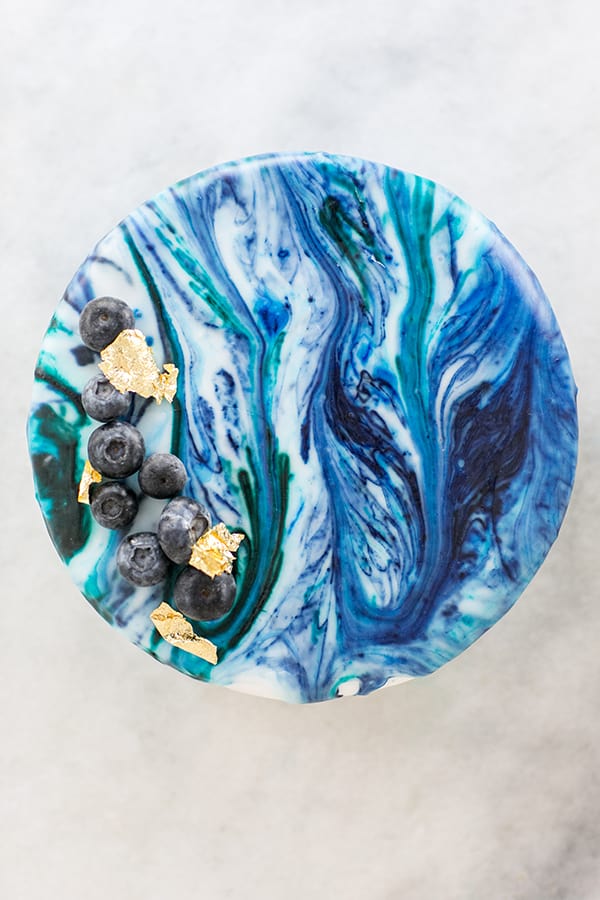
Don’t stir it, it will marble as you pour. Since we love blue so much, we did different shades of it to create our marble effect. You can use any color to make this cake!
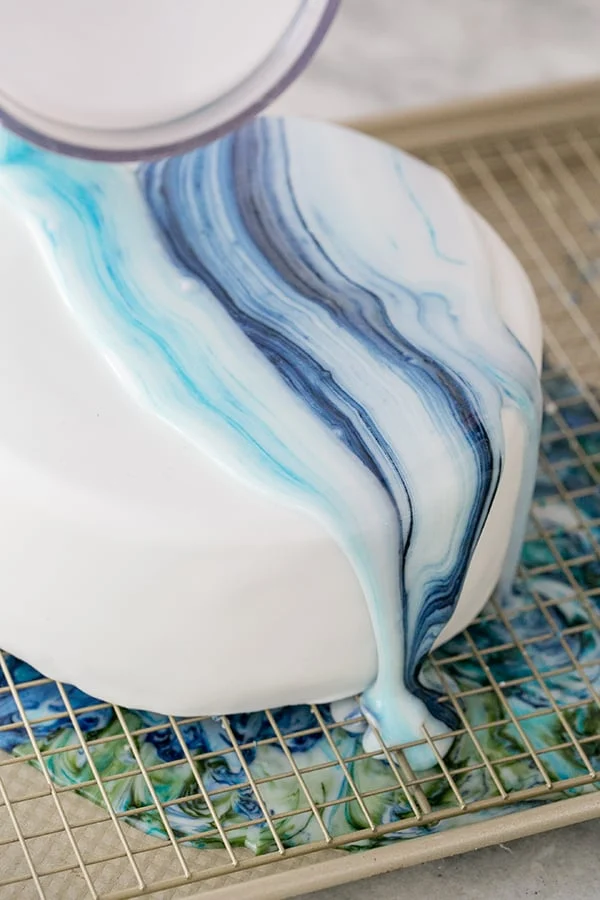
Pour the icing over the top of the cake and watch it drip down the sides. It’s awesome to see the colors blend together and make such stunning patterns!
In about 30 minutes, your marble drip cake will harden and keep its shape!
Tips for Decorating
- Make sure your cake has cooled to a warm temperature before decorating.
- Once the cake is covered in fondant, you can let it cool in the refrigerator for 30 minutes if needed.
- Remember to place the cake on a rack over a cookie tray before pouring the icing over it. This will ensure you don’t end up in a mess!
- Finish decorating the cake with fresh fruit or edible flowers.
- For the marbling, try to stick to different shades of the same color. It will give the marble drip cake a marble look.
- To make it even easier, call your local bakery and order an 8″ round cake covered in white fondant. Then all you need to do is add the icing.

More Recipes You’ll Love!
Looking for more? Here are some of our top cake recipes!
- Neapolitan Sheet Cake
- The Best Coconut Loaf
- Ice Cream Sundae Cake
- Chocolate Zucchini Cake
- Classic Banana Cake Recipe
- The Best Banana Bread
- Lavender Cake
- Buttermilk Cake Recipe
- Orange Chocolate Cake
Now that you know how to make the most amazing marble drip cake, show us your pictures! Please tag us on social and leave a comment below!
You can also FOLLOW US on FACEBOOK, INSTAGRAM, and PINTEREST to see more delicious recipes, cocktails, desserts, and parties!
My new Entertaining book is here! Order Now!

Marble Drip Icing
Ingredients
- 3 cups powdered sugar
- 1 tbsp corn syrup
- 1/4 cup warm water
- 1/2 tsp almond extract
- food coloring, gel or drops
Instructions
- Cover a round cake in fondant.
- Add all of the ingredients, except the food coloring, in a bowl and whisk until smooth.
- Add in drops of food coloring, or use a wooden popsicle stick to add drops of gel food coloring to the icing. Do not mix it. It will give it’s own marbling effect when it’s poured.
- Place the fondant cake on a cooling rack with a cookie sheet underneath.
- Pour the icing over the top and let it dry.
Notes
Nutrition
Nutrition information is automatically calculated, so should only be used as an approximation.


WHERE IS THE ACTUAL FONDANT RECIPE?
We bought the fondant at our local craft and baking supply store. Much easier!
I saw a few comments asking about using buttercream instead of fondant and wanted to share my experience.
I used a standard buttercream frosting recipe, used half in between my layers, then very slightly thinned the remainder with +/- 1 Tablespoon of milk (amount may vary depending on your recipe and humidity). I then microwaved it on 50% heat for about a minute to make it pourable. I poured this mixture over my cake and let it cool and dry for about 30 minutes. This created a soft “shell” that allowed the top swirl frosting to go on and look smooth.
I used the recipe above BUT used hot water instead of warm and mixed it with the corn syrup separately to fully dissolve the corn syrup, let that mixture cool to room temperature, THEN added it to my powdered sugar. I also don’t care for almond extract so used vanilla. I used Wilton Color Right food coloring, then poured.
OMG, I wish I could share a picture. It looked amazing. Like Italian glass. It had a beautiful sheen and tasted just like “regular” frosting. My buttercream “shell” did not budge.
Hey, I’m attempting this effect with buttercream tomorrow and was wondering if there was any particular reason you choose to air-cool your “shell” instead of putting it in the fridge for a bit? Thanks!
will the marble effect still come it right if I use regular, store brand food coloring? I’m trying to make the drip frosting pond for an alligator cake
For those who would rather use buttercream with this, the warm water would definitely melt the buttercream. However, I’m assuming the warm water is to help incorporate the corn syrup properly. If you mixed it all first, and then chilled a little, I wouldn’t think it would make the corn syrup seize up since it is already well incorporated. I think I will definitely try this with buttercream, make the glaze mixture and chill until it is totally cool as to not melt the buttercream (without food gel of course).
Let me know how it works with buttercream, I love buttercream more than fondant but didn’t think it would work. I will be interested in hearing!!!
I tried it, and I was surprised at how well it worked! No melted buttercream over here! I mixed the warm water and the corn syrup together first, and then I let it chill in the fridge. It didn’t take long to cool. Then I added the rest of the ingredients, added my food coloring and drizzled away. Although, here are a few things I would definitely do differently next time.
1) With the cooler corn syrup/water mixture, the mixture had thickened quite a bit since it was cold, making it not as pourable. Next time I may try just having the corn syrup mixture slightly cooled as to where it isn’t cold, or just warm enough where I know it wouldn’t melt the buttercream. That or I would add less powdered sugar (probably my preference) so it wouldn’t be nearly as thick.
2) Don’t use food coloring gel. I think I’d rather add liquid as the gel was difficult to really get in the mixture without slightly stirring.
3) Research what the heck I’m doing! ???? While the method I used did work, mine did not look nearly as pretty as yours because I just winged it lol. I should have watched videos or something on the technique first.
The glaze also tasted so phenomenal with buttercream! It was a surprisingly nice compliment. Thanks for the awesome idea! I 100% will try this again to hopefully perfect it!
Yay! Thank you so much for sharing all of your tips for this! I love buttercream WAY more than fondant so now I’m going to try this!! I am so happy it worked for you!
I also should add that my cake was completely chilled in the fridge for a good bit before I poured the glaze on. That way the buttercream was totally set and hard, just in case it may have made the buttercream run or something.
Hi there, you don’t say how big a cake this amount of icing will cover and also no mention of how much food colouring? How do you know how when there’s enough colouring in the mixture? Once you start pouring it’s too late to add more… Are we talking 10 drops per colour maybe?
I was wondering this too. How many drops did everyone use?
You can really use as many as you like. It depends on the color you want and how deep of a color you want. Just start with a few drops and add more as needed to your liking.
Can this drip icing recipe be used over whipped cream frosted cakes?
Hi! It wouldn’t work over whipped cream. It has to have a fondant seal. That would look cool though!
Will the drip on top harden? Or will it continue to slide? Im looking to cover a dome shaped cake. Thanks!
Why pour over fondant? Can this be poured on buttercreame?
I think it would melt buttercream, but you can put buttercream under a thin layer of fondant.
Will this work over buttercream? We HATE fondant.
Thanks!
We didn’t try buttercream, but maybe if you get the buttercream nice and cold it might work? I’m not sure!
Wow – this is so beautiful! {And so is your rolling pin!}
Thank you Natasha!!!