
This post may contain affiliate links. Please see our disclosure policy.
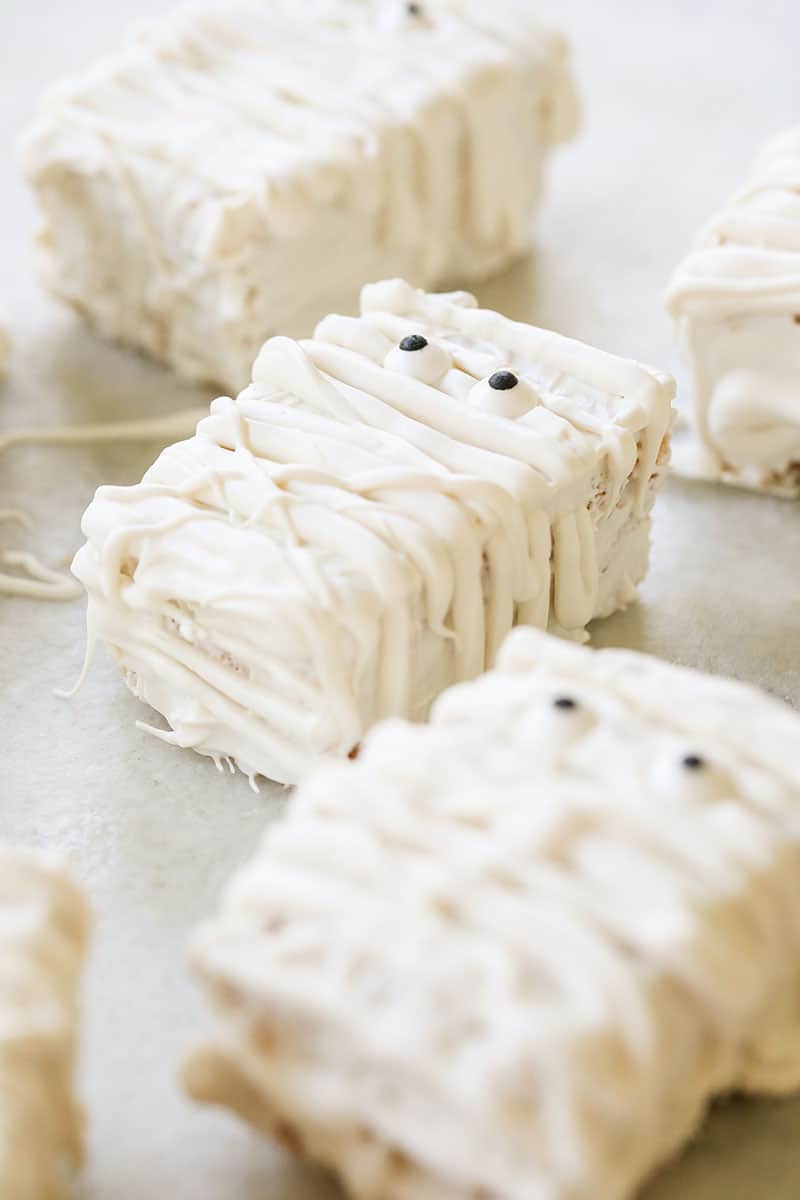
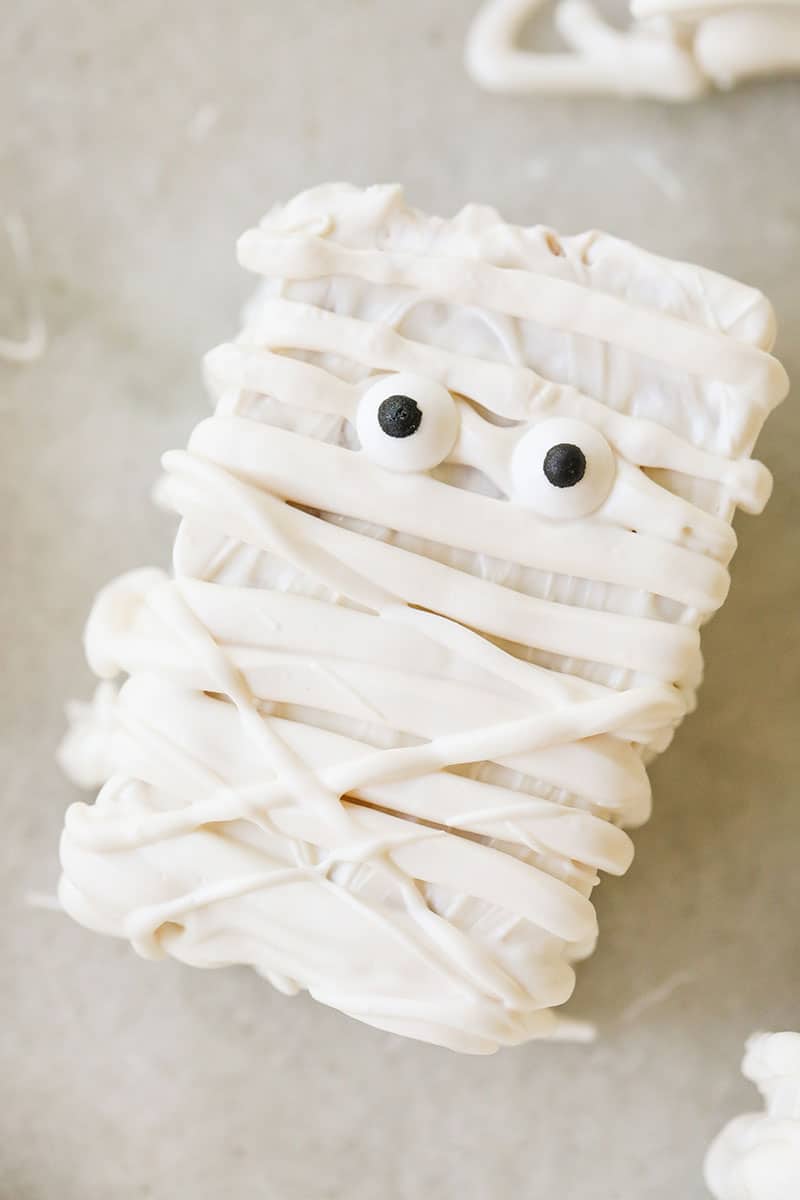
These Brown Butter Mummy Rice Krispie Treats are gooey, rich, and perfectly spooky! Made with brown butter and wrapped in creamy white chocolate, they taste bakery-worthy but are so easy to make!

Pin this now to find it later
Pin ItLike my 4th of July Rice Krispie Treats and Strawberry Rice Krispie Treats, I can’t get over how adorable these little mummies are. This is truly the best Rice Krispie treats recipe ever, made with rich brown butter for extra flavor.
I got the idea from my Mummy Cupcakes and Mummy Brownies, which are always a hit and so easy to make. You can even serve them alongside my Mummy Brie for the cutest Halloween party spread.
They’re fun, festive, and foolproof. You don’t need any cake-decorating skills to make these spooky, bakery-style treats!
Mummy Rice Krispie Treats Ingredients
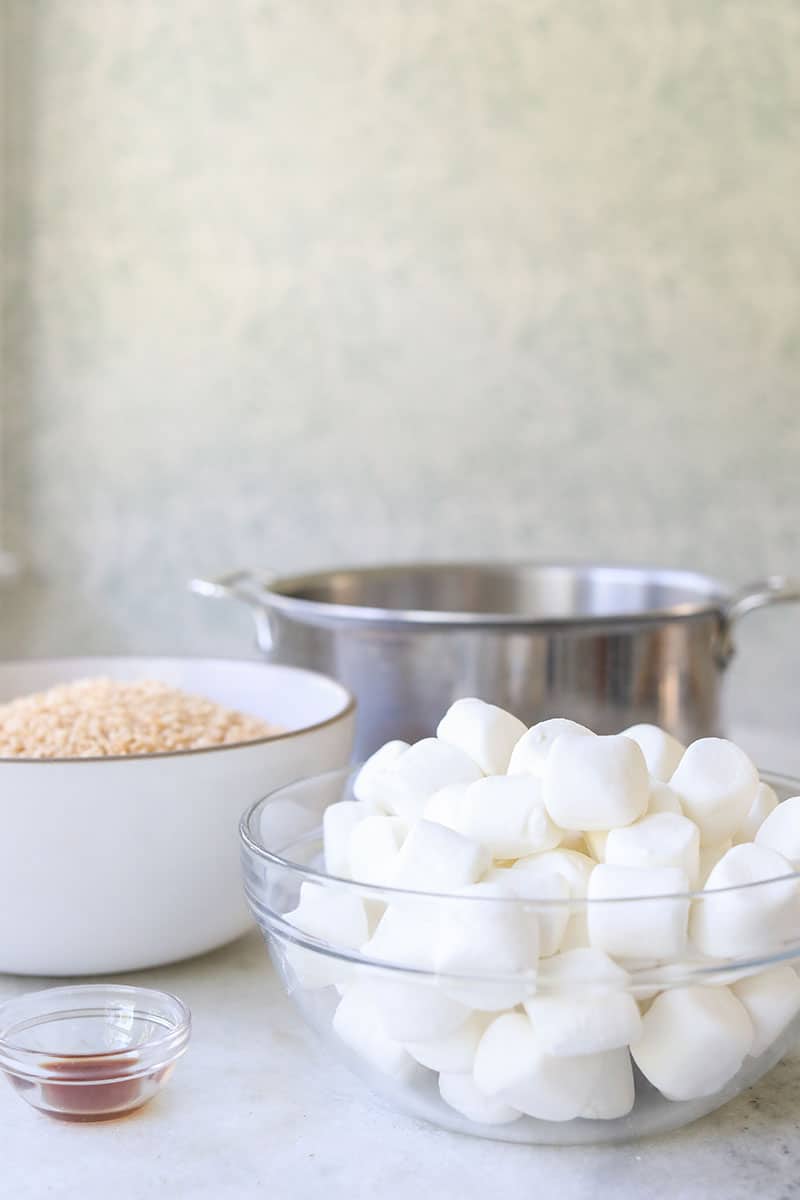
Rice Krispies: The classic base for that perfect crispy, chewy texture.
Marshmallows: Melted to gooey perfection for soft, pull-apart bites.
Salted Butter: Adds richness and helps create that signature chew.
Vanilla Extract: Brings warmth and flavor, use the real stuff if you can!
White Chocolate or Candy Melts: Melt and drizzle to create those spooky mummy “wraps.”
Candy Eyes: The finishing touch! You can also use them in my Frankenstein Cookies for another fun Halloween treat.
How to Make Mummy Rice Krispie Treats

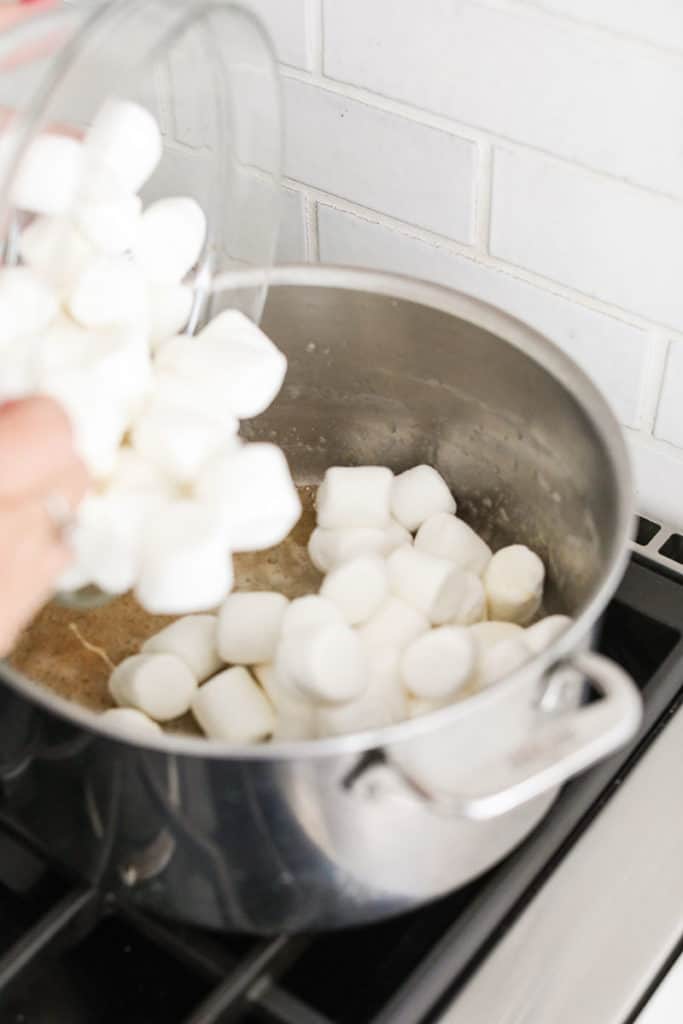
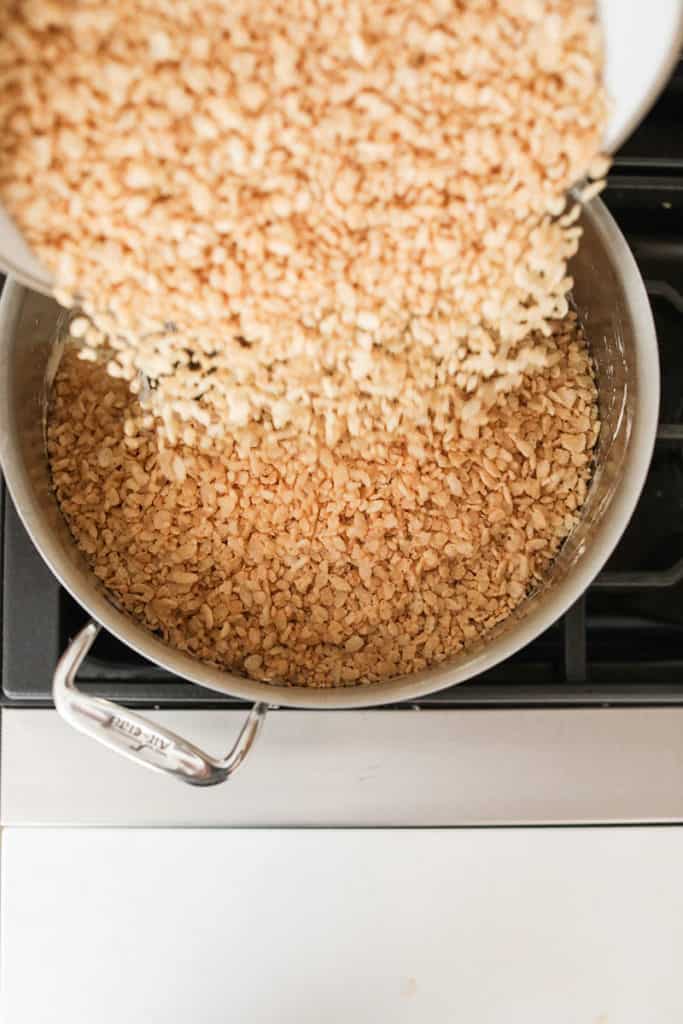


Brown the butter: Melt butter in a large pot over medium heat until golden brown and nutty.
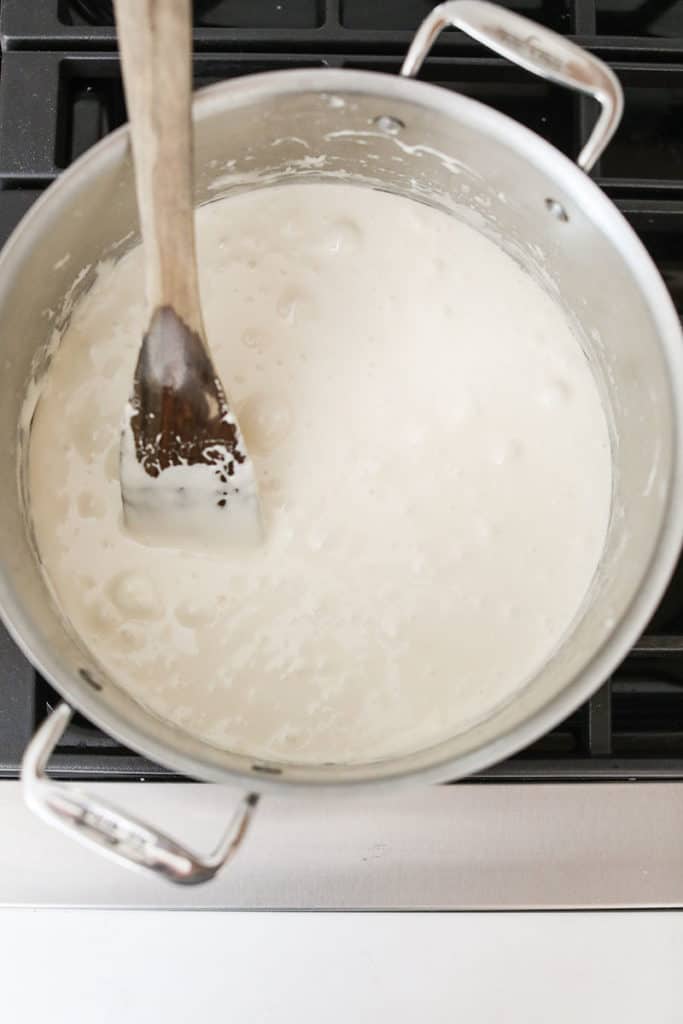
Melt the marshmallows: Turn heat to low, add marshmallows, and stir until smooth. Mix in vanilla.
Add the cereal: Remove from heat and stir in Rice Krispies until evenly coated.
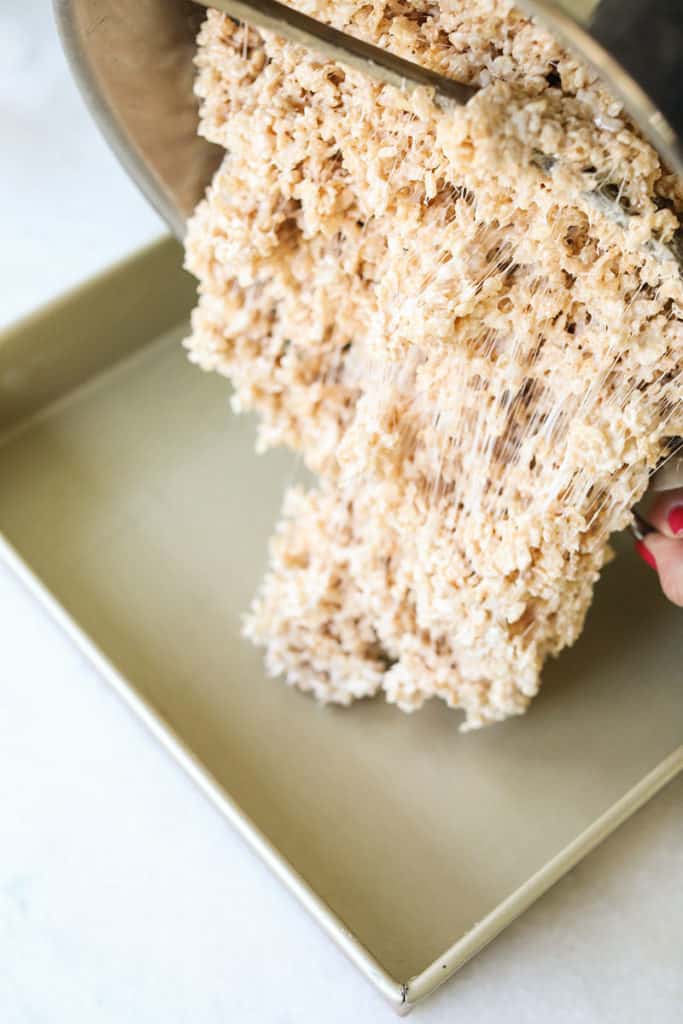
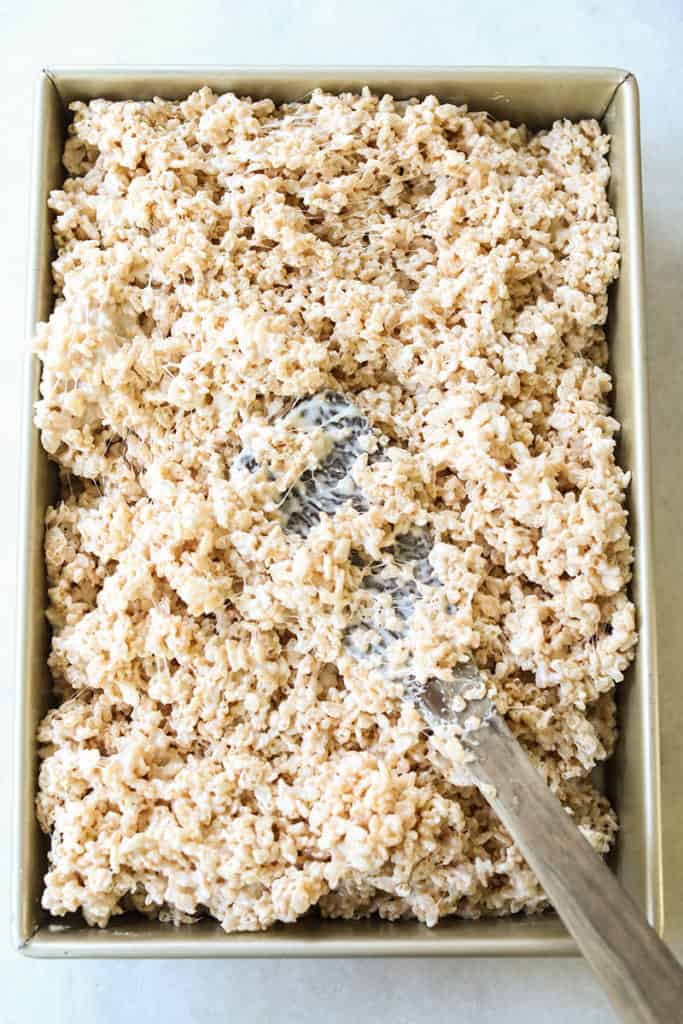
Press into the pan: Line a 9×13-inch pan with parchment paper and press the mixture down evenly using another sheet on top.
Cool and cut: Let cool completely, then lift out and cut into rectangles with a buttered knife.
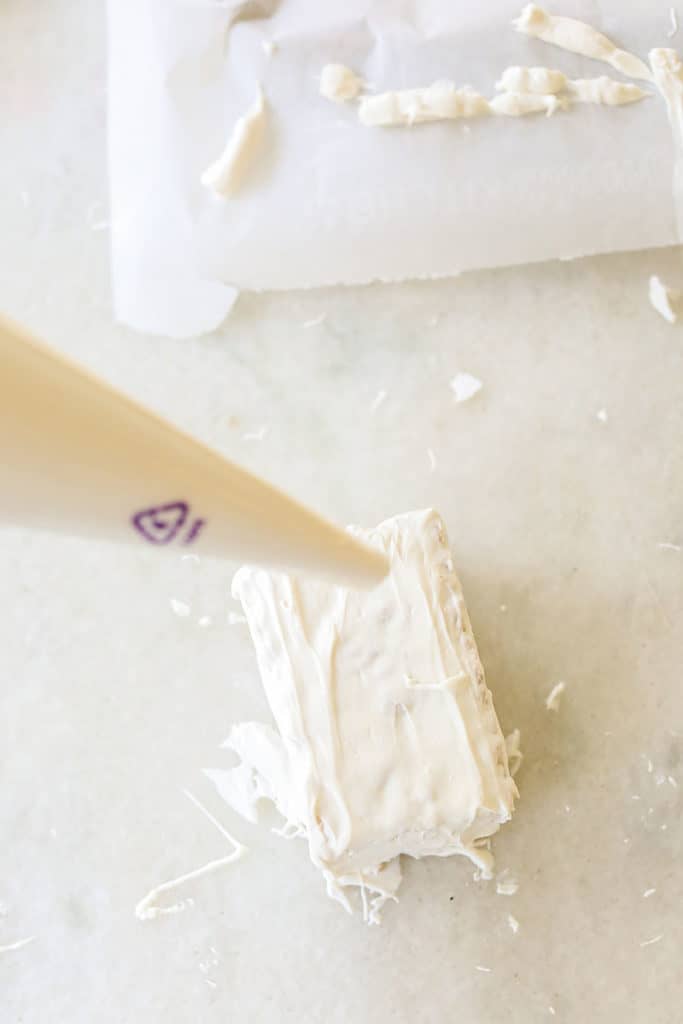
Melt the candy coating: Melt white candy melts with 1 tablespoon of canola oil in the microwave until smooth.
Dip and decorate: Dip the tops and sides of each treat in melted candy, then drizzle more candy melts across to create mummy “bandages.”
Add eyes: Press on two candy eyes before the coating sets.
Let them dry: Leave on parchment paper for about 20 minutes until hardened.
Perfecting the Mummy Look with Candy Melts

Eden’s Tips
Use parchment paper to press the Rice Krispie mixture into the pan — it won’t stick and makes it super easy to get an even layer.
Cut the treats with a buttered knife for clean, smooth edges (no sticking!).
Add a little canola oil to your melted candy melts to make the coating silky and easy to drizzle.
Don’t worry about perfect “bandages” — the messier they are, the cuter your mummies look!
Let the treats set for at least 20 minutes before serving so the candy coating hardens.
Storage Tips
Store your treats in an airtight container at room temperature for up to 1 week to keep them soft and chewy. To freeze, wrap each treat in plastic wrap and place in a sealed bag or container. They’ll stay fresh for up to 1 month — just thaw at room temp before serving.
Mummy Rice Krispie FAQs
They are best the day they’re made, but if you need the extra time to make them into mummies, you can make them the day before. Just seal them tightly and store them on a counter at room temperature.
If they are sealed airtight, they can last up to three
Change it up and add different flavored marshmallows, like strawberries! Or use chocolate Rice Krispies to make them.
You can also add peanut butter and different extracts as well. There are so many variations you can do. Just be creative!
More Halloween Treats

Holidays
Witch Finger Pretzels

Holidays
Easy Halloween Pretzel Rods

Halloween
Halloween Sugar Cookies

Halloween
Festive Halloween Dirt Cups
Let me know if you make these cute Halloween treats! Leave a review and a comment below. Also, tag me on social and share your pictures!
My new Entertaining book is here! Order Now!

Mummy Rice Krispie Treats
Equipment
- Large Pot
- 9 x 13 Cake Pan
Ingredients
- 8 ounces salted butter , 2 sticks butter (1 cup)
- 12 ounces Rice Krispies , 1 box
- 20 ounces marshmallows , about 80 large marshmallows or 2 10 ounce packages
- 1 teaspoon vanilla extract
For Mummies
- 2 bags white candy melts
- 45 sprinkle eyes
Instructions
- In a large pot, melt salted butter until golden brown.
- The browning process is essential as you want the butter to brown for the flavor of the Rice Krispie treats.
- Once the butter is melted, add in the vanilla extract.
- On low heat, add in the marshmallows and coat them in butter by turning them with a wooden spoon.
- The marshmallows will begin to melt as you stir.
- Stir until they are fully melted like marshmallow cream.
- Remove from heat and add in the Rice Krispies Cereal and stir until it’s very sticky and blends together.
- Pour the mixture into a buttered 13×9 cake pan.
- Use a spatula to spread the Rice Krispie treats around in the pan.
- Press down using parchment paper to make an even layer in the cake pan.
- Let them sit for 1 hour, then cut into rectangles with a buttered knife.
Mummies
- Melt the candy melts in the microwave in 30 second intervals.
- Add 1 tablespoon of Canola oil to thin out out the candy melts.
- Stir well and then dip the treats into the candy melts to coat them.
- Melt another bag of candy melts and fill a piping bag.
- Cut a hole at the bottom to make mummy bandages.
- Add two eyes on the Rice Krispie treats.
Notes
- Add a little canola oil to the candy melts for a silky, easy-to-drizzle texture.
- Use parchment paper so the dipped treats don’t stick while drying.
- Transfer melted candy melts to a piping bag (or zip-top bag) for the mummy “bandages.” Cut a small hole in the tip — smaller holes make neater lines.
- Drizzle quickly back and forth for that wrapped look — they don’t have to be perfect!
- Add candy eyes before the drizzle sets so they stay in place.
- Let them dry completely before moving or packaging.
Nutrition
Nutrition information is automatically calculated, so should only be used as an approximation.


So adorable, fun and delicious! I am sure these will be a big hit for Halloween parties.
Thank you Becky!!
What great fun! I’ll definitely have to give this a-go with my kiddos! This would be so great for a neighborhood Halloween party!
I love the flavor of the brown butter, great idea! And those are the cutest rice krispie treats I’ve ever seen!
These are SO CUTE I can’t handle it!! Plus really simple too!
These are too cute! And I love Rice Krispie treats!