
3 Charming DIY Projects For A Perfect Thanksgiving Dessert Table
Nov 19, 2024
This post may contain affiliate links. Please see our disclosure policy.
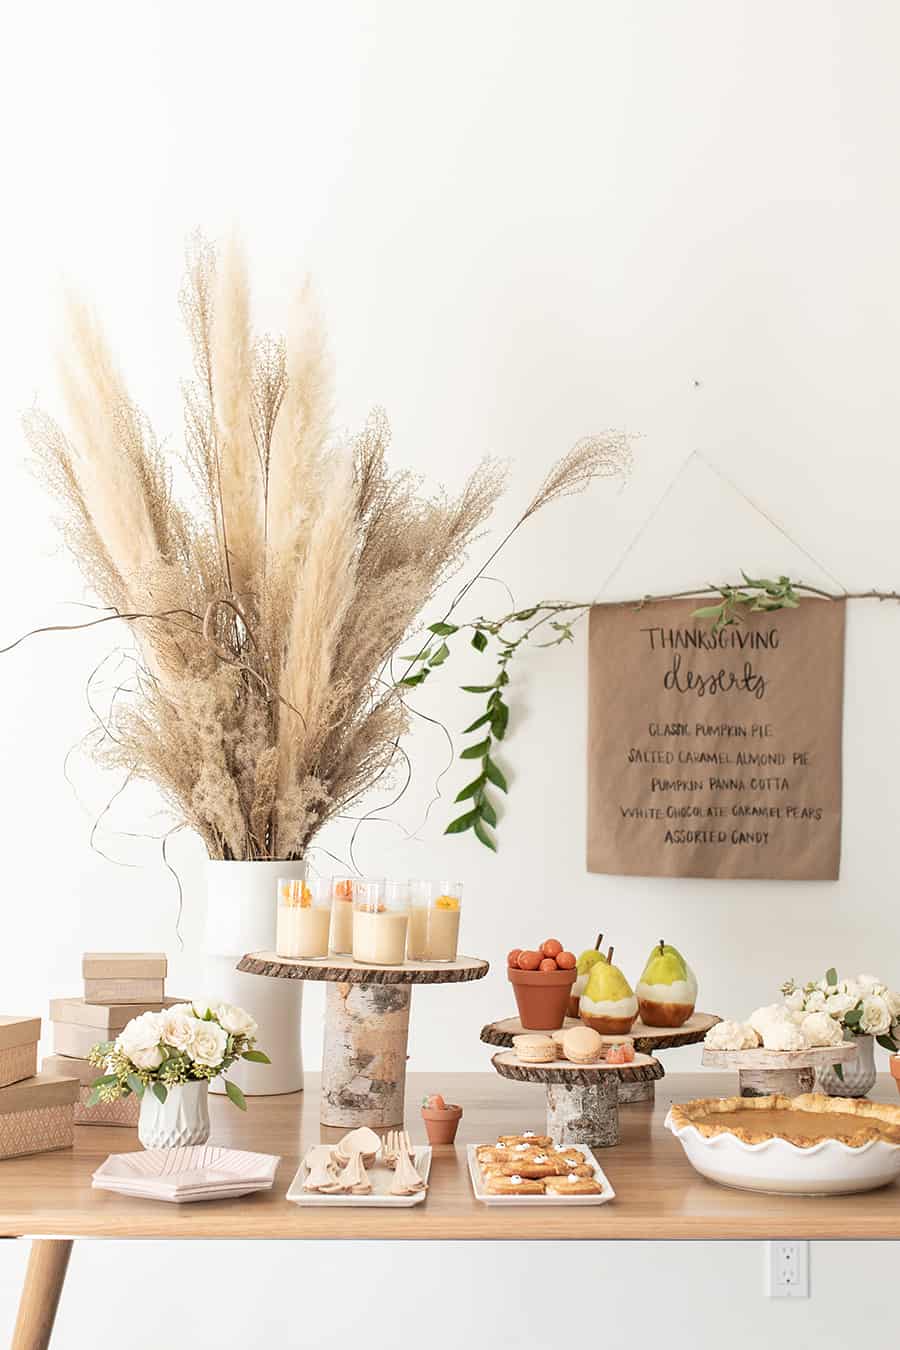
Elevate your Thanksgiving dessert table with three easy and creative DIY projects that bring charm and personality to your celebration. From rustic cake stands to custom dessert menus and fabric-wrapped to-go boxes, these simple projects will impress your guests and make your holiday extra special.
Pin this now to find it later
Pin It
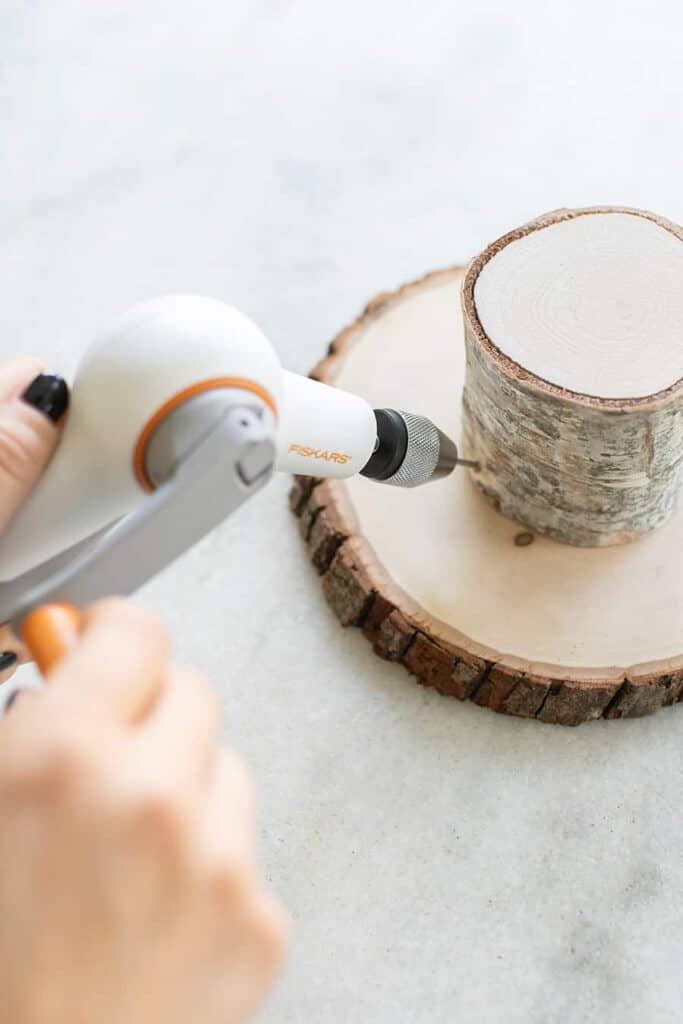
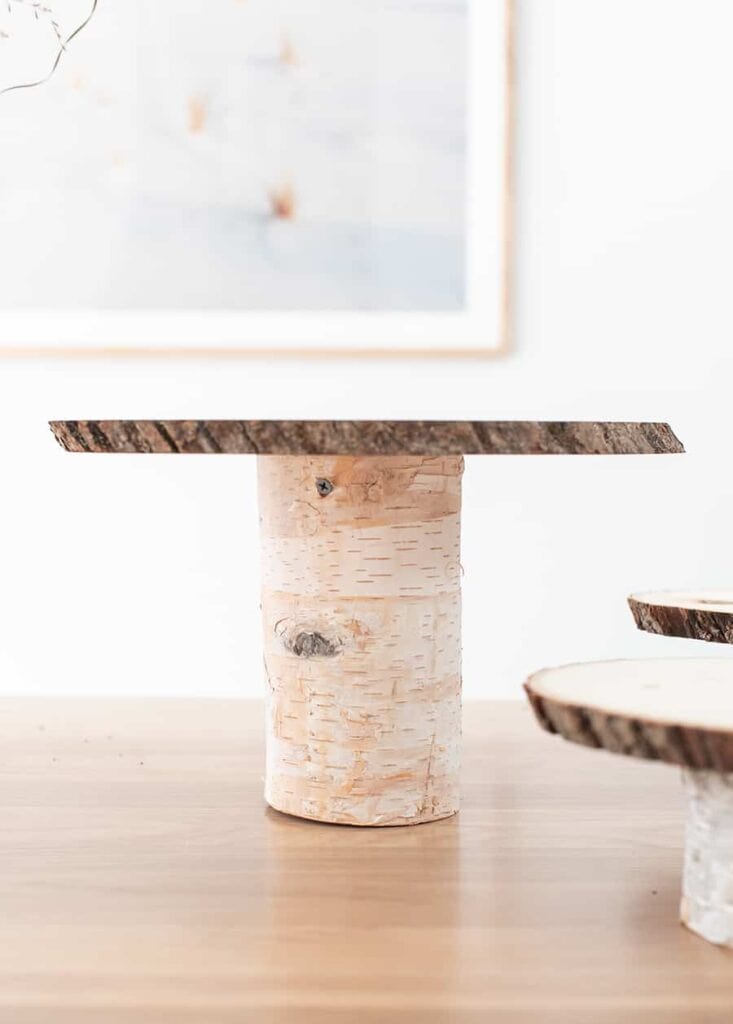
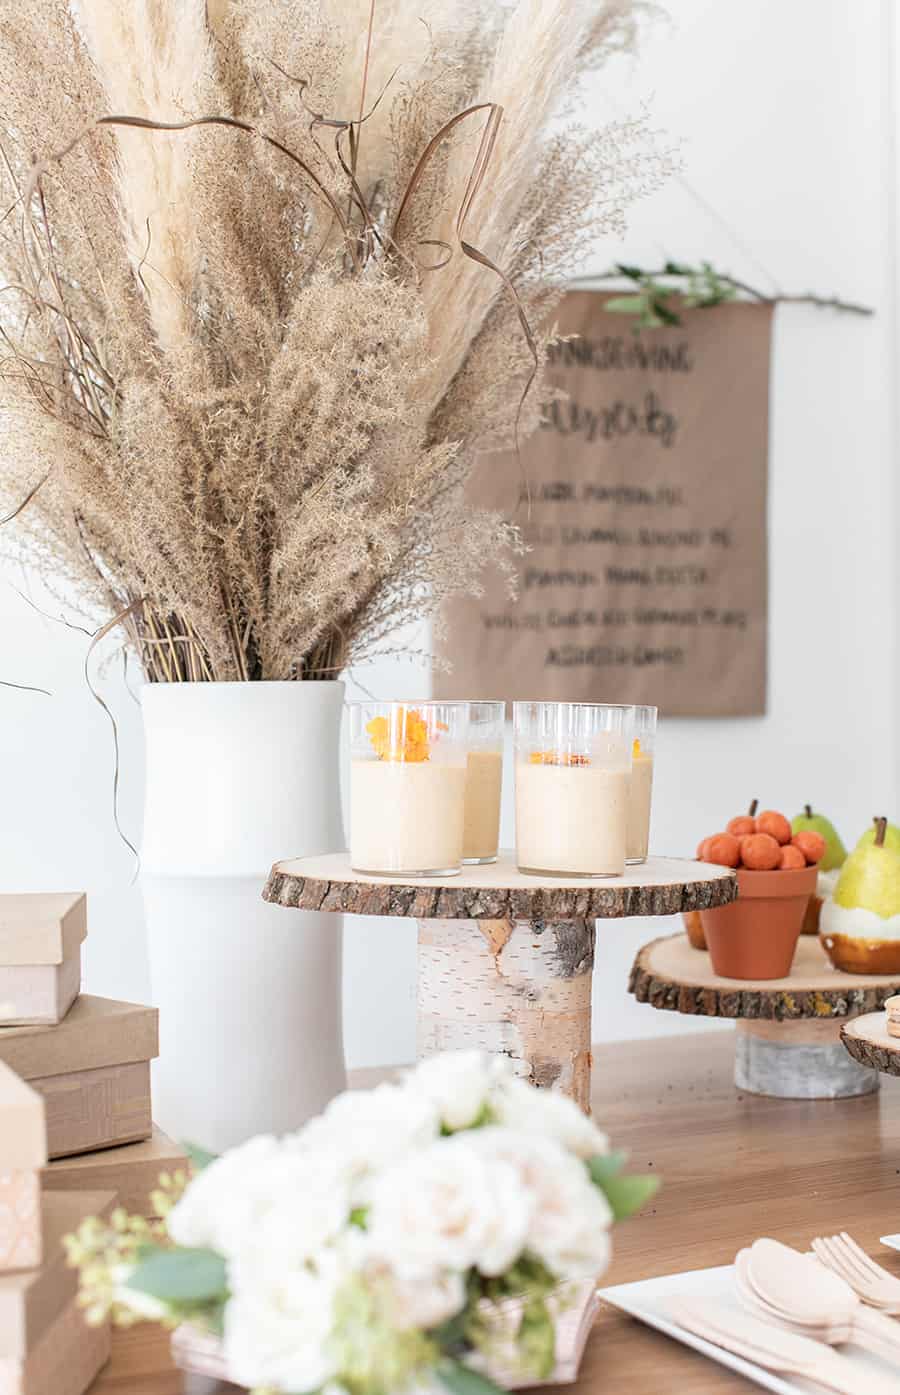
DIY Rustic Cake Stands
Bring the beauty of nature to your table with these charming birchwood cake stands. They’re perfect for displaying a variety of desserts and adding a rustic touch to your Thanksgiving decor.
What You’ll Need:
- Birchwood pillars
- Round birchwood centerpieces
- Fiskars Precision Hand Drill
- Wood screws
Steps:
- Prepare Your Materials: Pick up birchwood pieces from your local craft store. Choose a combination of pillar and flat round pieces for the base and top of your cake stand.
- Drill Holes: Use the Fiskars Precision Hand Drill to create 45-degree angle holes on opposite sides of the pillar. This manual-powered drill is perfect for precise and hassle-free holes.
- Assemble the Stand: Align the round wood piece with the pillar and attach them using wood screws. Insert the screws into the pre-drilled holes to securely connect the two pieces.
- Display Your Desserts: Once assembled, use these rustic cake stands to showcase pies, cupcakes, and other sweet treats.
I also made mini cake stands you might like too!
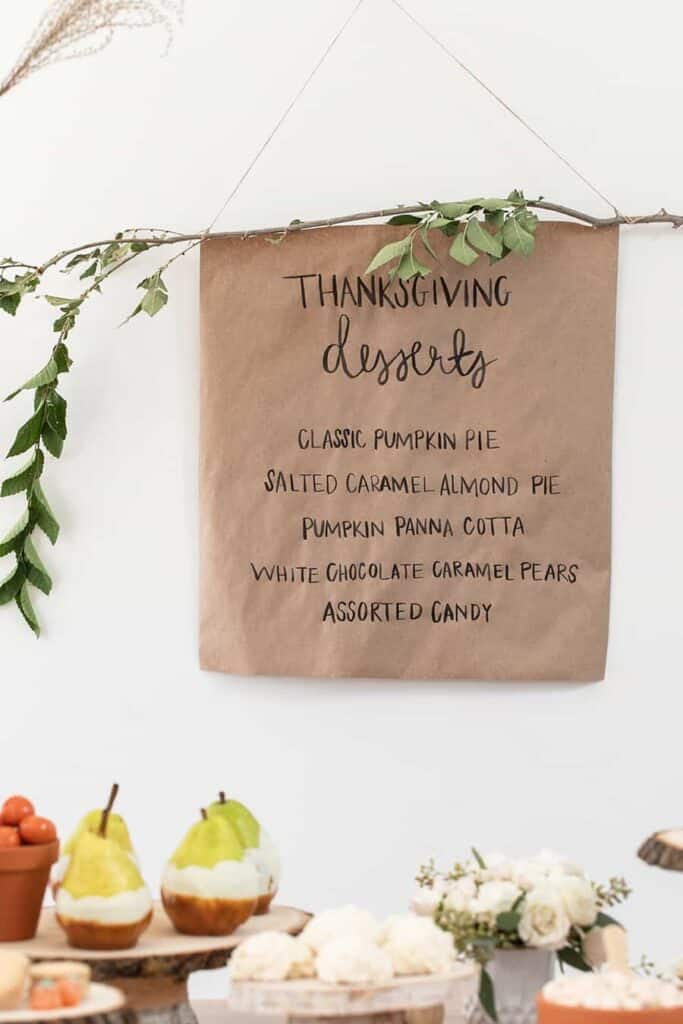
2. Custom Dessert Menu Sign
Add a personal and rustic touch to your dessert table with a DIY dessert menu. It’s a charming way to let your guests know what’s on offer while tying in with your decor.
What You’ll Need:
- A small branch or twig
- Twine
- Brown craft paper roll
- Hot glue gun
- Fiskars PowerCut™ Shears
Steps:
- Prepare the Branch: Cut a small branch from a tree using Fiskars PowerCut™ Shears. These heavy-duty shears easily cut through tough materials like twigs.
- Create the Menu: Roll out a piece of brown craft paper and write your dessert menu on it. You can use calligraphy pens for an elegant touch.
- Assemble the Sign: Attach the top and bottom edges of the paper to the branch using a hot glue gun.
- Hang the Menu: Use twine to tie each side of the branch, creating a hanging loop. Secure it to your wall or table backdrop with nails using the Fiskars Precision Hammer.

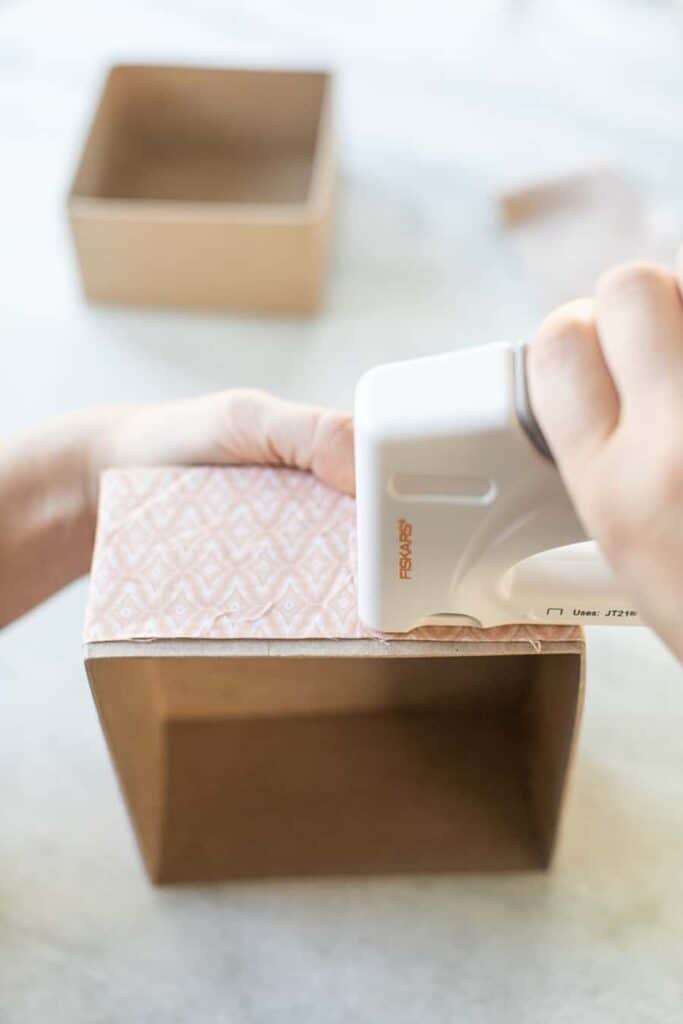

3. Fabric-Wrapped To-Go Boxes
Give your guests a delightful way to take home leftovers with these custom fabric-wrapped to-go boxes. They’re practical, charming, and super easy to make.
What You’ll Need:
- Cardboard to-go boxes
- Fabric strips (choose colors or patterns that match your decor)
- Parchment paper
- Fiskars Precision Staple Gun
Steps:
- Cut the Fabric: Select fabric from your local craft store and cut it into strips wide enough to wrap around the boxes.
- Wrap and Secure: Pull the fabric tightly around each box and secure it in place with two staples using the Fiskars Precision Staple Gun.
- Line the Boxes: Add parchment paper inside each box to protect it from dessert spills and enhance the presentation.
- Fill and Send Off: Place leftover desserts inside the boxes for guests to take home.

Bringing It All Together: Your Thanksgiving Dessert Table
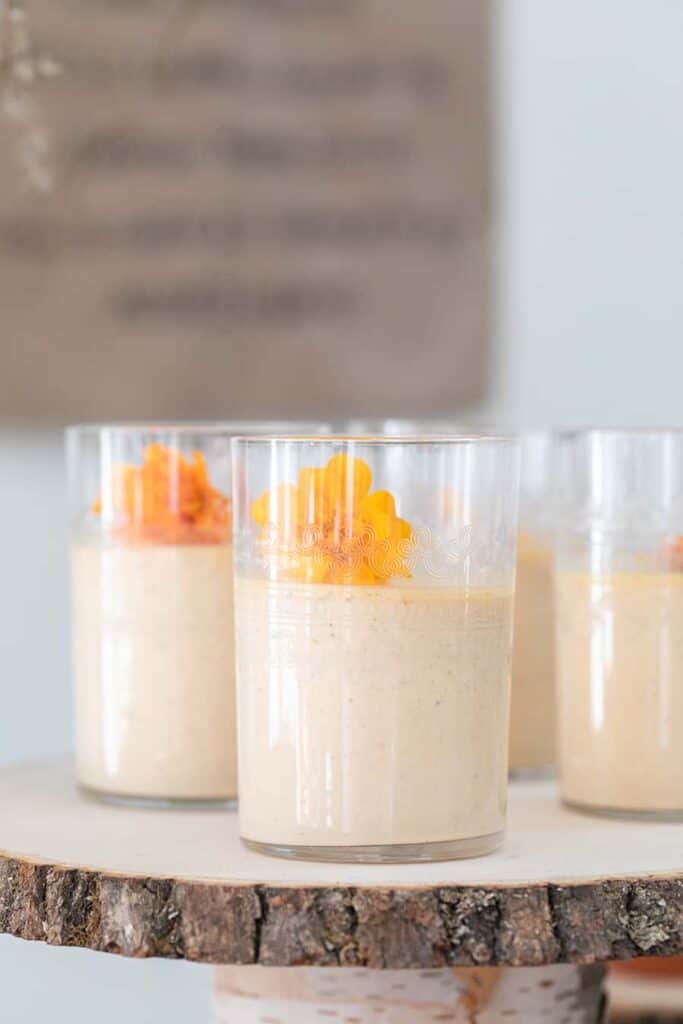
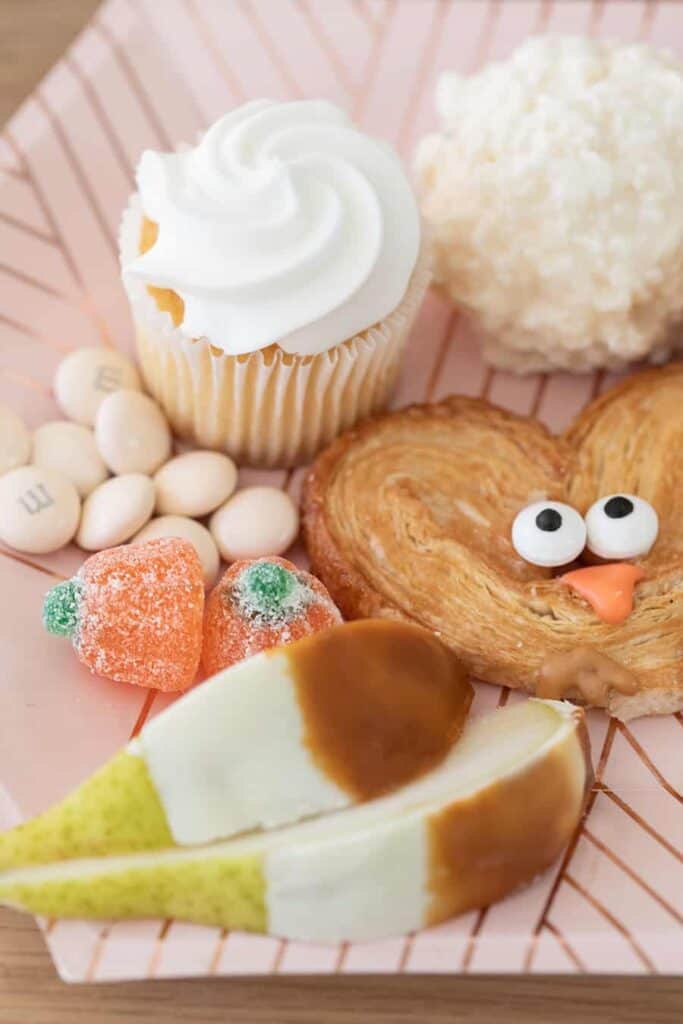
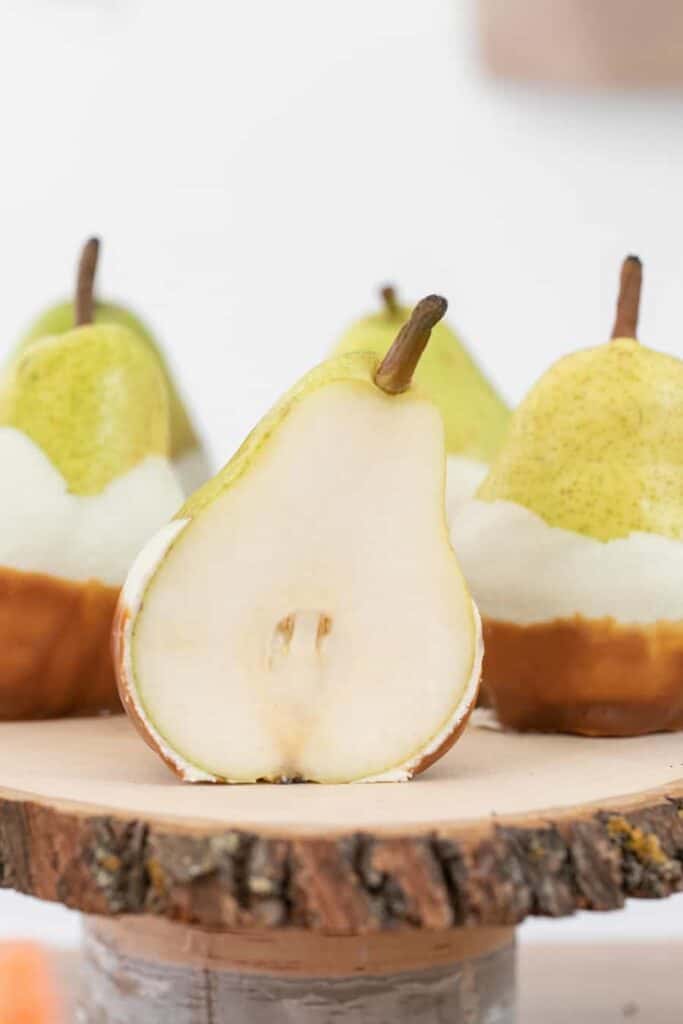
Once your DIY projects are complete, combine them to create a stunning dessert table. Arrange your rustic cake stands to display a mix of desserts, like pumpkin panna cotta, classic pumpkin pie, and caramel-dipped pears.
Place the custom menu sign prominently so guests can see what’s available, and stack the to-go boxes nearby for easy access.
For added charm, include floral arrangements or greenery on the table, and mix individual desserts with larger pies for variety.
With these DIY touches, your Thanksgiving dessert table will look amazing and create lasting memories for your guests.

Tips for a Charming Thanksgiving Dessert Table
- Invest in a versatile DIY tool kit like Fiskars for hassle-free crafting.
- Keep your dessert table cohesive by using natural materials and complementary colors.
- Don’t forget to enjoy the process – DIY projects are as much about creativity as they are about the final result!
- You don’t have to make all the desserts, fill your platters and cake stands with candy and store-bought treats for a stress-free Thanksgiving dessert table.

Thanksgiving Dessert Ideas
Here are some easy Thanksgiving desserts for your table!
- Pumpkin Panna Cotta
- Pumpkin Pie Recipe
- Pecan Pumpkin Pie
- Mini Pumpkin Pies
- Vanilla Cupcakes
- Pumpkin Cheesecake Truffles
- Baked Pumpkin Donuts
More Thanksgiving Entertaining Ideas
With these three charming DIY projects, creating a beautiful Thanksgiving dessert table has never been easier.
Whether you craft rustic cake stands, a custom dessert menu, or thoughtful to-go boxes, these simple yet impactful ideas will impress your guests and add a personal touch to your celebration.


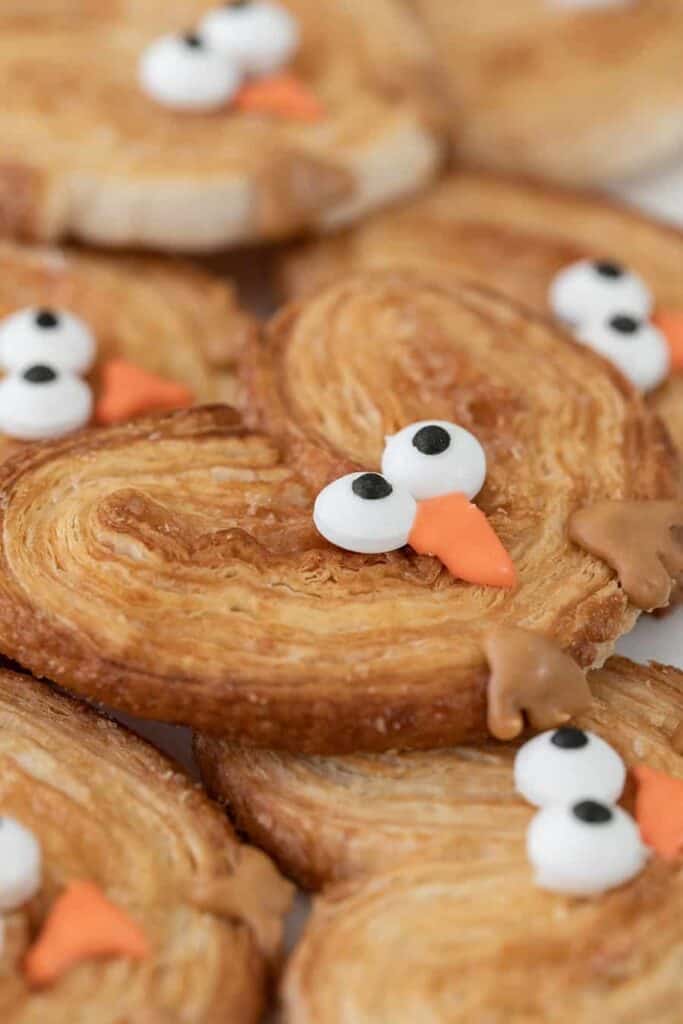
Where’s the recipe for the pastry with turkey eyes & feet?
Hi Christ!! So we just bought those Palmiers and then added the sprinkle eyes and feet with royal icing!